First of all I decided to go with four baffles instead
of two to provide a longer run and greater temperature rise. I put the
collector on the southeast side of the addition I built onto my small shop
last spring. This gets a lot of good direct morning sun. This helps to
start heating things up quick.
I have another wall mounted TAP on the back south facing
wall designed like the one you have
on your shop though not as big. It starts to kick in good after the active
one is shaded. The addition I'm heating is approximately 200sq.ft. and is
yet to be insulated.
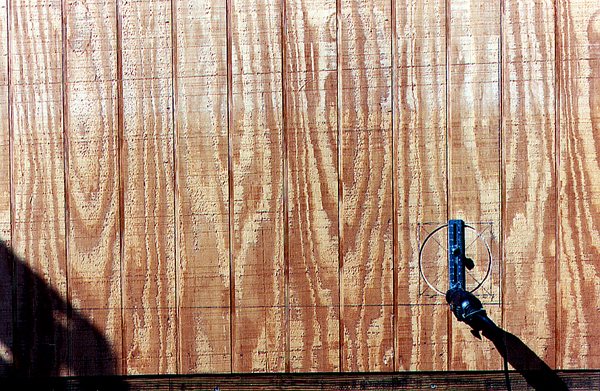
Photo 1: Layout of collector on the wall.
Photo # 1: I marked my level and plumb lines for the
inside measurements of the frame. I'm using 2x4's for the frame. Making sure
that the first vertical line is plumb and also that the first horizontal
line is square with the vertical. I'm sure you know that you'll be sorry if
they're not. The little tool in the photo is a Dremel tool I used to cut out
the inlet and outlet ports. A jigsaw will work just as well. I like the
dremel tool because it cuts such a nice circle.
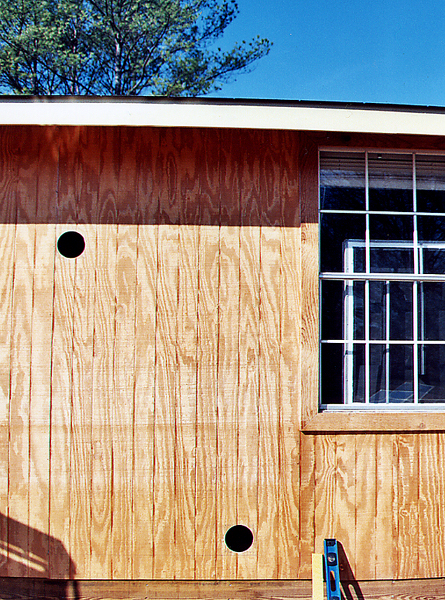
Photo 2: Cutting the inlet and exit vent holes.
Photo # 2: For this collector I cut 5.25"(13.3cm) inlet
and outlet holes because the fan I'll be using has a 5"(12.7cm) diameter
blade.
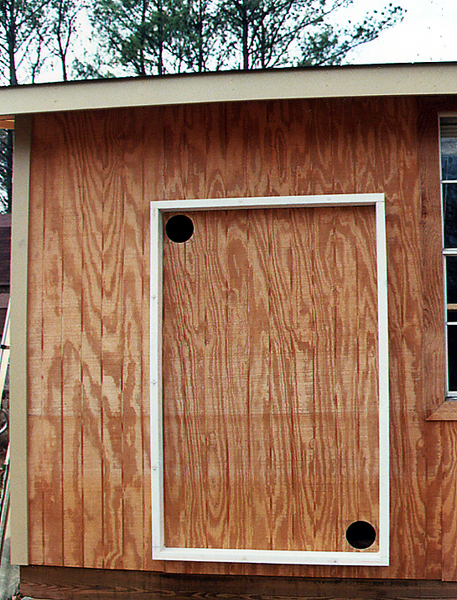
Photo 3: Installing the collector frame on the wall.
Photo # 3: The frame is 39.75"(1meter) x 64.25"(1.63
meters) inside measurements because of the glass I have on hand. I used
4"(10.16cm) ex. decking screws counter sunk 1"(2.54cm) to attach the first
vertical frame member to an existing stud behind the wall, for the
horizontal one I put screws in every stud I could hit. One vertical member
didn't land on an inside stud so I attached it from the inside using
2"(5.08cm) sheet rock screws. I primed all frame parts before attaching them
then filled all screw holes with caulking.
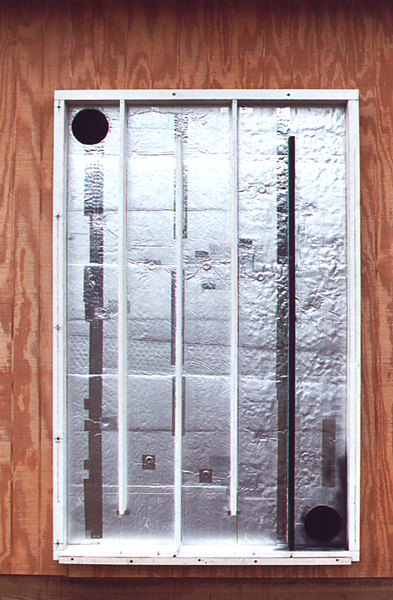
Photo 4: Installing the absorber and baffles.
Photo # 4: I then used 1/2"(1.27cm) R-MAX foil
faced insulating board inside the frame for the absorber. I then
installed the baffles which are 5" shorter than the inside vertical
measurement, and 7 7/8"(20.2cm) on center. I sprayed the inside with
Rustoleum high heat flat black paint (with a spray gun). After the
paint had dried I caulked all cracks and seams with 100% silicone caulk. Do
not skimp on caulking for your collector, you'll be sorry.
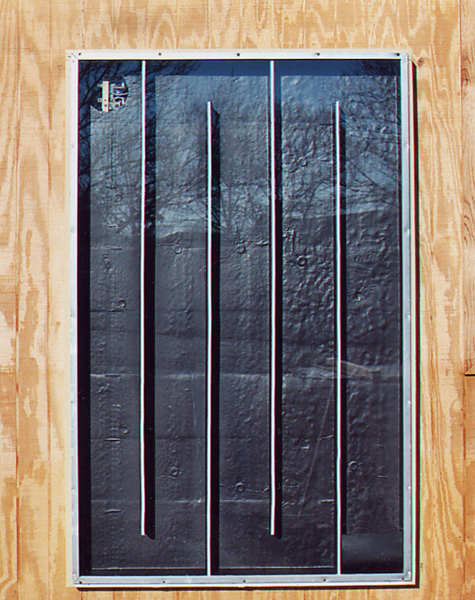
Photo 5 -- Finished Collector
Photo # 5: Glass installed, turning vane at bottom
right to help the air have a smooth entry. The glass I used had a 7/8"
frame around it with enough room for me to drill pilot holes for screws to
attach it to the frame. I then caulked all around the exterior of the
metal. The funny looking white lines you see behind the glass is
weather stripping to make a good seal on the baffles. The only fan I had on
hand to power this with was (believe it or not) a microwave fan which
turned out to work very well. The length of run through the baffles is 26'
8" (8.12meters). The collector glass comes out to be 40" x 64" (17.77sq.ft.)
Collector is 3"(7.62cm) deep making for 4.4cu.ft volume.
Performance:
I have not run a smoke test on it yet and do not have a meter to check the
air volume output of the collector. But, I can tell you this much.
Early in the mornings, at 9:00am I turn it on and in about an hour the
temperature in the building is up by 15F degrees. By noon the collectors
output is 50F degrees warmer than the intake air, I've checked this for
several days and it is constant.
The collector was not expensive to build at all.
Less than $40 and is simple and easy. One note: glass can be costly, I
got mine from Habitat for Humanity for $10. So it pays to scrounge
around.
One thing about this collector that surprises me is that
even after it is shaded for up to two hours the exit vent air is around 20F
degrees warmer than the intake air. I didn't realize that reflective
ground radiation would play this big of a part on the collector.
Greg
March 21, 2008
gwest77 AT
netscape DOT com (substitute @ for AT, and a
period for DOT")
Be sure to include
"Solar Air Collector" in the subject line.
This is another illustration of how
simple solar heating can be. For only about $2 per square foot for
materials and a few hours of labor The collector makes a significant
contribution to heating his addition.
