Search
The Renewable Energy site for Do-It-Yourselfers
Building the Sol-Air Solar Air
Heating Collector
Greg describes in detail the building
of a Sol-Air collector. The Sol-Air collector was developed by Bill
Kreamer, president of the Sol-Air company. Bill has generously made the
plans for building the collector available. I believe that having the
combination of Bill's plans and Greg's construction pictures and notes will make
building the collector go smoothly.
Thanks very much to Greg for
providing these construction photos and descriptions!
Greg's Description of Building the
Sol-Air Collector
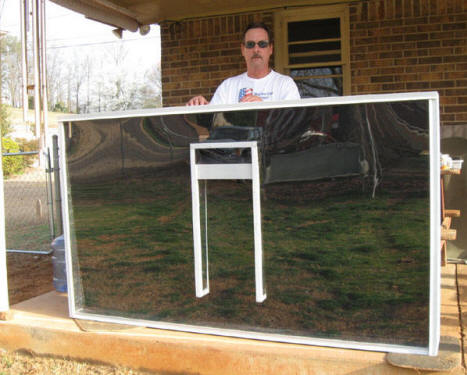
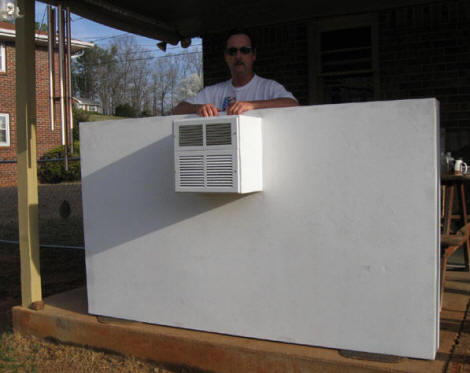
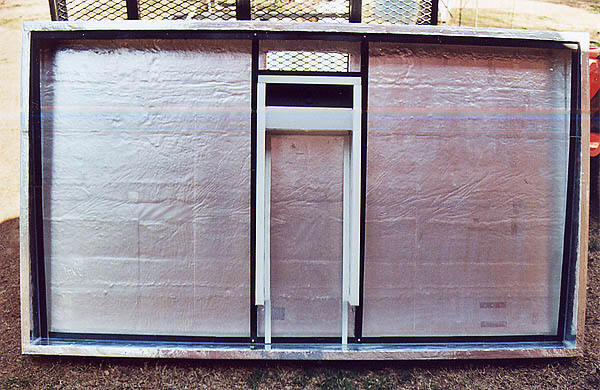
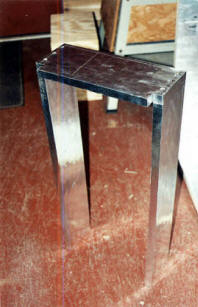
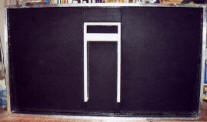
Front and back view of the finished collector +
two front views of Greg
Pictures Showing the Details of the
Build
Click on pictures for full size
|
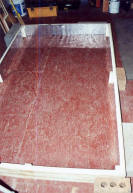 |
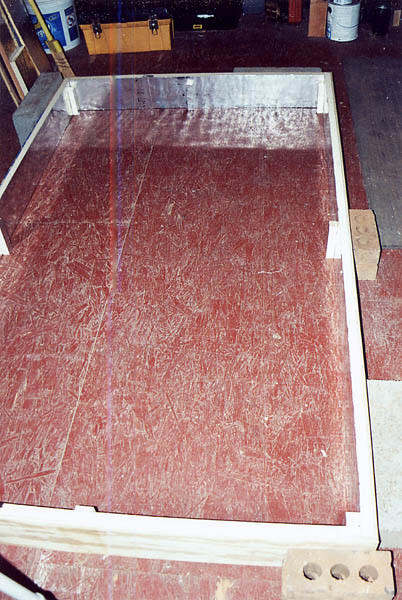
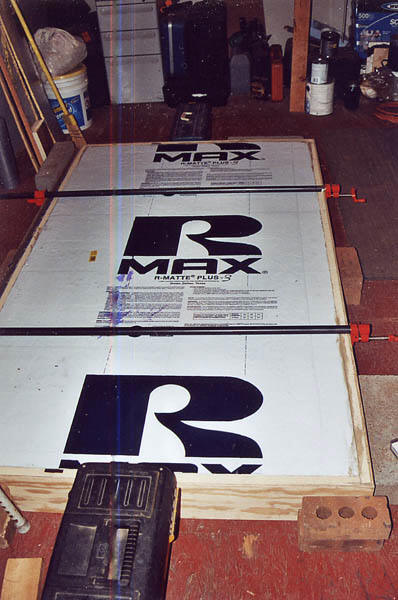
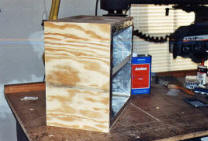
1. Collector case frame:
I didn't go by the plans with this, the plywood and polyiso board were
cut separately and then adhered together with premium polyurethane
construction adhesive, it's safer than the regular kind (no out gassing)
in case some should get inside the frame. I used bricks, blocks,
toolboxes anything to hold the collector square while everything cured
(approx a day) the small blocks of insulation you see are to help hold
the collector backing in place. I used painters tape (folded) so it
would stick on both sides to hold the blocks in place. I built the
larger version of the two in the plans. Collector area comes out to be
23.4sq ft |
|
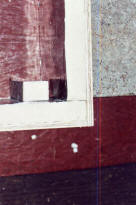 |
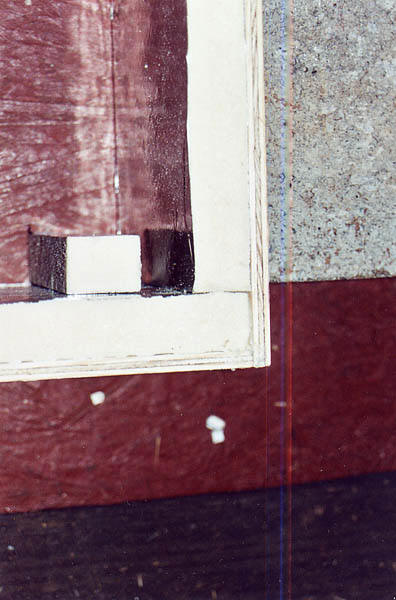
2. Close up of Corner
Joint:
The polyiso has been cut back 1 1/4" on the frame joints, also if you or
your neighbor happen to have a 1/4" crown nailer, shoot 3 or 4 staples
into each corner of the plywood where it overlaps the other, this helps
exceedingly well at holding things together. |
|
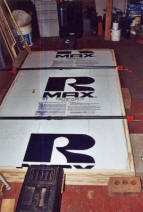 |
3. The case backing:
Carefully cut out the
collector backing. There is no need to bevel it so it fits into the case frame.
Use a utility knife with the extendable snap off type
blade. Be careful and use a straightedge so the blade doesn't break
away. Again, use poly adhesive around backing edges and set it into the
frame. |
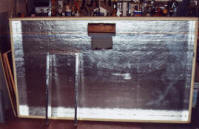 |
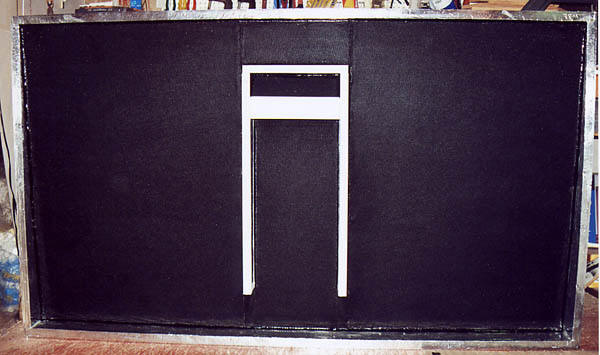
4. The naked collector:
Backing installed with the C-Baffle standing in front ready to go in. If
using the original plans be sure to cut the case hole as shown on p7 you
will see why when you install the fan shroud. To protect the case hole
opening I chose to omit the case hole metal trim and use aluminum tape
on exposed edges of the insulation board. It worked just as well.
Silicone all inside edges of collector. |
 |
5. Another look at the
C-Baffle:
Again, all edges protected with tape. You will notice three holes in the
top of each side of the C-Baffle, I used 2" screws to help hold it
together while the adhesive set. Fill the holes with silicone
afterwards. |
 |
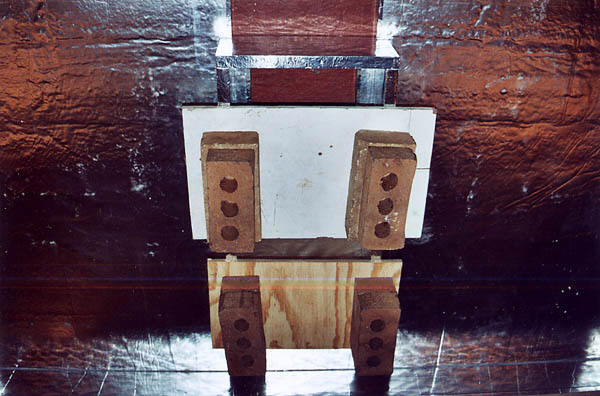
6. Setting C-Baffle in
place:
Put poly adhesive on back edges, make sure it is square in the collector
add weights as I did or use clamps and let the adhesive set. |
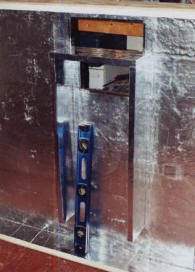 |
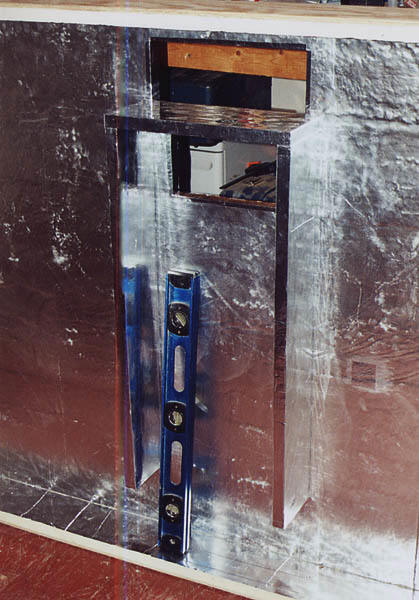
7. C-Baffle in place:
The measurement between the top of the C-Baffle and the bottom of
the baffle legs to the inside of the case should be the same or
(very) close. Again silicone around all edges. I put the 2ft
level in the photo as a size comparison.
(P8) Another view of C-Baffle
|
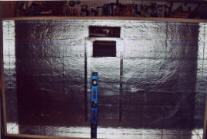 |
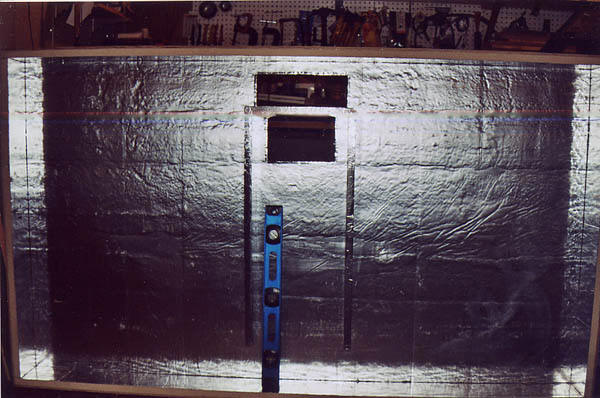
8. Another view of
C-Baffle: |
 |
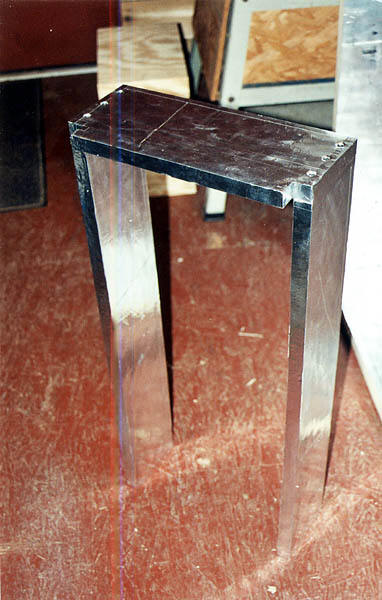
9. Finished Manifold:
A look at the finished manifold, make as plans call for, protect
with tape.
|
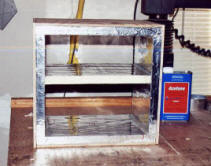 |
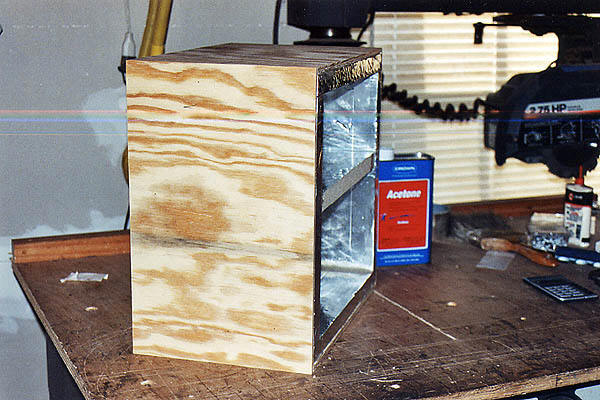
10. A better view of manifold:
I left the tape off of the center divider so the silicone would grip
better at the place it meets the C-Baffle.
you can see the acetone in the background, my
favorite cleaner for any kind of metal. Rough on the hands though,
and any open wounds you may have at this point, "use gloves". Be
sure the acetone will not melt them. Also the brand Crown doesn't
matter, but I thought by the time I finished this project I would
need a shot of the real thing, for medicinal purposes only you
understand :-)
|
 |
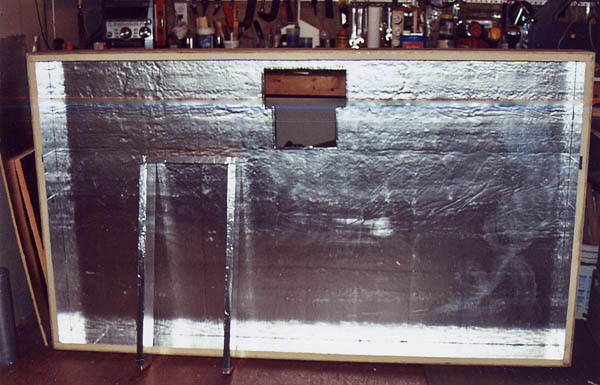
11. Collector with all
rail and trim installed:
Again I chose to use all 1" x 1" railing for the absorber framework
using the poly adhesive to hold it in place with clamps or weights till
set. I also went around the rail edges with silicone, call it overkill
but I don't want anything coming lose over time. The center rail I cut a
notch out of the backside so it would sit on top of the upper and lower
rails just to help hold it in place while the adhesive set up I also
used a pop rivet in each end of the rails to better hold them.
|
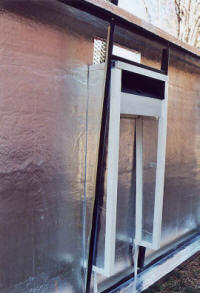 |
12. Another photo of the
C-Baffle, trim and collector rails:
You can better see the angle of the absorber rails. The C-Baffle trim
you see is made from 1"x1"x1" aluminum house coil trim, use the poly
adhesive on the inside these also. For the collector rails I used gutter
coil stock because it is more rigid than the other and just works
better. It was left over from another project. You can use house coil
trim if you wish. At the top of the C-Baffle you can see the fan shroud
with the upper portion painted black. The reason for the case hole
opening to be like p7 calls for is that it helps support the back of the
fan shroud when you place it inside of the C-Baffle. When installing the
rails inside of the C-Baffle, if you will turn them so one leg of the
rail points up and the other sticks out away from the baffle you will
not have to trim them as called for in the plans. As for the fan shroud
make it as called for in the plans if you use the fan called for. I
didn't and should have made the shroud 1" longer in the front because I
used a 140mm computer case fan in mine, the extra 1" will help direct
the air flow just a bit better. When I cut the hole for the fan in the
back of the shroud it barely fit, so allow for that also. Learn as you
go, I did and that's why I sent this to Gary. |
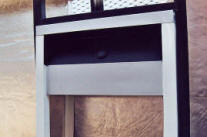 |
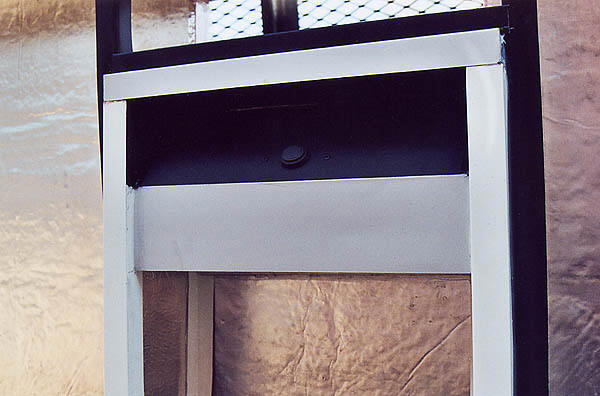
13. Close up of the fan
shroud showing the thermostat area:
You can't tell from the photo but this area is triangular shaped and
painted black to help the thermostat heat up faster. More on that in a
minute. In photos 11,12 & 13 disregard what you see at the top of the
C-Baffle, it's the tail gate of my utility trailer. |
 |
14. Installing Absorber
Felt:
You can see the glossy bead of black silicone I used on top of the
absorber, use a good bead all around the perimeter edges on all parts of
the absorber. The reason for using white trim on the C-Baffle is to help
keep that part of the collector cooler in the sun. While installing the
absorber (recycled polyester felt) and continually burning my fingers a
light came on in my head. Since the absorber rails were all 1" x 1" I
went to Wal-Mart and got some sticky back Velcro "3M" brand with
industrial adhesive, 3/4" wide, placed it on the rails (the loop part of
the Velcro) so I would have a 1/4" gap or so behind it for hot glue.
Take the absorber material, cut the size needed for each bay plus 1" for
each side, start with top or bottom rail and push the material onto the
Velcro and use your finger nail or some other tool to rub on the
material and Velcro to make sure it locks in place. Run a bead of hot
glue a little at a time behind the Velcro strip and push the felt into
it. Let it sit a minute or so to cool then take anything you have that
is approx 1" wide (wood scrap lumber works well) and approx the same
width of the collector bay you're working in and move to the opposite
side of the collector. Wrap the felt around the scrap lumber, stretch it
and push it into the Velcro and glue as before. Do not be afraid to
stretch the material, you'll be surprised at how much it will stretch
just don't over do it. The remaining two sides can be stuck together and
glued without having to stretch the material much at all. After you
finish doing this to all parts of the collector go back and carefully
trim the excess felt away with a very sharp blade. If you happen to cut
through the insulation board while trimming the felt don't worry because
the bead of silicone you put around the absorber perimeter will seal it
up nicely. |
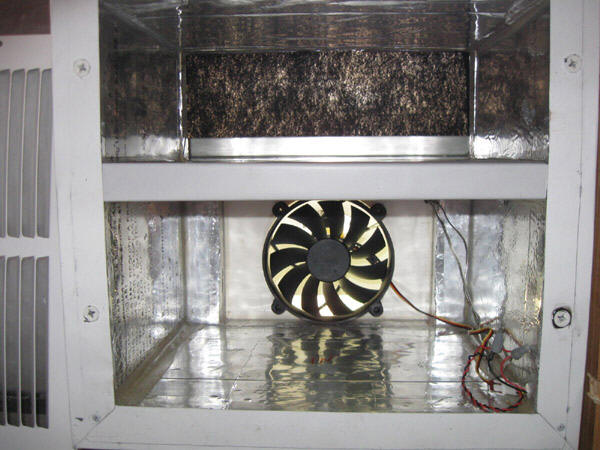
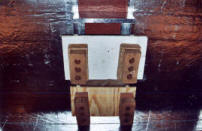
Fan and Thermal Switch Installation
These next few pictures show the
installation of the fan in the manifold.
|
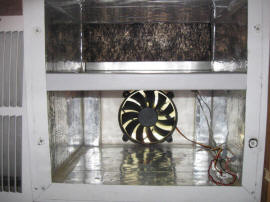
Fan mounted in manifold
|
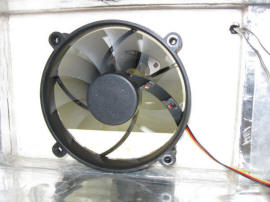
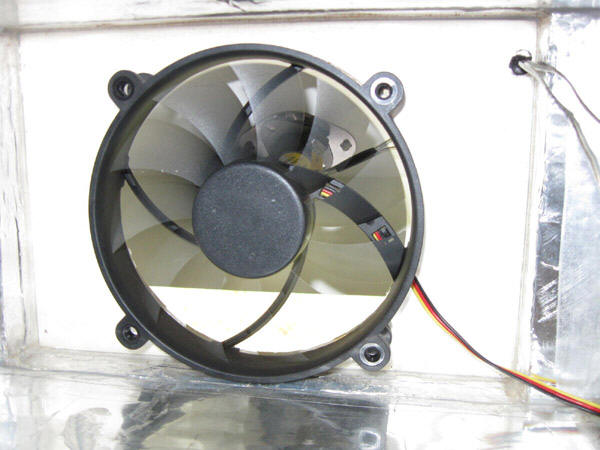
Close-up of fan -- thermal switch
is just visible above fan hub. |
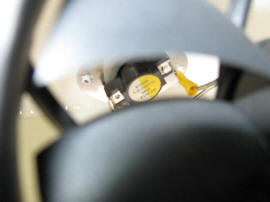
Thermal switch as seen through
the fan blades. |
A few notes
When purchasing the felt material for
the collector it comes on what they call "bolts" in the fabric store and is
approx 54" wide, buy enough so it will be approximately 6" to 8" or so longer
than the collector to have some to play with when cutting. Don't go by the
material list in the plans, they are not correct. I got my felt at Wal-Mart
On p8 of the plans do not make the
baffle trim as called for, make it 30" because the baffle legs are only 30" or
you can make them 35" and cut and bend them to cover the entire baffle leg. I
chose to make mine in two parts. Do the same for the upper part of the C-Baffle.
On p12 make the space between the
bottom rail and collector back 1" and not 3/4" as called for. I asked Bill
Kreamer about this. The placement of the top rail is correct for using felt or
furnace filter media. I like the felt, it's already black (no fumes).
For the manifold, the size in the
plans will work well if you have siding on your home or shop. If you have a
brick home and it has brick window trim along the bottom, often called "rowlock
ledge" you need to measure the distance from inside your window trim to the
outside of the rowlock and build the manifold accordingly, for the depth you
will need instead of making it 9".
For the Lexan glazing I feel it would
be better to use 1/8" instead of the 3/32" I used and for adhering the glazing
to the C-Baffle, next time I will use transfer tape instead of silicone.
Grainger has it in a variety of thickness and widths made for applications like
this. You can use silicone at other places it calls for. I just didn't like the
way the silicone seal looks on the baffle, also with transfer tape no rivets are
needed in the baffle.
The trim for the outer collector case
needs to be made after you finish the collector not ahead of time, but bend it
as shown per plans. I also put a luan backing on the collector to help protect
the insulation board. Prime and paint it then silicone the outside edges. You
could use a FRP (Fiberglass Reinforced Plastic) panel on the back for better
weather resistance and for those that dislike painting.
I have not run many test on this collector yet, Gary knows of the only test I
did run but one thing I have noticed using the 90* to 110* thermostat in this
collector while waiting for it to come up to running temp during one test I
watched the temperature rise to almost 150 F inside of the manifold outlet
before the fan came on, that's a little close for me seeing that the Lexan is
rated at 180 F I think the next one will have a 80 F to 90 F thermostat to see
just what happens or I'll just change this one out because when installing the
stat I used the flat mounting bracket that came with it just in case the stat
ever failed it could be easily replaced without having to drill out any rivets.
If you know of anyone that owns a metal brake, sheet metal or a heat and air
shop near by have them make your rails and trim, it will save you a big
headache, time and wasted metal to do so. If you prefer to use gutter coil stock
for your rails and trim it comes in different widths for the different size
gutters and down spouts and has to be purchased by the pound, usually with a
minimum purchase. A coil of house trim stock in Georgia where I live is
$80 per coil at Lowes at this time. The 4' x 8' sheet of Lexan I got through
Grainger went from $110 to $128 in two weeks time so watch the prices in your
area, they will go up and down. Mostly up I'm afraid. I also like using low
voltage fans in my collectors for one main reason. If you have ever had an ice
storm, bad wet snow storm and have lost power only to have a nice sunny day
follow it with still no power your collector will not work unless you have back
up electric or generator. The low voltage fans work off a 12V battery if need be
so you can still have heat from this collector.
Bill Kreamer says the C-Baffle in the plans will work for collectors up to
4x8ft. So, instead of wasting expensive Lexan one can just use the whole
sheet.
Greg
March 31, 2009
Greg is happy to answer email
questions at: gwest77 AT comcast DOT net (type @ for AT and a
period for DOT)