
Search
The Renewable Energy site for Do-It-Yourselfers
ProMaster DIY Camper Van Conversion -- Beds and Storage
|
This page covers the design and build for the beds/storage compartments for our RAM ProMaster camper van conversion.
The bed platforms will have 4 inch foam mattresses and provide sleeping for two. They also provide most of the storage for the van and house batteries, electronics, propane, and fresh water.

Bed platforms without mattresses.
Go back to the main camper van conversion page...
|
|
| |
Important Update
The material on these pages describing our camper van conversion has been moved to our new new site dedicated to efficient RVs and camper vans.
The new site covers all the material here and adds a lot of new material on other camper van conversions, camper van design and build, resources for people converting vans, other efficient camping vehicles, new ideas in efficient RVs and camper van travel hints.
The new site is here...
I'm leaving these pages here as you may have bookmarked them and the Comments section has some good suggestions, but I suggest that you go to the new site -- I won't be updating this material anymore.
Thanks to all the people who read these pages and especially to the people who left comments and suggestions! Feedback on the new site is very much appreciated.
Gary
|
|
Table of Contents
Bed Layout...
Construction...
Drivers side bed...
Passenger side bed...
Bolting beds to floor...
Storage compartment lids...
Mattresses...
Cost and Weight...
Comments...
Bed Layout
After looking at a lot of potential layouts and mocking up several, we decided on a van layout with two beds at the back of the van like this:
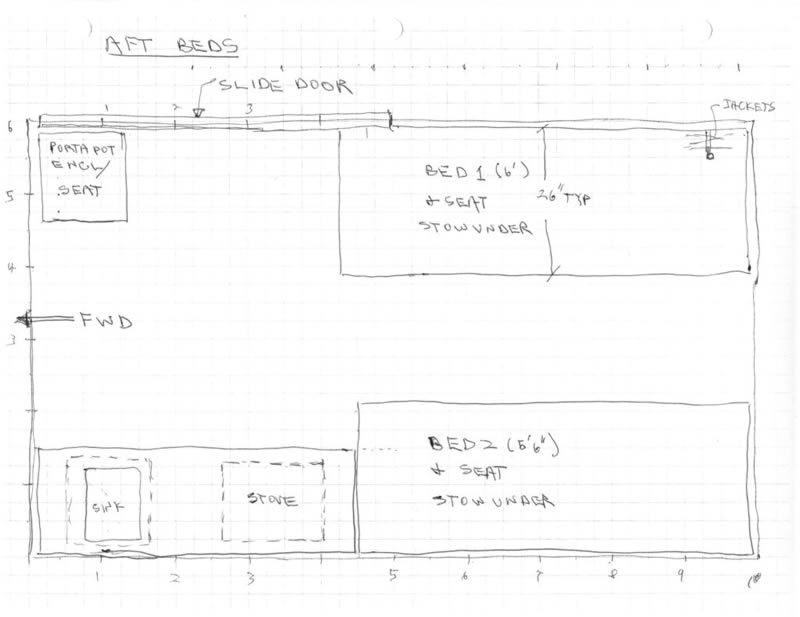
The bed platforms each provide a flat place for a mattress and also provide most of the van storage and a place to mount water tank, batteries, and the propane tank.
The finished beds look like this:
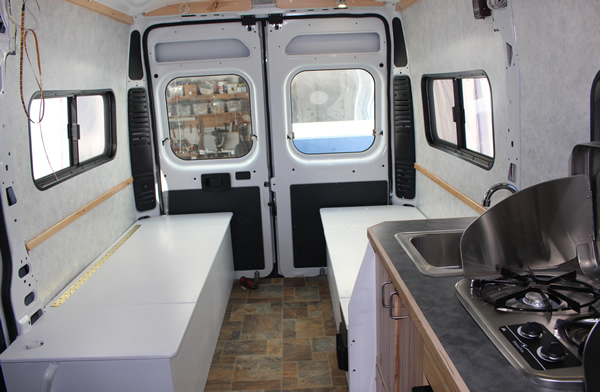
The two bunk platforms aft of the galley.
|
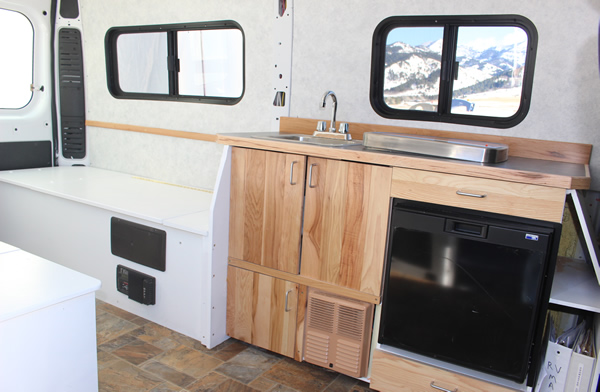
Driver side bunk with galley in front.
|
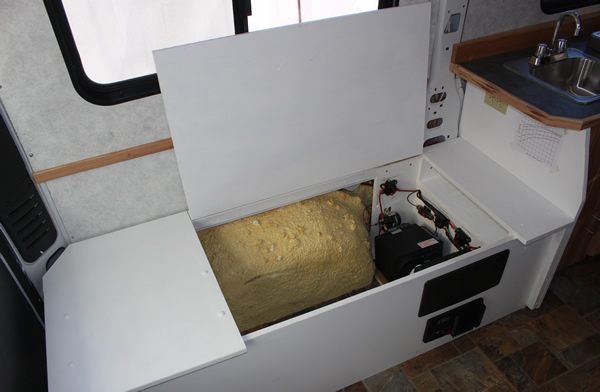
Driver side bunk with hinged lid open.
|
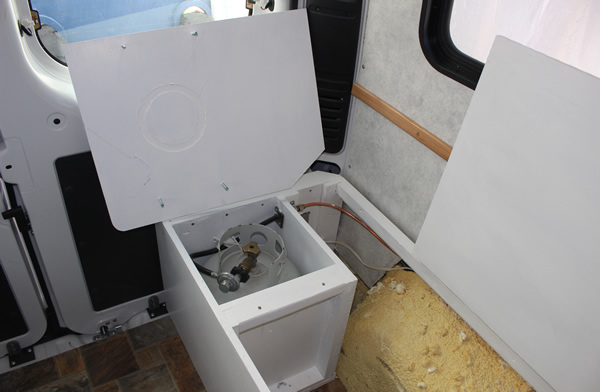
Aft end of driver side bunk with propane tank compartment lid off.
|
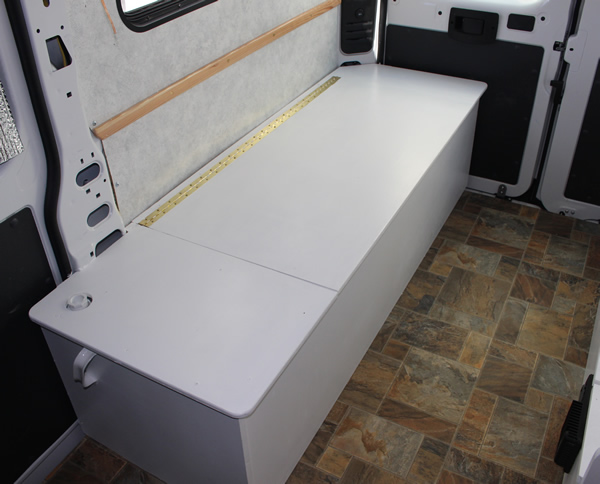
Passenger side bunk.
|
Passenger side bunk with water tank forward and storage aft.
|
None of the pictures show the mattresses, which we are having made locally and still waiting for.
Construction
The bed platforms store heavy stuff like batteries and water tanks, and we don't want those coming loose in the case of an accident, so they are heavily built and are well anchored through the van floor.
The bed platforms are constructed from Medium Density Overlay plywood (MDO) because it is strong, flat, and has nice smooth face sheets that take paint well. I've used this on many projects and really like it for its strength, stability, and weather resistance (its used for freeway signs). It is more expensive that most plywood, but to my mind well worth the extra expense.
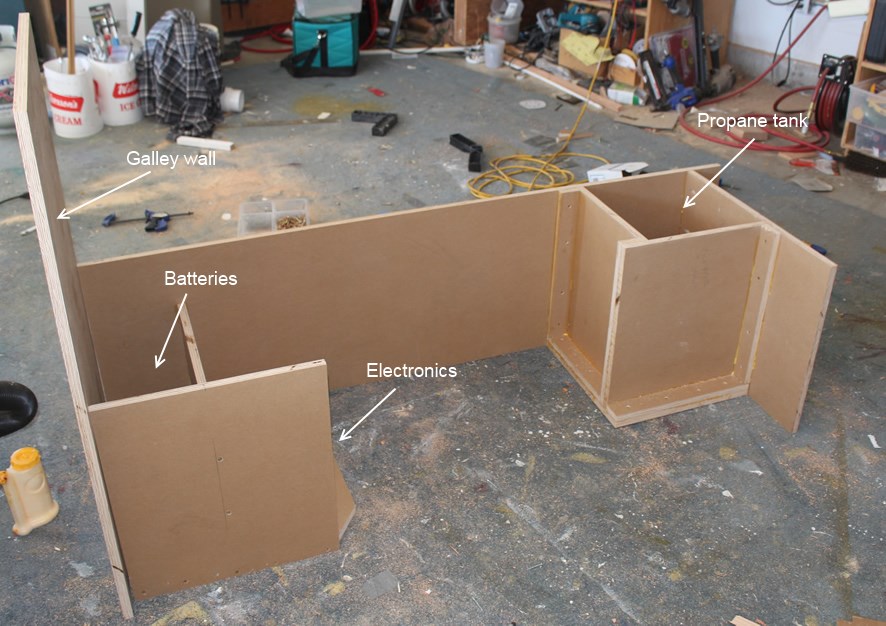
Driver side bed:
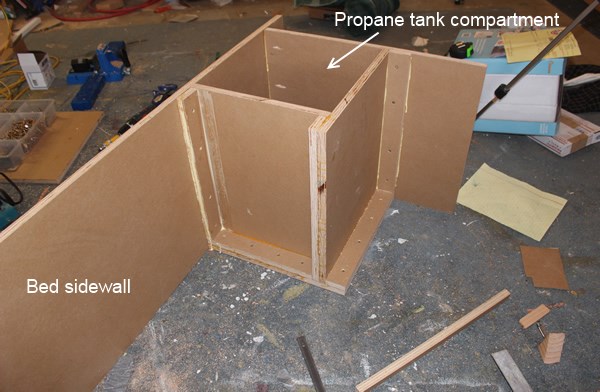
The driver side bed has the electrical system (including two golf cart batteries) stored in its forward end and the propane tank compartment in its aft end. The part between these two is storage that is accessed via a hinged lid.
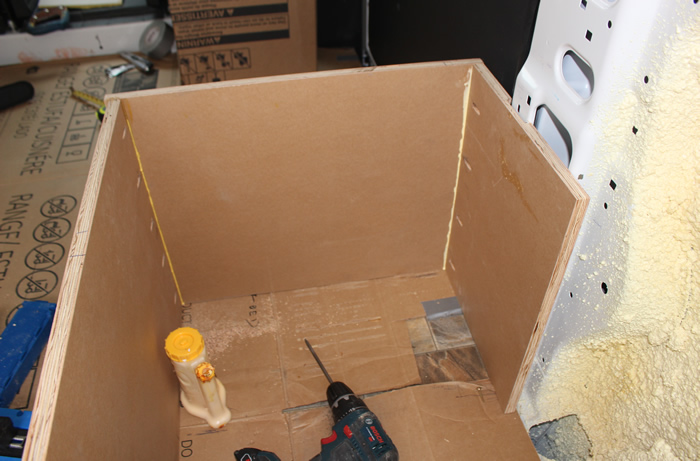
Propane tank compartment end:
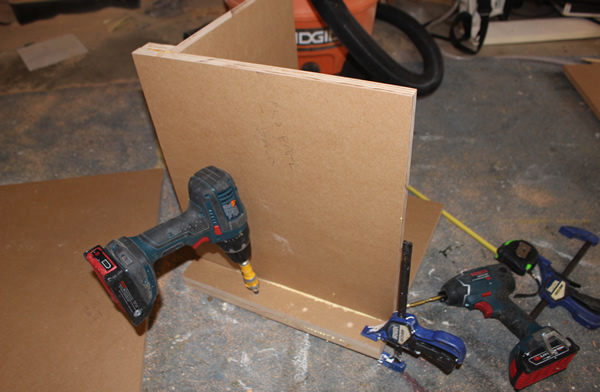
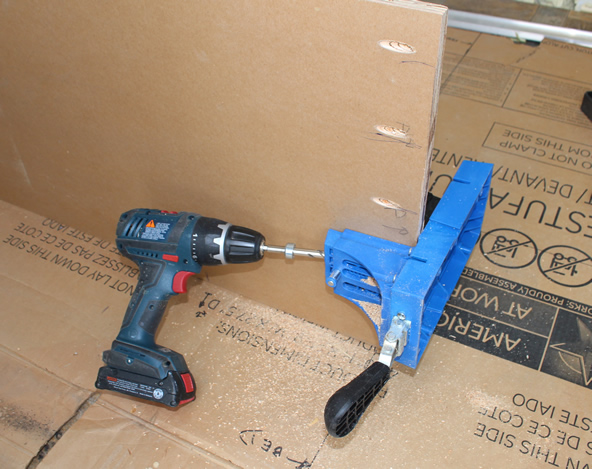
Glued shear blocks were used to insure lots of glue area and strong joints. |
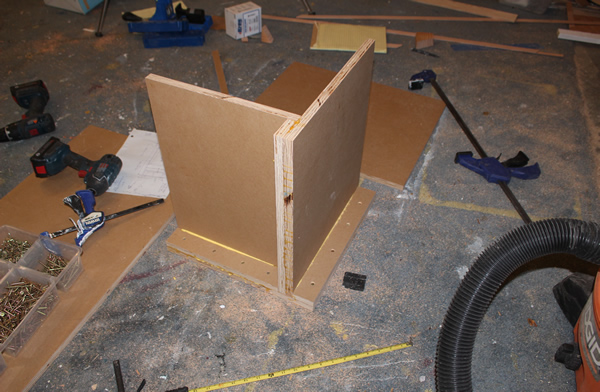
This is the box that will house the propane tank taking shape.
|
 |
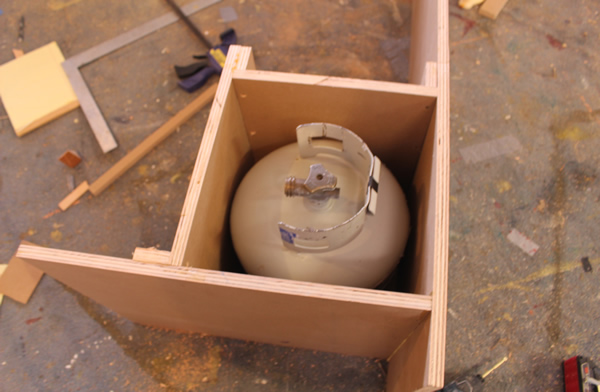
It fits!
|
For more details on the propane tank installation...
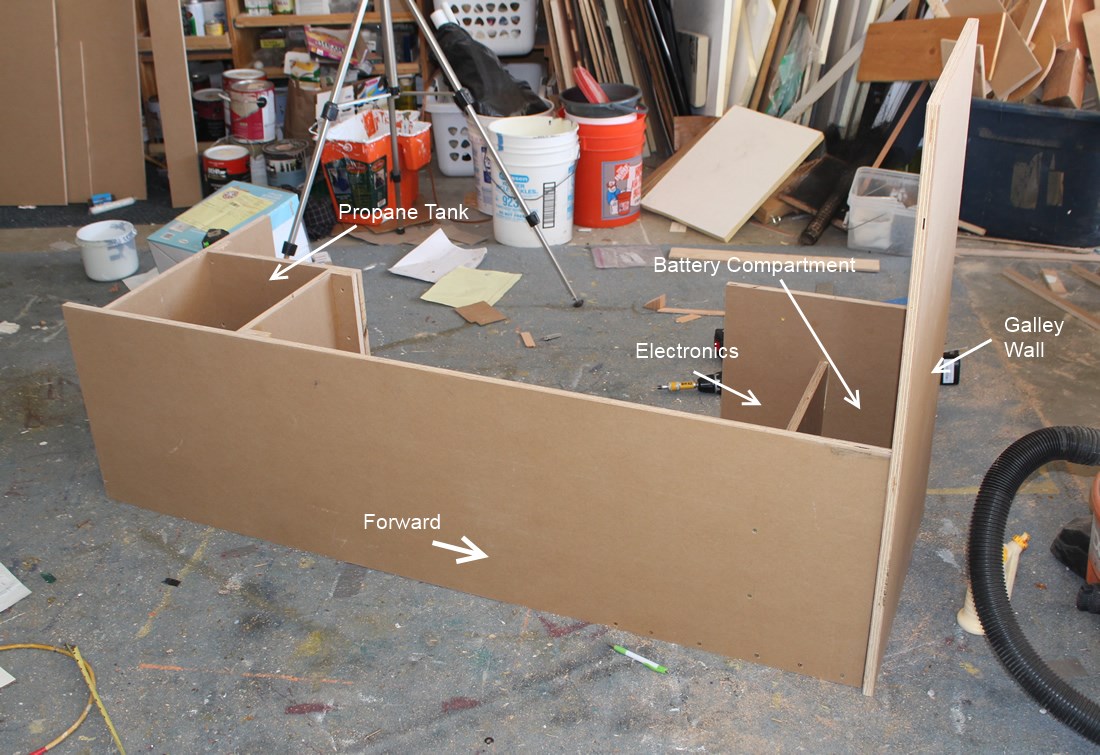
Forward end with battery compartment:
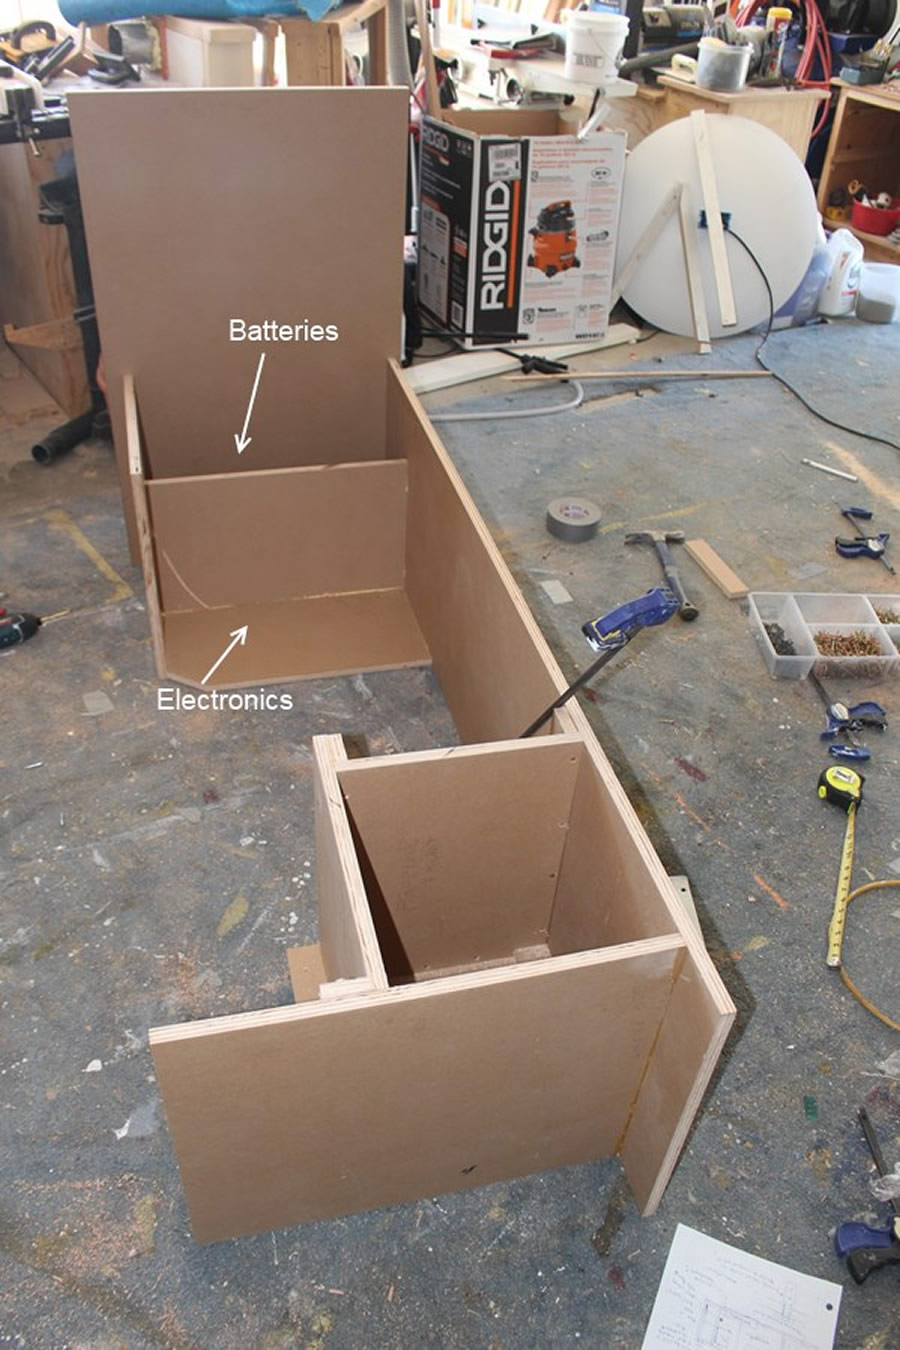
More details on the battery and electronics installation...
The basic bed structure was built in the shop and then moved into the van and bolted down. There are a set of through the floor bolts at the battery end, and another set at the propane tank end.
Passenger Side Bed:
The passenger side bed houses the fresh water tank at its forward end. The part aft of the water tank is dedicated to storage that is accessed via a hinged lid.
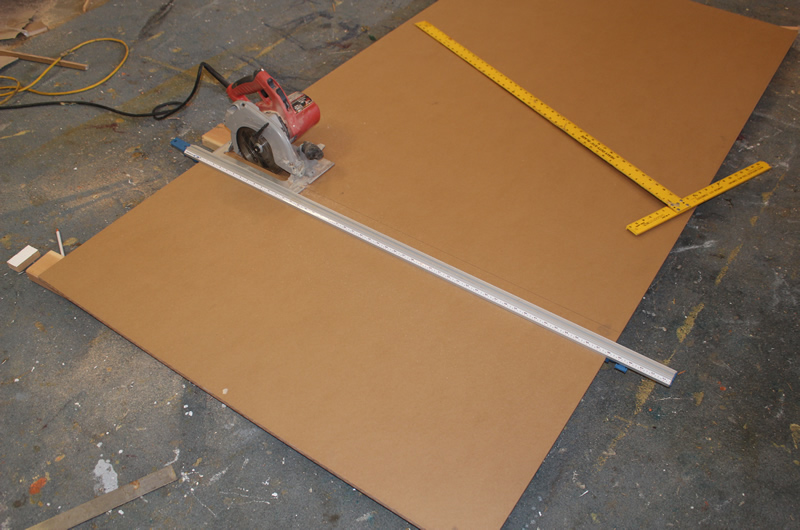
Most bed pieces were cut with table saw, but Skil saw with fine blade and a guide do just as well. |
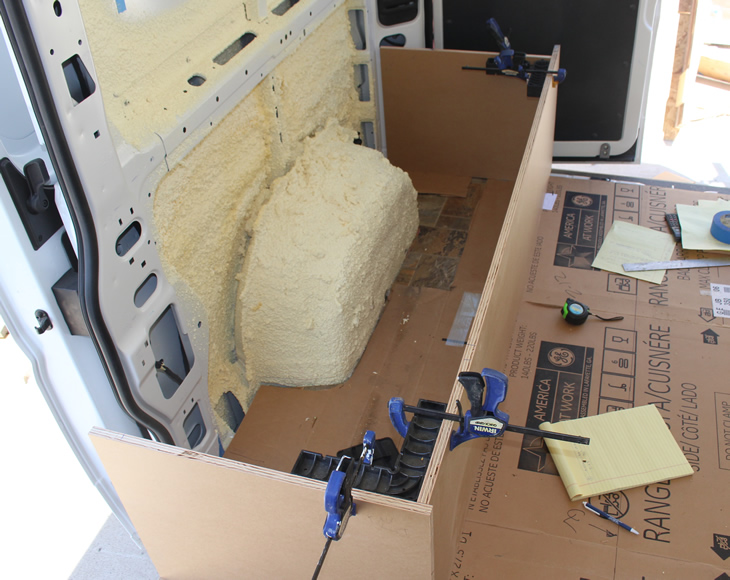
Assembling the bed pieces in the van. |
Forward end of bed where water tank will live. |
Used quite a few of the Kreg fasteners on the passenger side bed.
I used glue as well as the Kreg screws. |
Shows the water tank in installed in the forward end of bed platform.
Bolting beds to floor
Due to the heavy items in this bed platform, it is bolted to the floor in several locations.
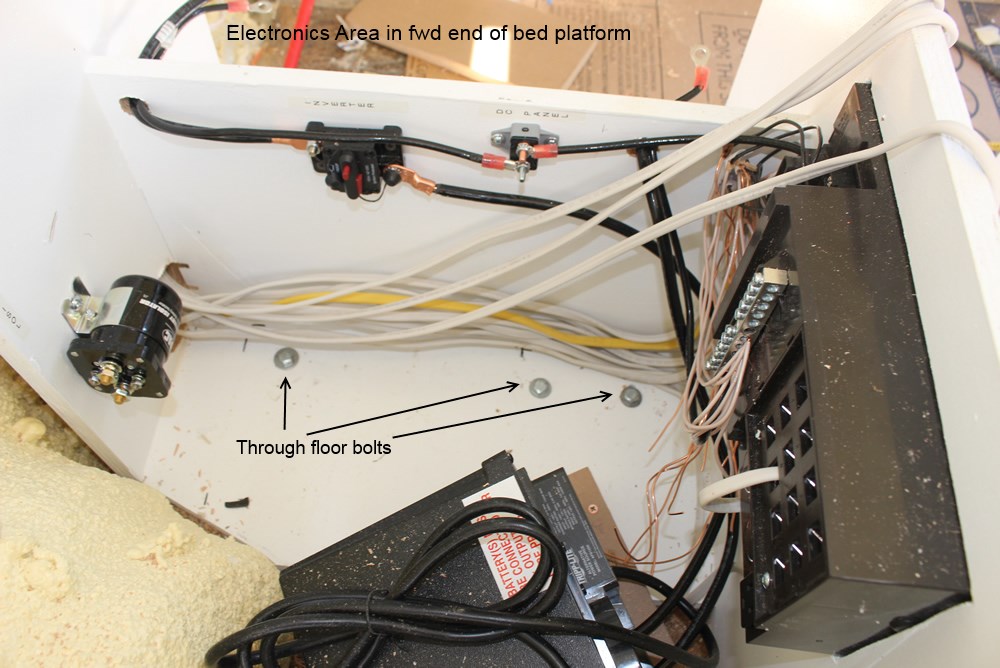
Looking down and forward at the electronics area of the bed platform. The three bolts (and a couple on the other side in the battery area) go through the floor to secure the bed platform (and batteries/electronics/propane tank) in place.
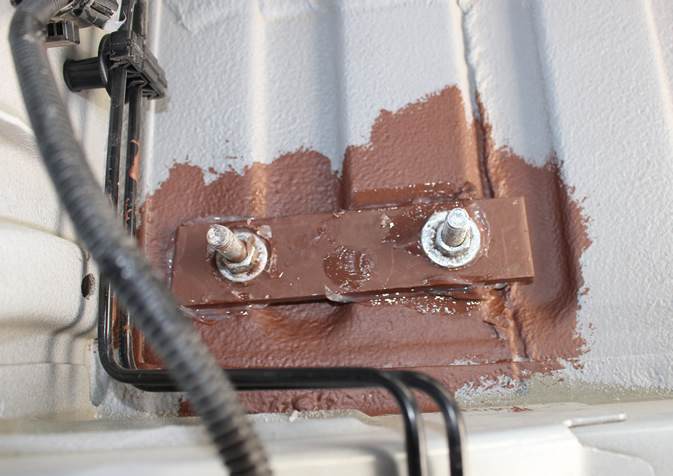
The through floor bolts from under the van (looking up at the bottom of the van floor).
The added metal plate provides additional tear out resistance.
The lids:
|
Driver side bunk with storage lid open.
Electronics are in forward part of bunk and propane tank in the aft box in bunk.
Guess I should paint the insulation white.
|
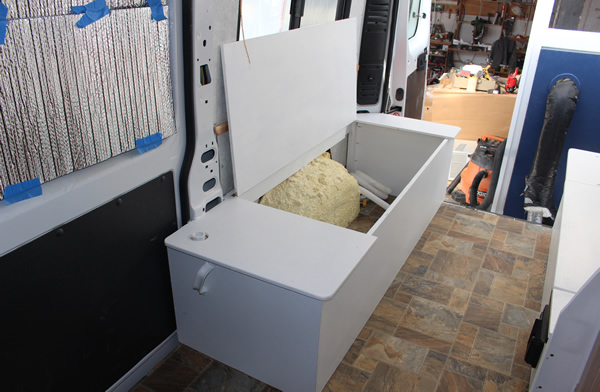
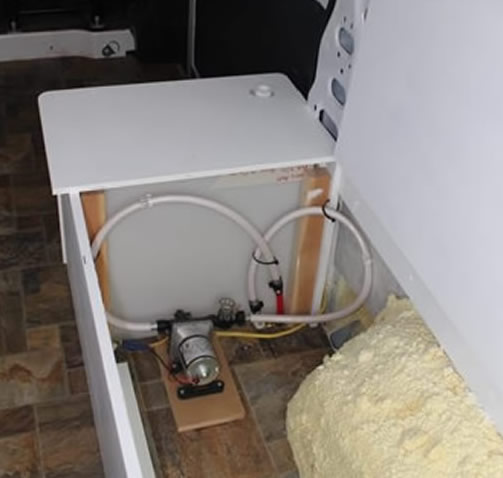
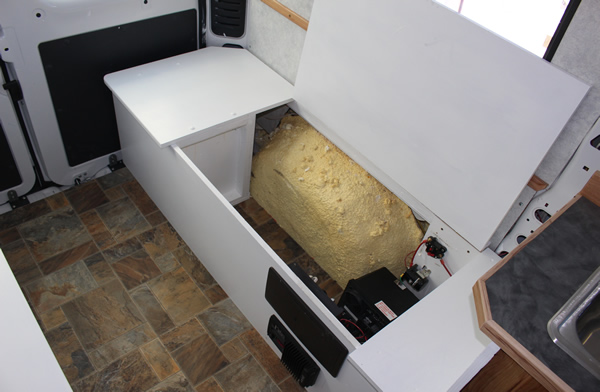
Passenger side bunk with storage lid open.
The fresh water tank is in forward part of the bunk.
|
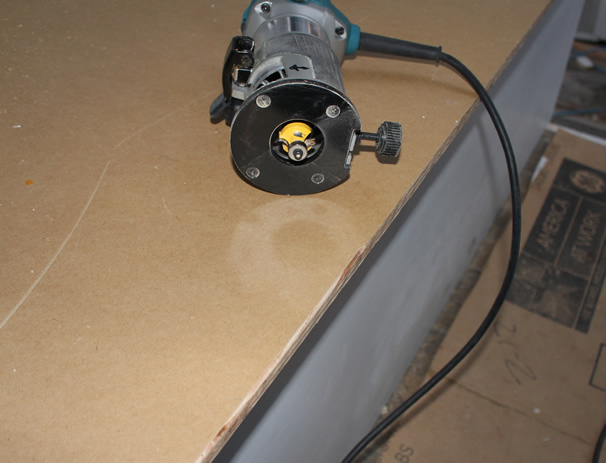
Rounding off the square edges on the plywood with router and round over bit.
|
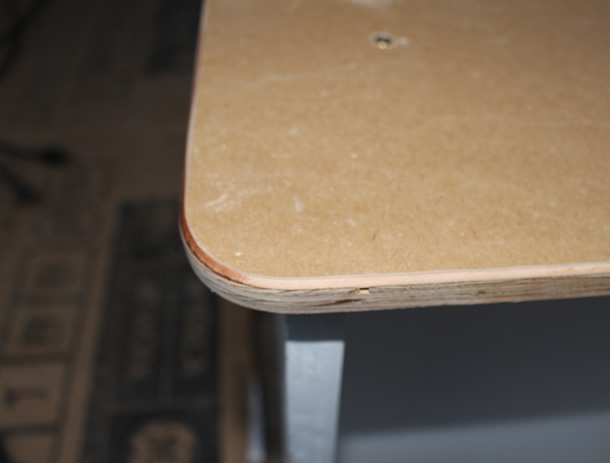
All of the exposed corners are rounded to reduce chance of injury.
We tried to do this for all the van conversion furniture. |
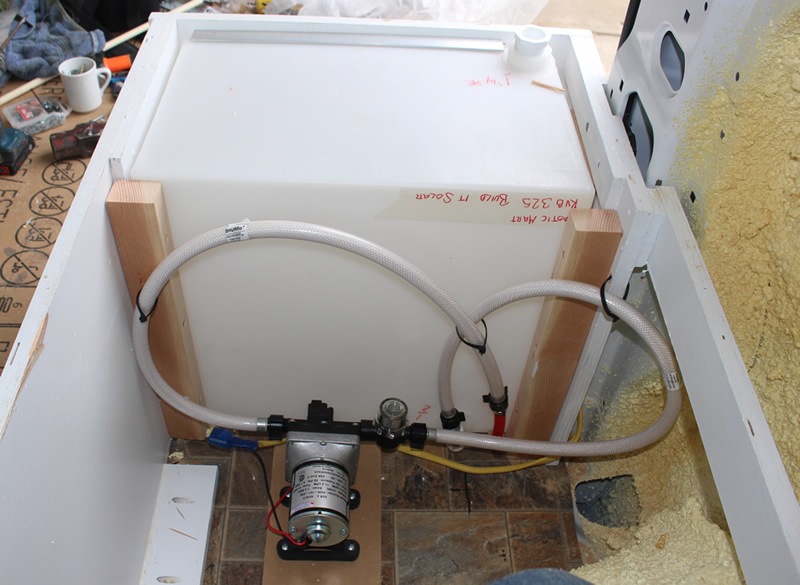
The fresh water tank is in the forward part of the passenger side bunk.

Fresh water tank and pump in bunk.
|
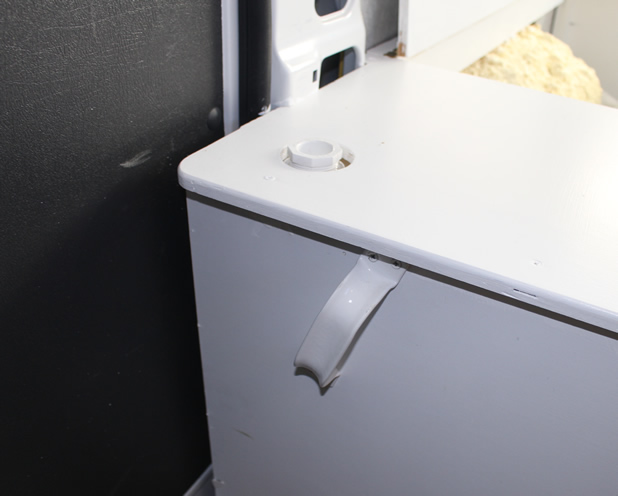
Fresh water fill is a threaded fitting in top of tank that is accessed via the sliding door. To fill, the PVC cap (in picture) is removed and a short potable water rated garden hose is used to fill the tank.
The water gaging system is to remove the PVC plug and look down into the tank -- who says an X airplane engineer can't do low tech!
|
Still working out what kind of latch to use for the storage compartment lids.
Mattresses
The mattresses will be 4 inch thick medium density foam with upholstery fabric covers. We are having these made locally -- to be ready in January.
Cost, Weight and Time
| Item |
Cost ($) |
Weight (lb) |
| Bed MDO |
$108 |
137 lb |
| |
|
|
| Piano hinges (2) |
$16 |
8 lbs? |
| Bolts and fasteners |
$10? |
5 lbs? |
| Paint |
$15 |
5 lb (aprox 1/2 gallon) |
| Mattresses |
$200? |
20? |
| Total |
$349 |
175 lbs |
I worked on the beds over a long time period while also working on other things, so don't have a precise idea how much time they took -- say 3 full days.
If I had to make a guess:
Cutting out and gluing up the bed platform bases -- 1.5 days
Installing and bolting down and detail fitting -- 1 day
Installing hinged lids and fixed covers -- 1 day
Comments
Comments and Suggestions...
Go back to the main camper van conversion page...
Gary
November 30, 2014