Home Depot is selling a nice and easy to install LED retrofit for can
lights. We decided to try one as we have lots of can lights that
would benefit from an efficient retrofit. This page gives a
rundown on the installation and the results.
Bottom line is that we are very pleased with it so far.
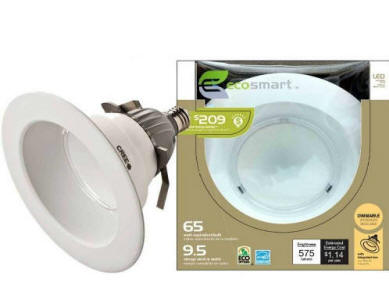
This is the
Home Depot listing for the light... Cost is $40 -- kind
of steep, but see the payback calculations below. Note that the
package picture above says 9.5 watts instead of 10.5 watts, but I think
that its the same light.
Claimed features:
- 575
lumen output with 10.5 watt power consumption
-
2700 Kelvin color temperature (warm), and 92% color accuracy.
- 20 year life
- Instant on
- dimmable
Installation
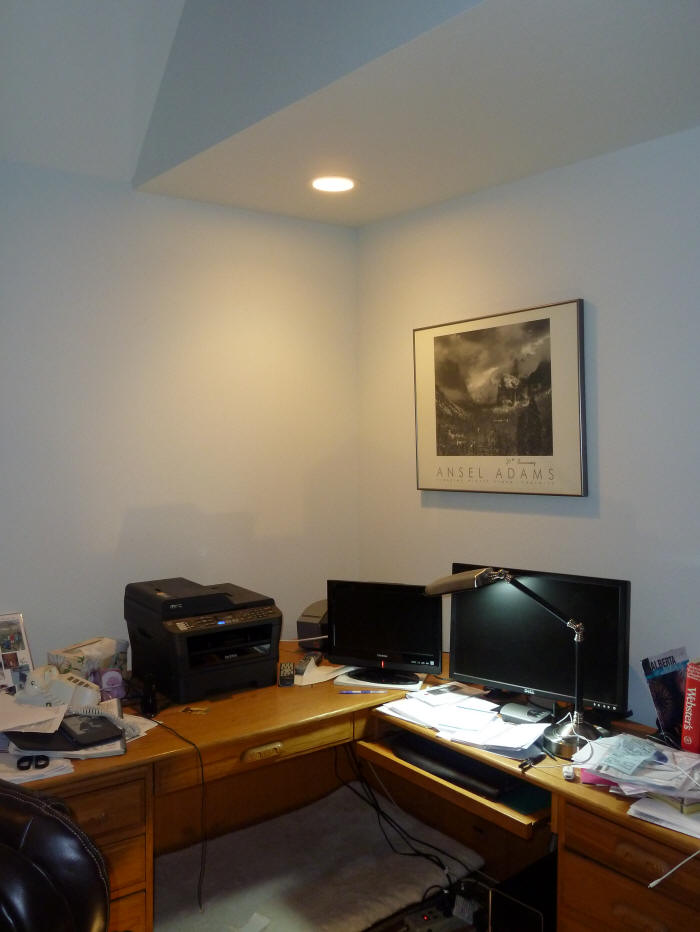
In our case, the light went in quite easily.
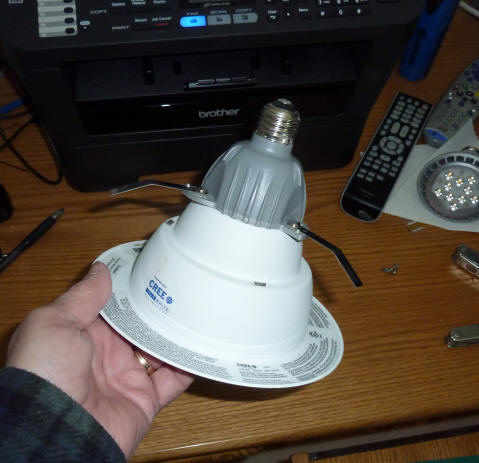
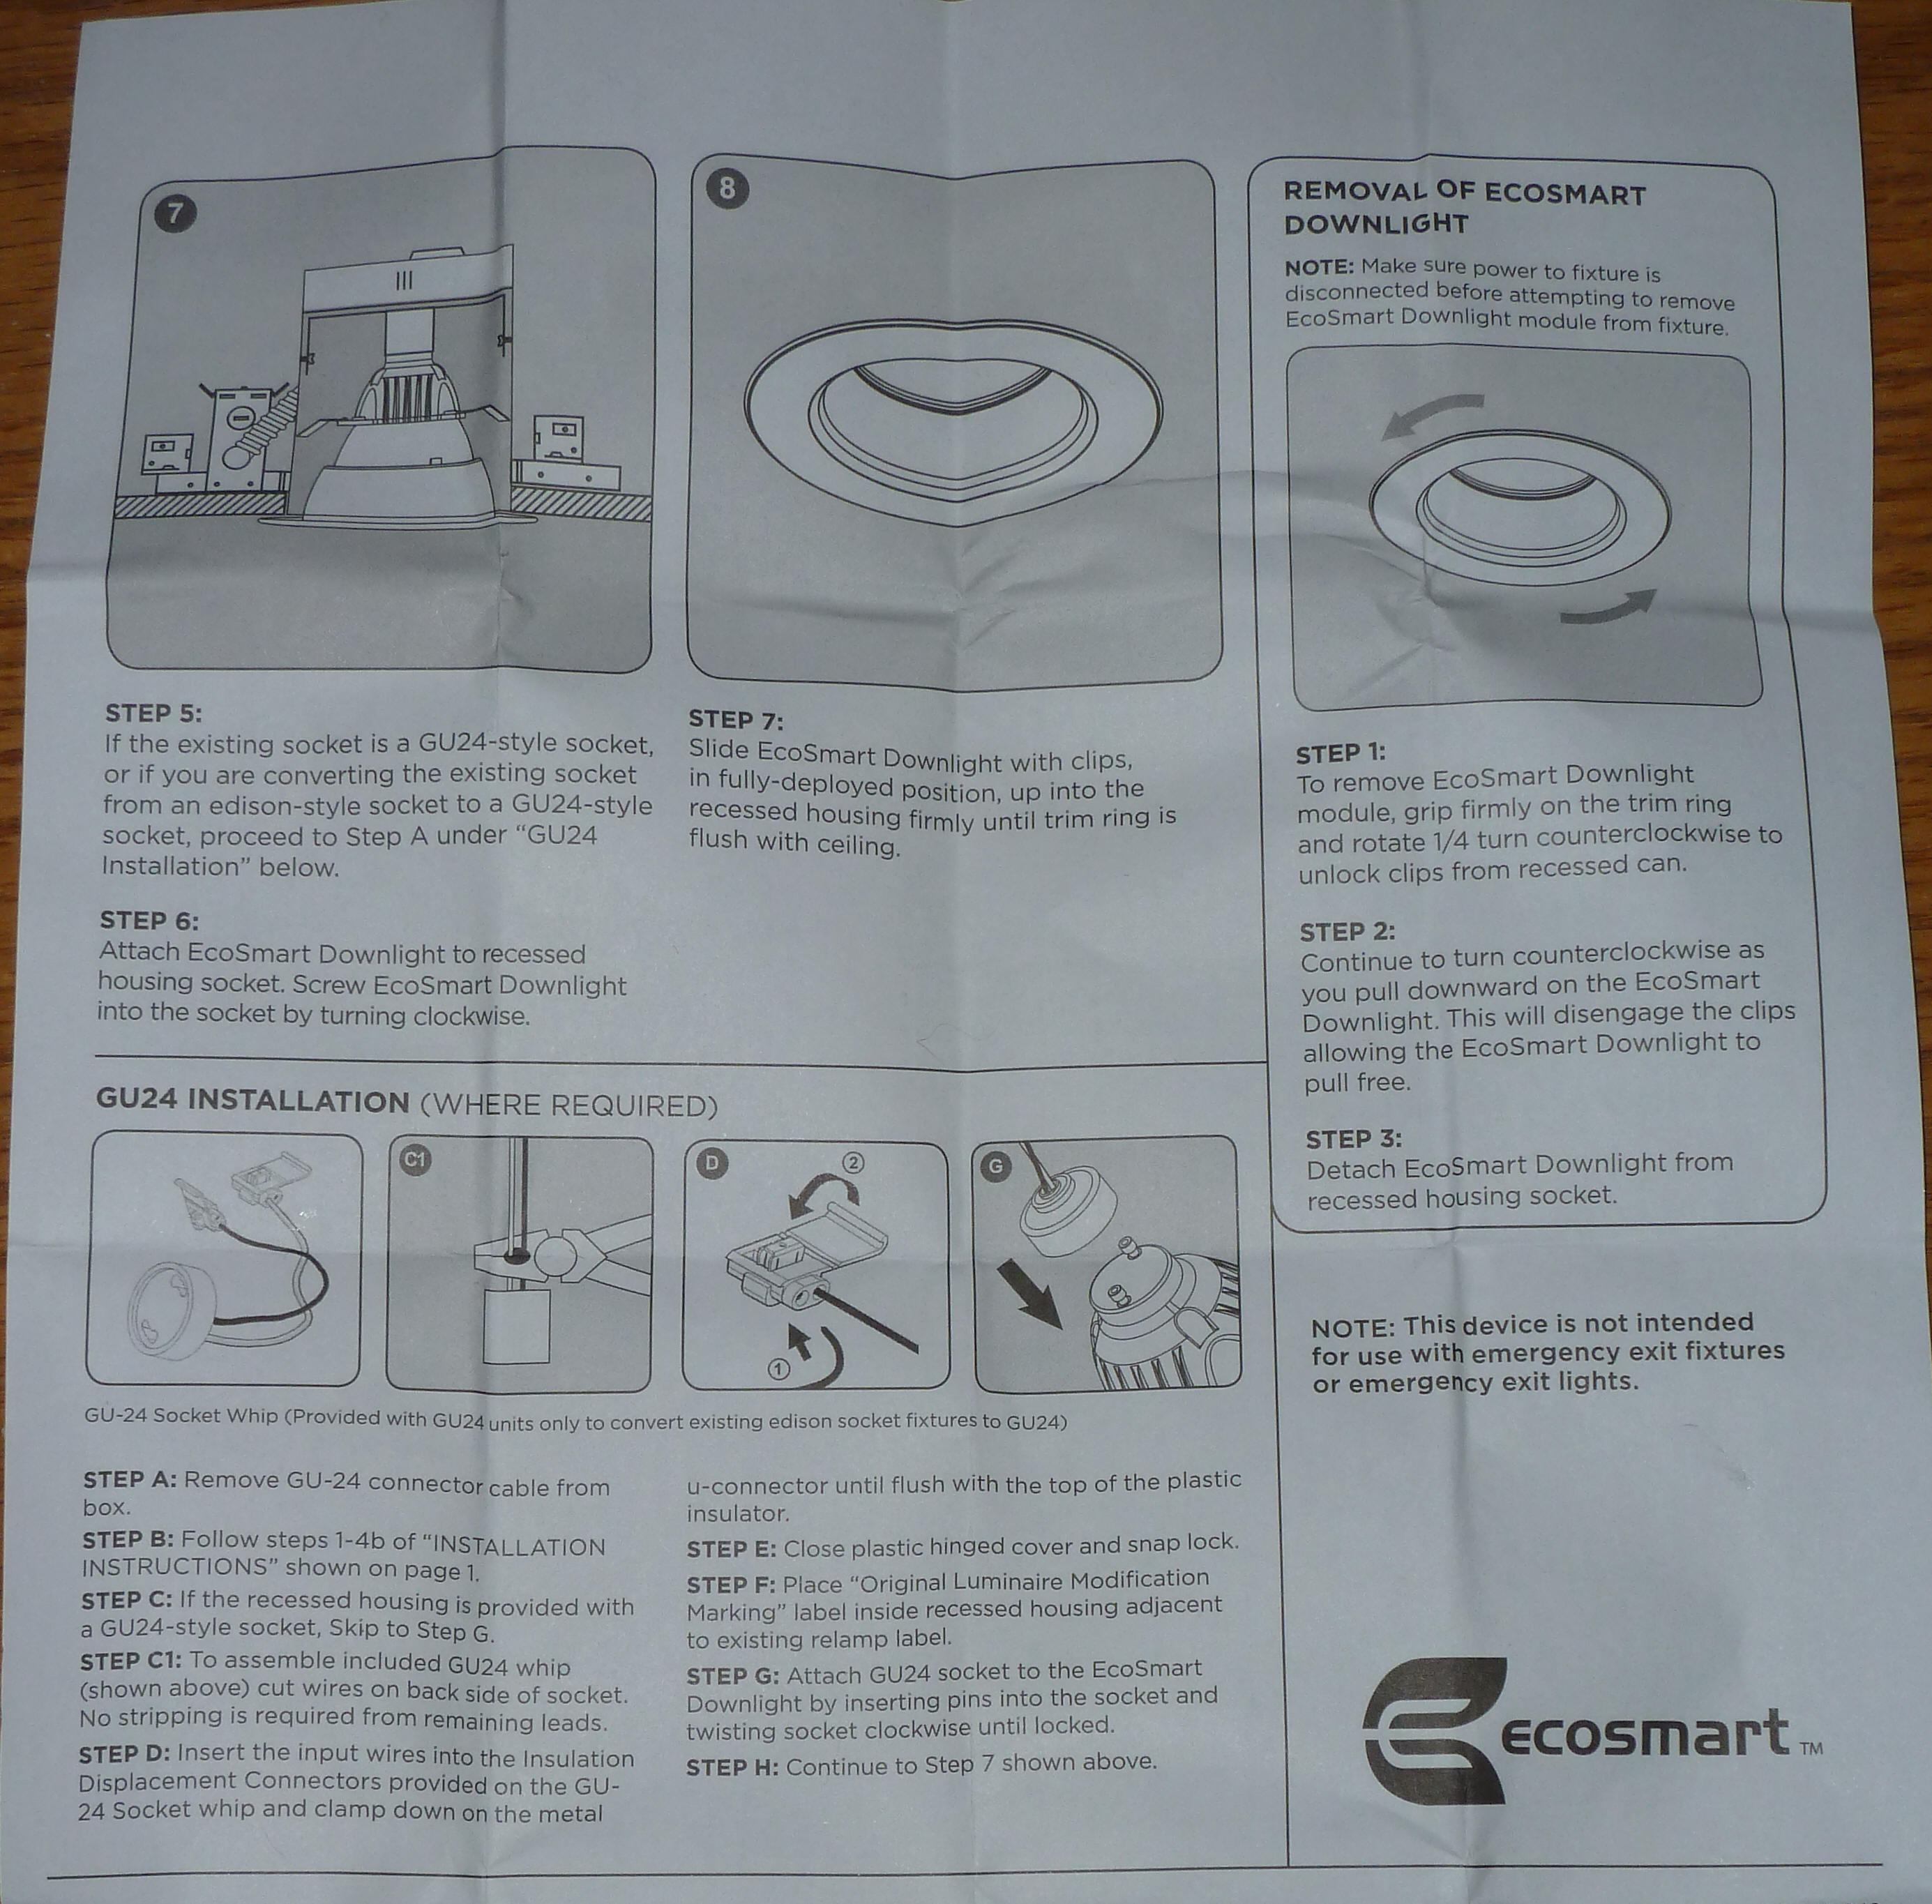
Basically, the new light has 3 spring clips that stick out as shown in the
picture below. When you slide the light up into the old can, the spring
clips engage the walls of the old can, and hold the new light in place.
The clips are designed such that when you rotate the fixture CCW, the clips
rotate inward and release the light so that it can be removed.
The step by step:
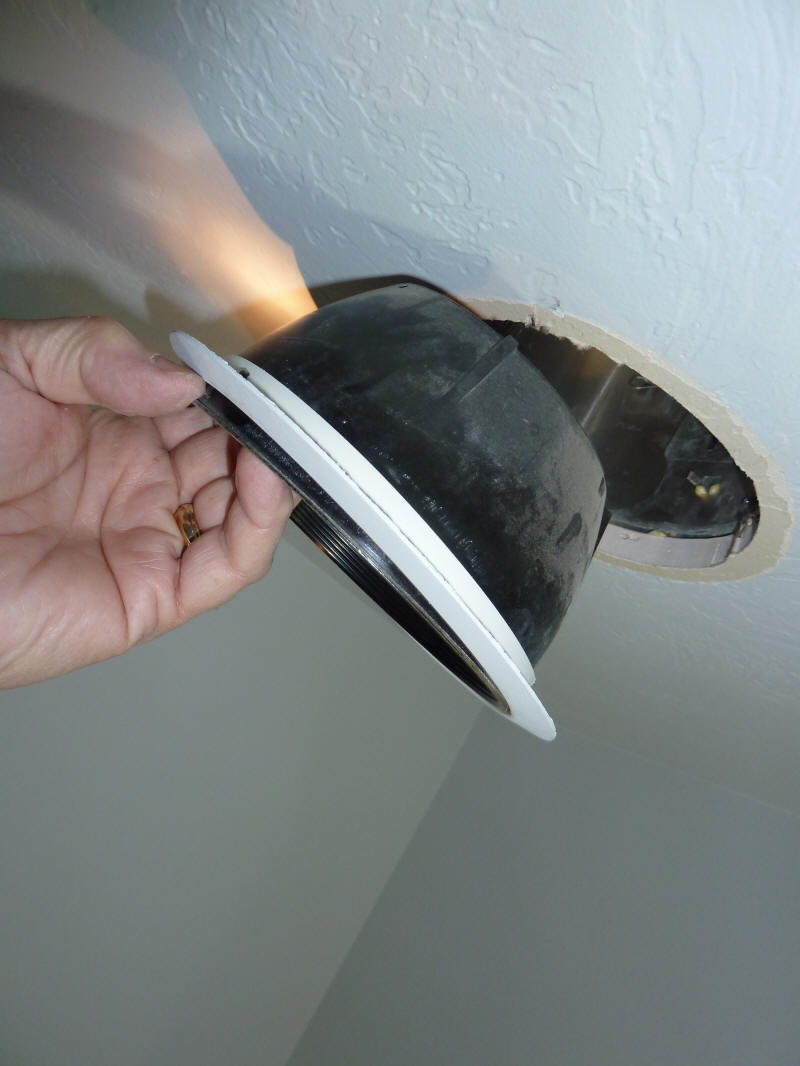
Get a work light, and turn off the power to the can light you are replacing.
Take the old bulb out. Pull the bezel on the old can light down --
on ours this involved disconnecting some springs that hold the bezel in
place.
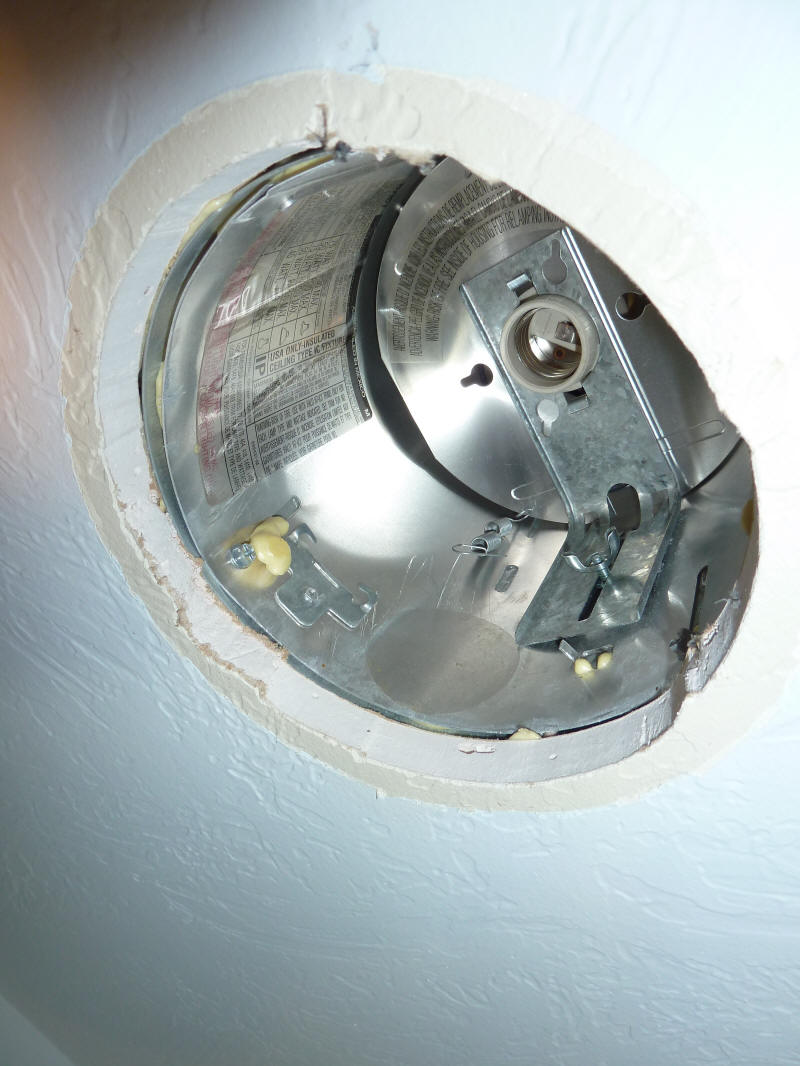
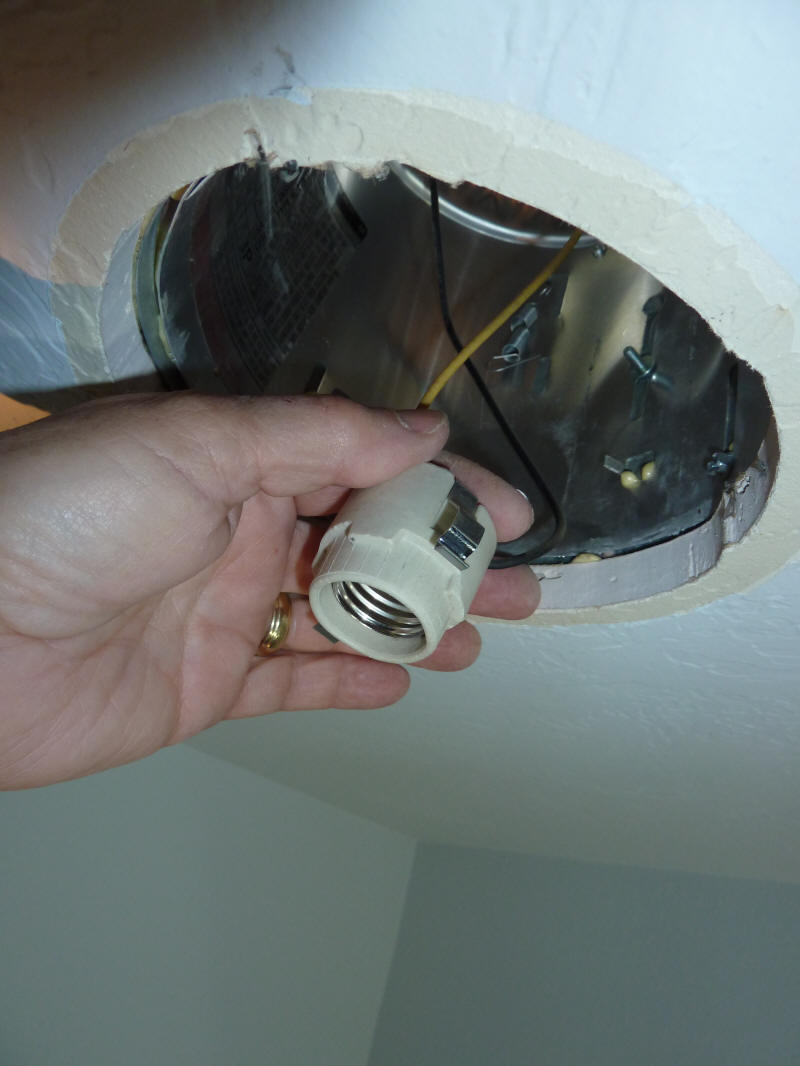
Take out whatever is holding the bulb socket in place so the the socket
is just hanging on its wires. On ours, this
just involved taking off a wingnut and a sheet metal clip -- a minutes
work.
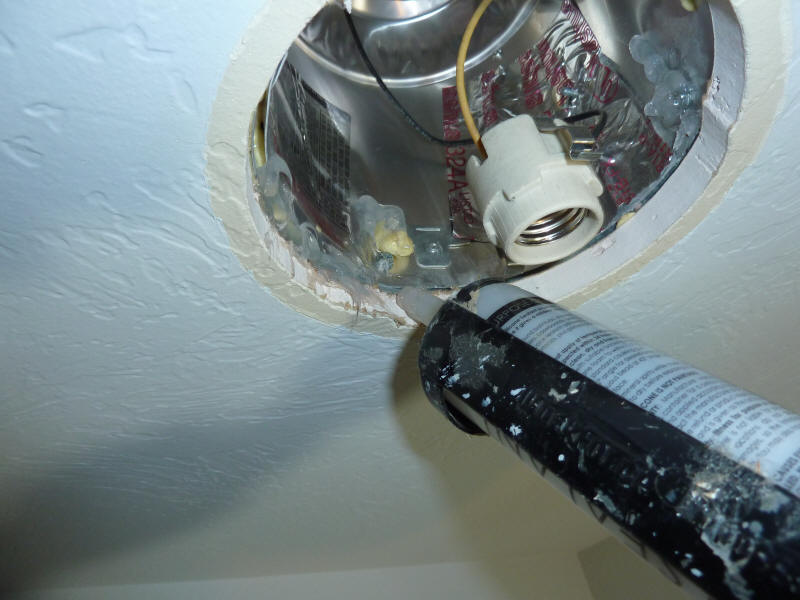
In our case, I took some time here to seal up all the holes and
slots and cracks in the old can light. I used aluminum tape
on the open slots, and silicone caulk for the gap at the sheetrock and a
couple other places. Our cans are already insulated over in the attic,
but if yours are not you might consider insulating and sealing. If concerned about
having insulation right up against the cans, you can buy fire treated boxes
that are made for covering cans before insulating. Anyway,
this is your chance to seal up the big thermal hole that can lights cause in
your ceilings.
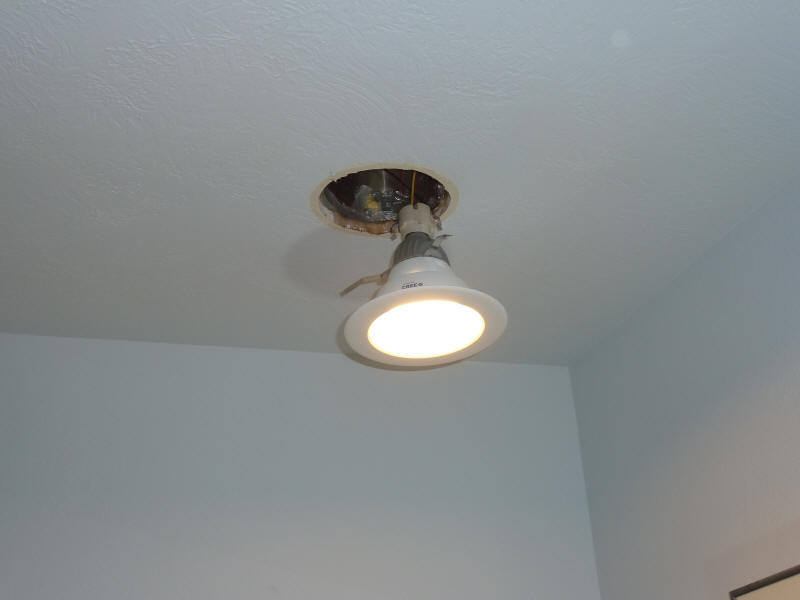
Screw the new fixture into the old can light socket. I'd check
that it works at this point before pushing it up into the can.
Rotate the spring clips out so they are perpendicular to the light
fixture, and push the light fixture up into the old can. On ours this
was surprisingly easy to do.
Turn on the light and have a beer under the nice warm light.
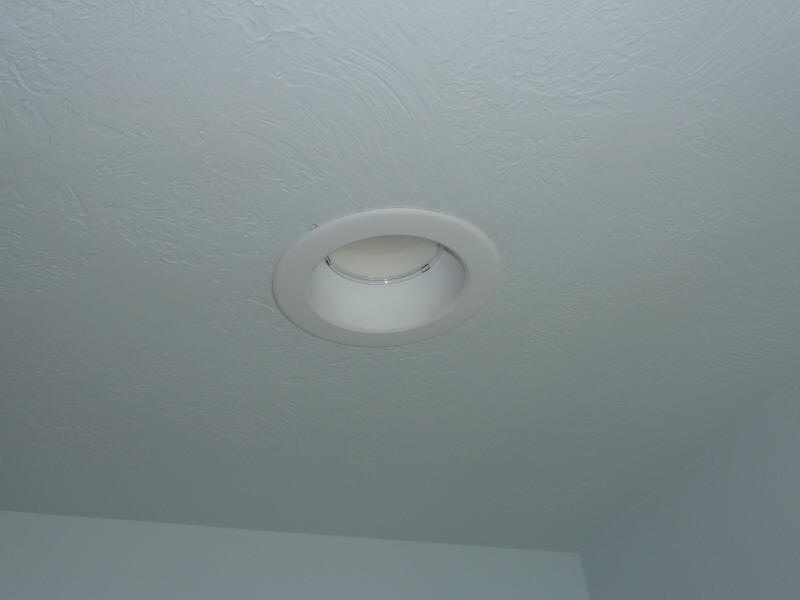
Results
We like the new light. It gives off plenty of light. The
pattern is wide. The light color is warm and pleasant to work
in. There is no startup delay.
We have not tried the new lamp with a dimmer -- a few people reported
flickering with their dimmer, while most had no problem.
Reviews
There were 117 reviews on the Home Depot site. The overall score was
nearly 5
out of 5 stars. There were many 5 star reviews -- comments like: "Fantastic
Light", "Blows away CFLs", "Awesome". The only
negatives I saw in a quick review were: 1) did not work well with some dimmers,
2) does not fit all cans.
Payback
The packaging claims over "more than $200" lifetime saving. Lets
see how it works out for us.
If the light is on 6 hours a day (as the one we replaced
is), and it replaces a 65 watt incandescent, and you pay 10 cents a KWH for
power, and you use the bulb 350 days a year -- then the yearly electricity
saving is:
Year Saving = (65 watts - 10.5 watts)*(6 hr/day)*(350
days/year)*($0.1 /KWH)*(1 KWH/1000 watt-hrs) = $11.45 per year
Maybe another $1+ per year for bulb replacements
(depending on what you use now).
A total of about $13 per year saving.
So, the payback on the $40 initial price is about 3 years
-- beats the stock market.
The CO2 emissions saving per year at the US average 1.5
lbs CO2 per KWH is 170 lbs per year. -- 3500 lbs CO2 over a 20 year life
of the bulb.
In addition to the electricity saving, there can be a saving in heating fuel.
If you use this as an opportunity to seal up and insulate the can fixtures, I
think the saving in heating fuel could be significant -- especially if you live
in a climate like ours. As a very very rough estimate:
If you have a can light that is not insulated above (as
cans often are), and this is the equivalent of 1 sqft of R1 insulated area, and
you insulate over the can to R40, and you use propane fuel at $2 per gallon, and
you live in SW Montana with 8100 Heating Degree Days, then the
Insulation
Upgrade Calculator shows a saving of $5.50 a year in heating fuel.
People living in less of a winter wonderland than we do
would see less saving.
People in cooling climates should see a saving on the AC bill both because the
bulbs generate less heat and there is less loss of conditioned air into the
attic.
BUT THAT's NOT ALL -- IF YOU CALL NOW, WE WILL THROW IN
AN INFILATRATION SAVING!!!
I was not able to find a good method to estimate the
infiltration/exfiltration saving. But, some good sources report that the
major contributor to exfiltration is air leaking from the living space into the
attic. The cold outside air and warm inside air creates a stack effect
with a small pressure differential that wants to move air from the living space
into the attic. This results in new cold air being pulled into the house,
which has to be heated. The can lights in our 1996 home have quite a bit
of open crack length -- just looking at one, I'd say about 25 inches of nearly
1/8 inch crack area. So, you have open area for air to flow through
and you have a pressure differential trying top push air through the opening --
it stands to reason that there will be significant heat loss.
In our case, I've already replaced most of the can light bulbs with CFLs, so
the saving is not nearly as large as the change from incandescent to LEDs shown
above.
In the end, the nicest features (to me) are that if the life claim is anywhere near
correct, I'll never have to change these lights again. And, the light
color is very pleasant.