Search
The Renewable Energy site for Do-It-Yourselfers
Inside Storm
Window From Multi-Wall Polycarbonate
|
The set of pictures below shows how
to add inside storm windows made from multi-wall polycarbonate glazing.
These storm windows should cut
thermal losses through double glazed windows about in half, while still
admitting daylight and allowing a (somewhat distorted) view out.
While these storm windows could be
left in place permanently, we have mounted them with Velcro tabs, and intend to
install them at the beginning of each heating season.
Here are the pros and cons of these
polycarbonate (Lexan) panel storm windows as I see them.
|
|
The pros:
-
High R value (R1.8 for dual wall
and R 2.5 for 3 wall) -- good $ saving
-
Very tough material (this is the
plastic that football helmets are made from)
-
Lightweight -- big sizes are easy
to handle -- a 5' by 5' window can be carried with one hand.
-
Tolerate high temperatures (up to
270F)
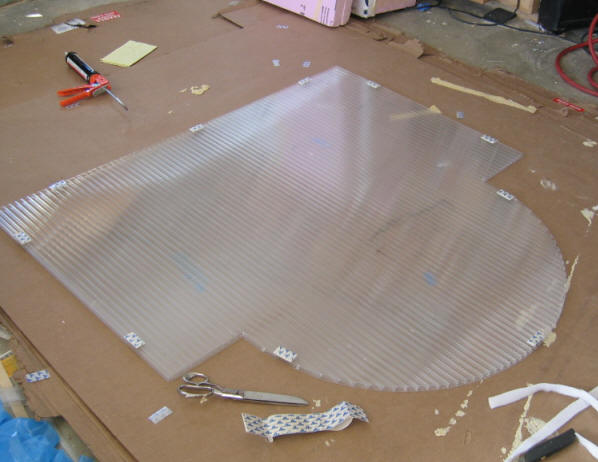
-
Easily cut to size with wood
working tools
-
Can be cut to
odd shapes that would
be impossible to get thermal curtains to fit
-
Not too pricy ($1.50 to $3.50 per
sqft depending on layers and thickness)
-
Light enough to be held in place
with Velcro tabs.
-
High light transmission to preserve
solar gain
The Cons:

Two samples of Polycarbonate glazing. Twinwall clear in front, and 5
wall white tinted in back.
The glazing comes in clear or various tints.
Building and Installing
Please
read this before you proceed.
We have vinyl window frames that
provide a nice flat surface to mount the storm windows against. They look
like the picture below. If your frames are different, you may have to
invent a new mounting technique. If you come up with a method for other
frame configurations, please send it in.
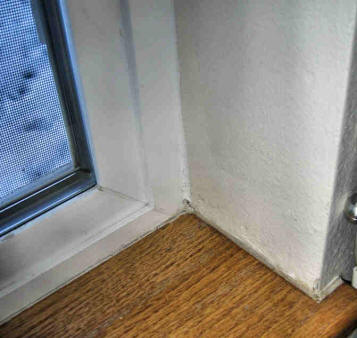
Vinyl frame
provides an inch wide mounting surface
parallel to the
glass, and about an inch from the glass.
This is used to
seal the storm window panels against.
Measuring and Cutting:
Note that the polycarbonate sheets
have a UV resistant coating on one side, and this side must face the sun.
Make sure that when you do the markup on unsymmetrical windows that you mark it
up such that the UV resistant face ends up facing the sun. The
protective film is marked to show which side has the UV coating.
Also note that the ribs in the
polycarbonate sheet should be vertical when the window is installed -- not
horizontal.
The polycarbonate sheets come with a
plastic film protective layer on each side. Leave this in place as long as
possible.
Measure your window dimensions.
Subtract about 1/8 inch from each edge, and layout the dimensions on the
polycarbonate sheet with marker. The 1/8 inch allows for some
waviness in the window frames, and allows for thermal expansion of the
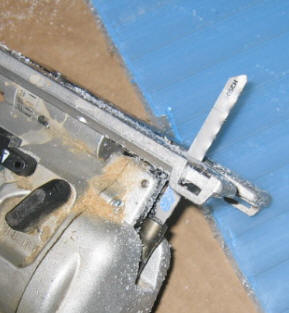
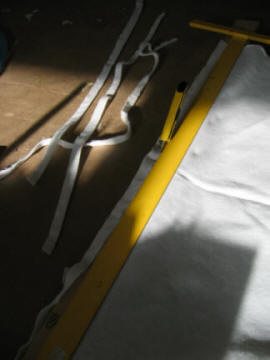
polycarbonate. I cut the polycarbonate with an electric jig saw, which
works fine. Other wood working saws would probably also work fine. I
used a fine tooth blade -- see picture.
Its a good idea to pull back the
protective film on the UV coated side and mark the panel "OUTSIDE" with a
marker, so you don't loose track of which side goes out when the film is
removed.
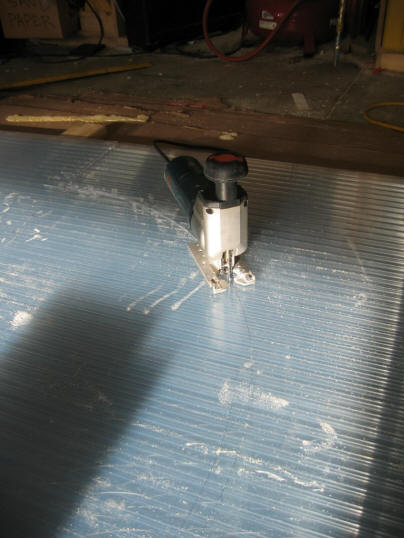
Cutting the sheets with a fine tooth
jig saw blade.
Do a trial fit to see if you need to
do any trimming. You can trim the panels with a plane or other woodworking
tools. There should be a little wiggle room for thermal expansion.
Adding Velcro and Felt:
Update Oct, 2007:
The method shown below that uses Velcro and felt strips works as described,
but I have had trouble with the adhesive on the back of the Velcro tabs
deteriorating to the point where it no longer holds the window in place
effectively.
This year, I added 3 to 4
small, pan head screws to each window to replace the Velcro. These
screws go just a small distance into the Vinyl window frames, and are small
enough that the holes are not visible when then windows are taken down for
the summer. The polycarbonate material is so light that just
this small number of screws is fine to hold the storm window in place.
Make sure that the screws do not go far enough to interfere with the window
glass.
If I were starting the project
over, I would dispense with both the Velcro and the felt strips that are
described below. This makes the job easier, looks a little better, is
still easy to install and take down, and still holds the window securely in
place.
If the screws described above
are not a possibility for your frames, you can still use the Velcro and felt
as described below. You might be able to find a brand of Velcro that
holds up better -- please let me know if you do.
Another alternative would be
to use small wood strips that match your window framing material to hold the
polycarbonate in place. The wood strips can be secured to the wood or
sheet rock that frames the window.
I am more sold on this
multi-wall polycarbonate for inside storm windows each year. They hold
up well, insulate very well, and are easy to install and remove (or just
leave in place).
Gary Oct 6, 2007
Update Nov, 2008: In putting the inside storms up this year, I noticed
some slight stains or smudges on the inside of the polycarbonate panes (that
is, between the layers of polycarbonate). Apparently some
material gets down into the corrugations. This is very slight, and not
really a problem, but to keep it from developing further, I added aluminum
tape over the top edge of the polycarbonate panes (see pictures). This
is actually what most of the installation instructions recommend, but I did
not do it initially because I did not think it would be needed for inside
use. I only added the tape on the top of the panes, but you could add
it top and bottom.
The aluminum tape will also
prevent air from thermosyphoning through the space between the pane walls,
which would reduce the effectiveness of the storms.
I really do like these inside
storms -- very easy to put up and take down, or just leave them in place.
The stiffness of the dual or triple wall construction makes them easier to
handle than the single thickness Acrylic panels, not to mention more
thermally effective. An easy way to cut your window heat loss in half
(or a lot more if you have older tech windows).
Click on pictures for full
size
|
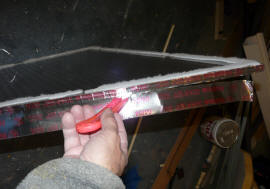
Applying and trimming the aluminum tape.
Pull the backing off, stick in place, and
trim the overhanging edge with a razor
blade knife. You can use the leftover part
for the next edge.
|
Finished aluminum tape.
Does not show at all. |
We plan to install the storm windows
each heating season and remove them from for the summer. To allow for easy
in/out, we installed a few Velcro tabs around the periphery of the panel.
The Velcro spaces the panel about a sixteenth of an inch out from the frame
surface -- to fill this gap we used felt strips in a color that matched the
window frames.
The Velcro that we used has an
adhesive back, which we used to attach the hook side to the polycarbonate and
the loop side to the window frame.
Once you have the window cut to size,
you will want to clear out the cutting chips that tend to get in the window
ribs. If you have a compressor, just blow the chips out. Otherwise,
some tapping and blowing will get the job done. I guess one could also run
water from a hose down the ribs to clear them and then let them dry.
Lay the window down on cardboard with
the outside face up.
Pull back the protective film from
the edges.
Cut a few (usually about 6 to 10
depending on the window ) Velcro tabs about 1 inch by 2 inches each. Its
best to stick the hook and loop components of the Velcro together before cutting
them, so you cut both at the same time. The color of Velcro should match
the color of your window frames -- else it will show.
Peel back the film to expose the
Velcro on the hook side, and apply the patches of Velcro to the polycarbonate at
a few places around the periphery of the sheet. Leave the loop side of the
Velcro patches stuck to the hook pieces, and don't remove the film over the loop
side adhesive until just before you are ready to put the panel in place.
This makes it much easier to install the windows -- you don't have to worry
about aligning the Velcro patches on the frames to the Velcro patches on the
polycarbonate panels.
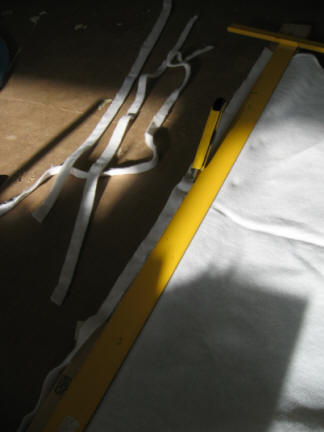
Cut some strips of fairly heavy felt
about 3/4 to 1 inch wide -- these will be glued in between the Velcro tabs you
just put in. Use felt that is about the same thickness as the stuck
together thickness of the Velcro hook plus loop pieces. The felt strips
prevent air from circulating between the polycarbonate sheet and the window
frame.
Lay a small bead of silicone down
along the edge of the polycarbonate panels between the Velcro tabs to glue the
felt to the panel. Its best to use a Silicone caulk that is
approved for use against polycarbonate (Lexan). Clear is good.
Press the felt strips down into the
Silicone. Let the Silicone cure.
Click the pictures to enlarge.
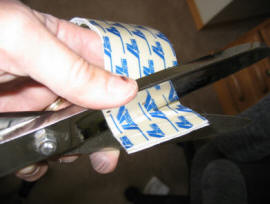
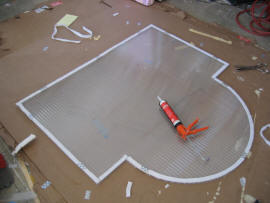
Cutting the Velcro
tabs -- cut hook and loop sides at same time,
and leave them
stuck together.
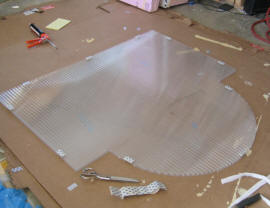
The panel with all
the Velcro tabs stuck in place.
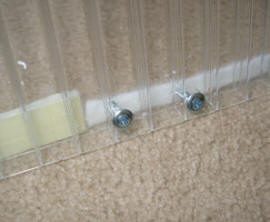
Cutting the felt
strips with a razor knife.
The panel with the
felt strips glued in place with a bead of Silicone caulk.
Note that the felt
follows curved edges easily.
Install something
that will allow you to pull the window back out after they are installed.
We used two pan head screws.
The two screws allow
you to pull the window
back out after its
installed.
Note: Ron
suggested using brass dresser drawer pulls instead of the pan head screws.
This would look better and work better.
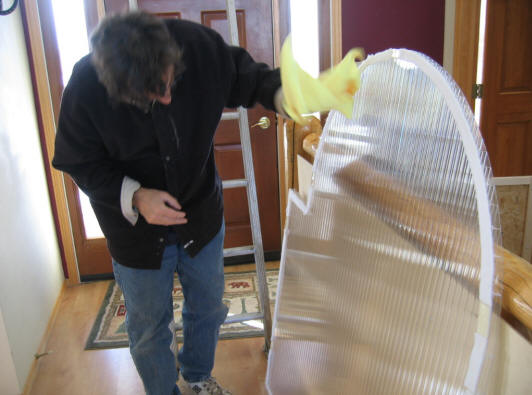
Installing the Window:
The window panels are pretty light
weight and easy to install.
Clean up the windows frame area, and
(maybe) wash the inside surface of the glass.
Remove the protective film from both
sides of the polycarbonate panel.
The panels tend to pick up static
electricity, which in turn tends to pick up just about everything. Wiping
the panels down with an anti-static cloth helps.
Peel off the film covering the top of
the Velcro tabs.
Place the panel in the window frame
opening and press until the adhesive on the Velcro tabs sticks to the window
frame.

Make sure the polycarbonate is clean -- an anti-static cloth is helpful.
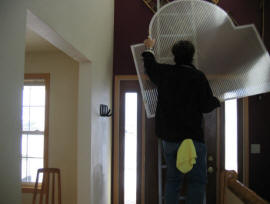
The panels are lightweight and easy
to put in place.
They can be left in place
permanently, or installed each Fall.
Have a beer.
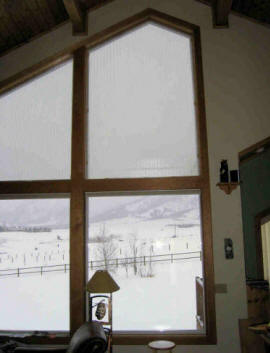
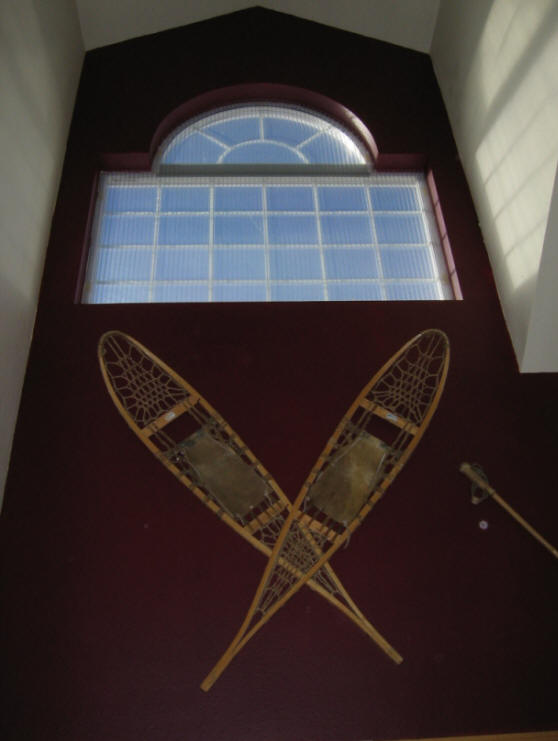
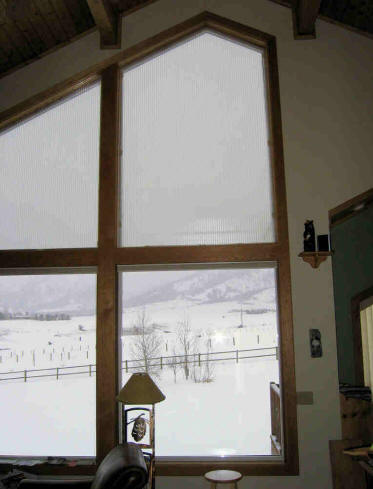
Great for odd
shaped windows
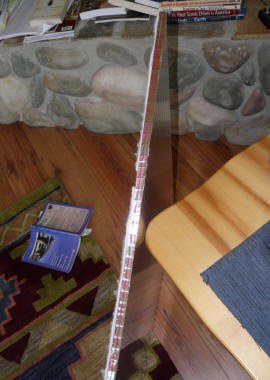
The upper window shown is 5 ft wide
by 8 ft high, and still installs easily.
Gary
1/16/2006