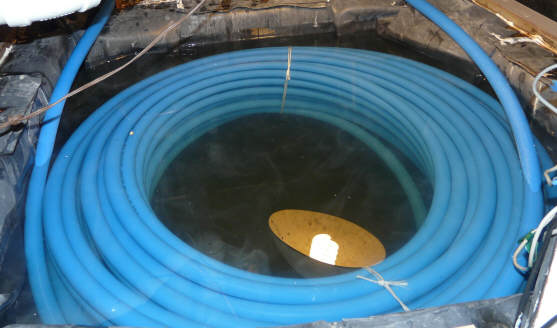
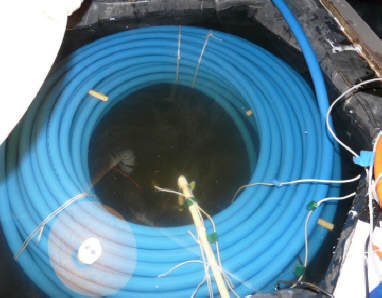
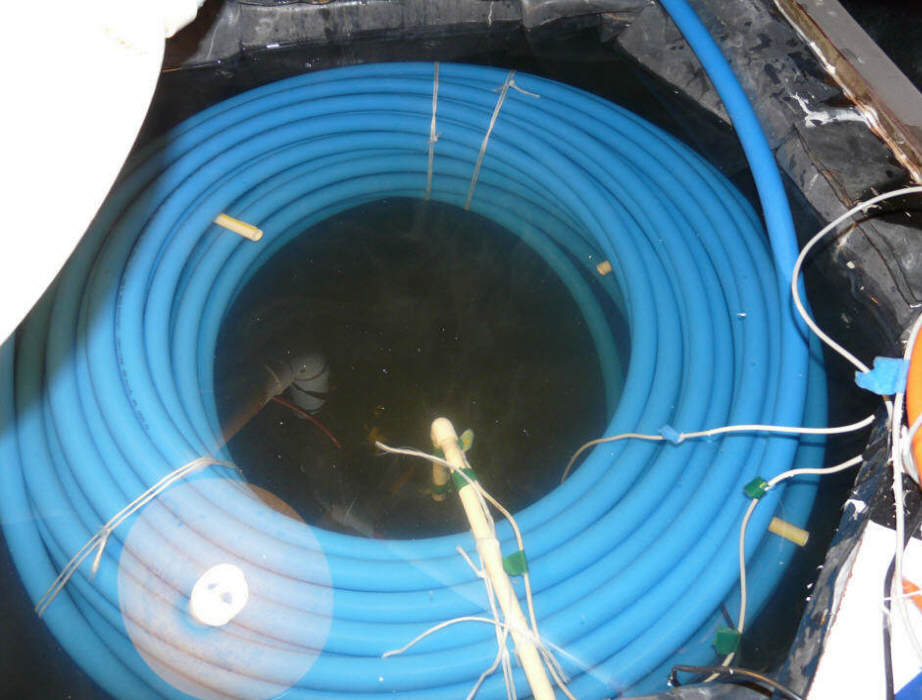
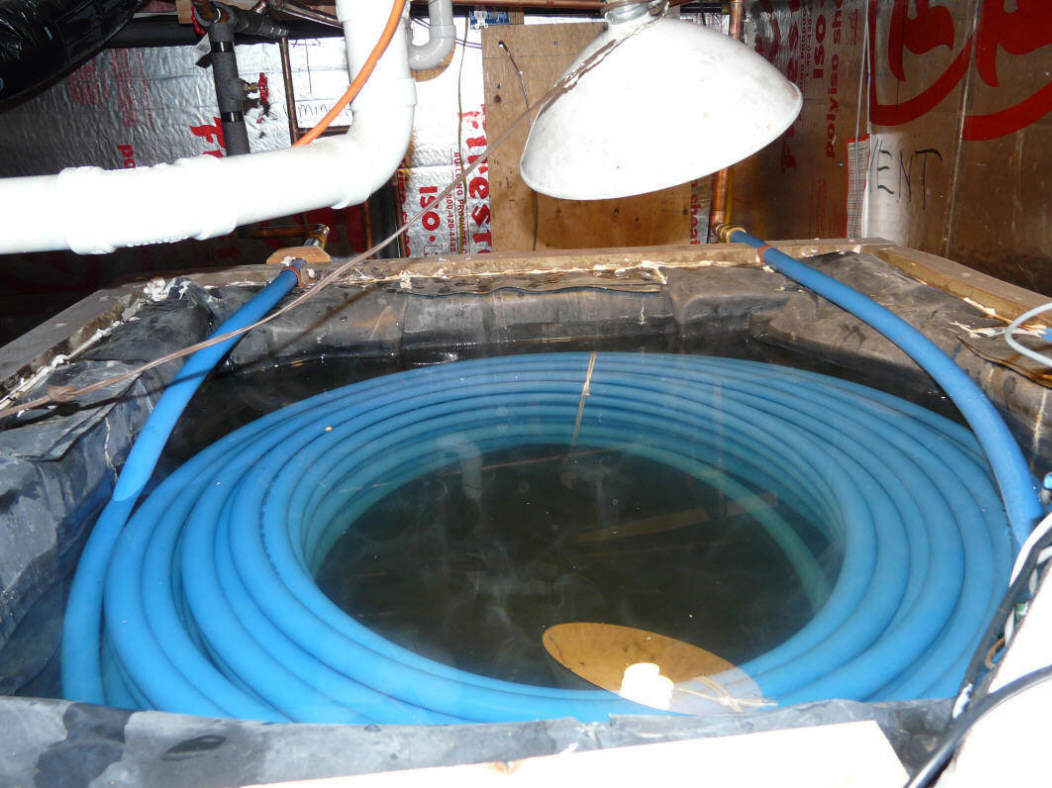
$2K Solar Space + Water: Domestic Hot Water Heat Exchanger

This section covers installing the large PEX coil heat exchanger that is used to preheat water using heat from the solar heat storage tank.

The cold water on the way to your regular hot water heater takes a single pass through this very large coil of PEX to pick up heat from the solar storage tank.

This is a very simple heat exchanger that is quite efficient.  The PEX coil itself holds 10 gallons of water, so for the first 10 gallons of an hot water draw this heat exchanger is 100% efficient.  After the first 10 gallons, the PEX coil acts as a regular heat exchanger, and while not highly conductive, it has a very large heat transfer surface area.

Back to Table of Contents...


Installing the Heat Exchanger

The heat exchanger for this solar water heater is a 300 ft coil of 1 inch diameter PEX pipe. This coil of pipe is immersed in the storage tank. Cold water bound for the regular hot water tank first passes through the PEX pipe coil where it picks up the stored solar heat in the storage tank. If the water needs further heating, the regular hot water tank tops it off.

The PEX pipe coil itself holds about 10 gallons of water. So, for each new hot water demand, there will be 10 gallons of water already in the pipe coil that has been heated up to the full temperature of the storage tank. So, for the first 10 gallons of demand, the heat exchanger is essentially 100% efficient.

If more than 10 gallons are needed, then the 300 ft pipe coil acts as a conventional heat heat exchanger and the outlet temperature will drop somewhat below the storage tank temperature depending on the flow rate.  I've tested the PEX coil as a heat exchanger and it does quite well...

PEX is very commonly used in residential plumbing systems for hot and cold water.  Make sure that you get PEX that has the NSF approval stamp for potable water applications.

In some cases, people who have built the $1K solar water heating system have used copper pipe heat exchangers.  These heat exchangers take up less room, so if space is limited in the tank they can be a good choice.  Look through the example $1K systems for examples...


The PEX pipe coil heat exchanger covered
in this section.

Building the Heat Exchanger Support

The heat exchanger should be supported up off the bottom of the tank to get it into the hotter part of the tank when the tank is stratified.

I used 3 full size concrete blocks to do this.


To prevent any abrasion between the blocks and the pipe coil or tank bottom, I siliconed scraps of EPDM on the top and bottom of each block.


In general you need to be careful about materials used inside the tank. The temperature is high and its very wet :)

Silicone, EPDM, polypropylene cord all seem to be OK. Most kinds of metal fasteners don't do well -- including galvanized.

Note that when the tank is filled with water, and the PEX coil is filled with water, the PEX coil tends to float up off the supports, so they really only appear to be needed when tank is not full of water.  So, you might eliminate them if you just have a way to temporarily support the coil when there is no water in the tank.

An alternative to using the blocks to support the heat exchanger coil would be to hang the coil using lengths of polypropylene rope.  The rope loops that support the heat exchanger could be tied to anchor eyes that are screwed into the plastic edge boards.  I would use three of these eyes.  The eyes should be stainless steel, as galvanized metal does not hold up well to long exposure to hot water.   Normally these ropes will not be under any load, as the coil tends to float up near the top of the tank by itself, but you should have something to support the coil when the tank is drained.


The concrete block heat exchanger support. Scraps of EPDM are silicone cemented to the top and
bottom of each block.


The three heat exchanger support blocks finished.

Installing the PEX Pipe Coil

I kept the 300 ft PEX coil in its original coil shape.   I tied it several places with polypropylene twine, and then cut the bands that held it tightly in its coiled shape.    This allowed it to expand a bit, and made some space between the coils for water to circulate and transfer heat. 

I installed a few CPVC pipe spacers between coils to make more space for the tank water to circulate around the coils.  Unfortunately, these little pipes tend to fall out over time.


After thinking about this, I think that the best way would have been to make some T shaped pieces from CPVC such that one leg of the T could be pushed between the coils from the top -- the other two legs of the T would rest on the top of the pipe coil and keep it from falling out.  This would make for vertical flow channels through the PEX coil, which is probably better for heat exchange than the horizontal channels.


Some people who have built $1K solar water heating systems have recoiled the PEX to make a more effective heat exchanger -- for example Ken's tank has a very nicely done example...  I'm sure that this does make for improved heat transfer, but bear in mind that recoiling PEX is a real pain.

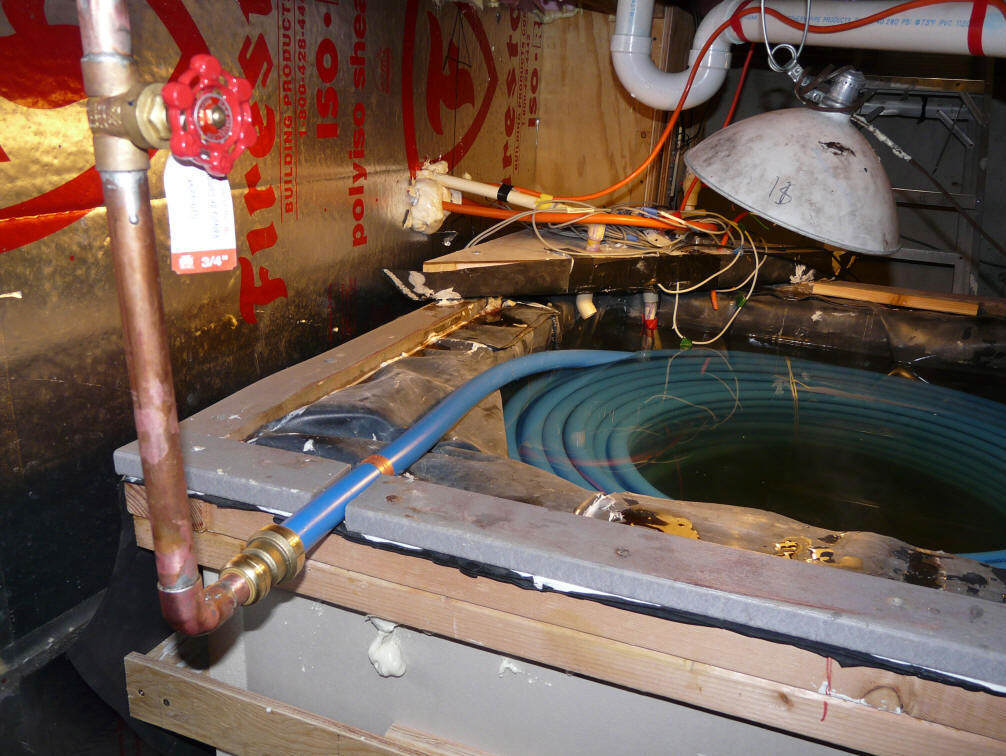
Note that the plumbing connections to the PEX coil are made outside the tank -- there are no heat exchanger connections immersed in the heat storage water.

The 300 ft of PEX is probably overkill for the heat exchanger for normal residential use.  You could probably use 200 ft and get good results.  I used the full 300 ft because that's the way is came, and I had no other use for the extra 100 ft.


The 300 ft coil of PEX ready to take the plunge.


The PEX coil installed in the tank.
The white pipe supports a sensor for logging
tank temperature.

Connecting the PEX Coil Heat Exchanger

First, decide on where all of the plumbing connections for the heat exchanger and for the collector pump and floor loop pump are going to be made.  The heat exchanger connections are best made on the side of the tank closest to the cold water pipe coming into the hot water tank.  Peek ahead to the sections on the collector and floor loop to get an idea where you want these connections -- if there are conflicts, work out the best compromise.

Cut slots in the tank edge board for the two ends of the PEX coil to exit the tank.  This can be most easily done with a small hand saw taking care not to damage the EPDM.

Before you cut a new slot, you may want to add additional screws to hold down the edge board so that its well anchored to the tank frame on both sides of the slot.

The PEX pipe must be secured well where it goes through slots in the sill board. I used a copper pipe clamp on the inside, and a plywood support on the outside to keep it in position. Be sure to seal around the penetration and the pipe clamp with silicone.

When you fill the tank, its very important to make sure there is an air gap between the collector return pipe and the water surface. Air must be able to go up the return pipe to replace the water in he collectors as the collectors drain down. Not allowing this air space will result in the collector not draining, and freeze damage to the collector piping.


The PEX coil in the tank and hooked up to the copper house plumbing.  Note how the coil floats up
into an ideal position to take advantage
of thermal stratification.


One of the connections to the PEX coil to the house
plumbing.


Note that there are no penetrations of the tank liner, and there are no plumbing fittings inside the tank. That is, the ends of the HDPE pipe are taken outside the tank where the connections to the house hot water plumbing are made.

Since the fluid in the tank is plain old water, there should be no issue of needing a double wall heat exchanger, but this is something you might want to confirm with your local code folks.


Gary February 9, 2011