Description and pictures from Ken...
So what I did was to take your ideas and fit it too very
specific requirements that I have. My "Heat exchanger" can not exceed 4' x
4' x 6' outside dimensions. As I will be heating a Hot tub as well, I wanted
to jam as much into the exchanger as I could, with out wasting space while
providing the best possible efficiency.
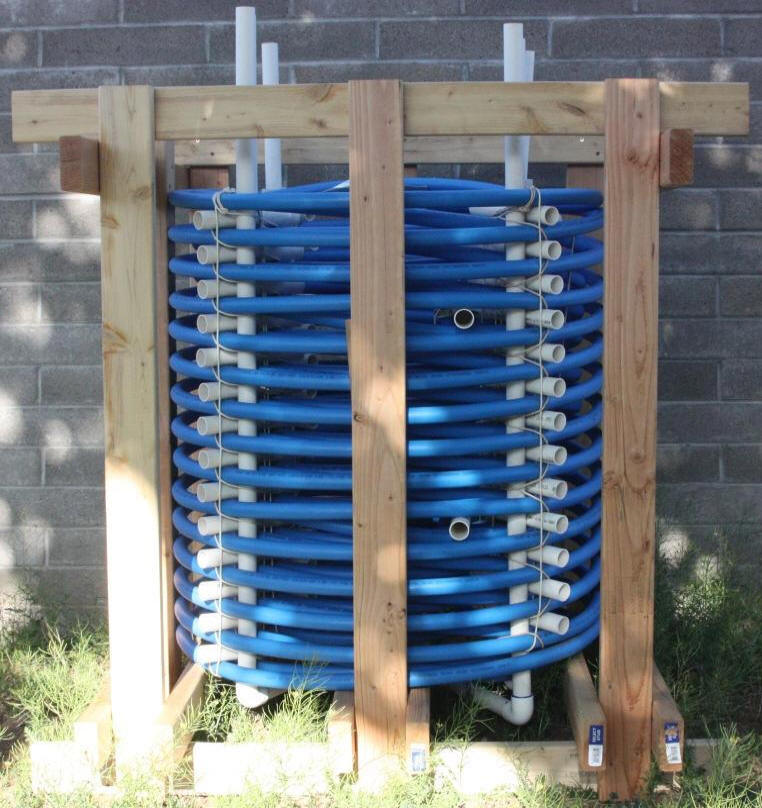
I created a frame in which to coil the 1" PEX tubing and to maintain
a 1" spacing between all loops. This did take a few hours and a bunch of
fore-head banging before I go it right. I thought I'd share it with you in
the event some one else could find it helpful. Please feel free to view the
attached pictures, and post them to your site if you'd like.
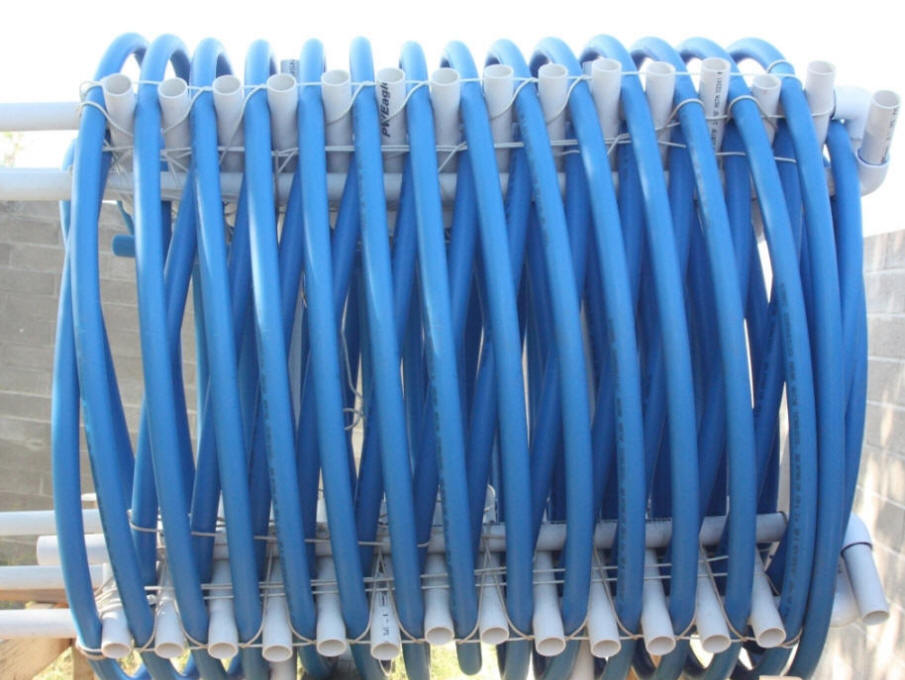
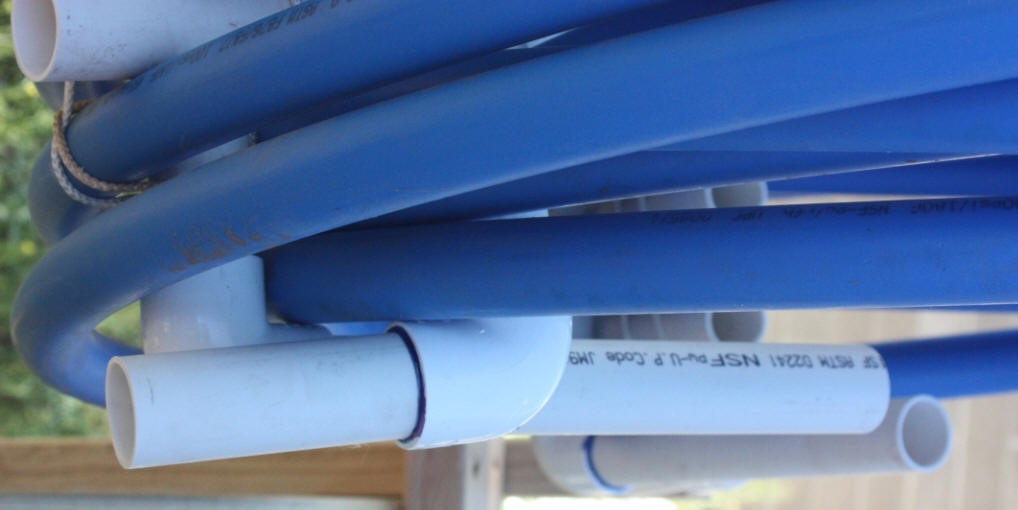
I used 1" PVC between the coils both vertical and horizontal, and
tied it altogether with polypropylene string (I could have used CPVC, but I
don't think it matters as there will not be any use other than for spacing
and regular PVC is rated to 200 F).
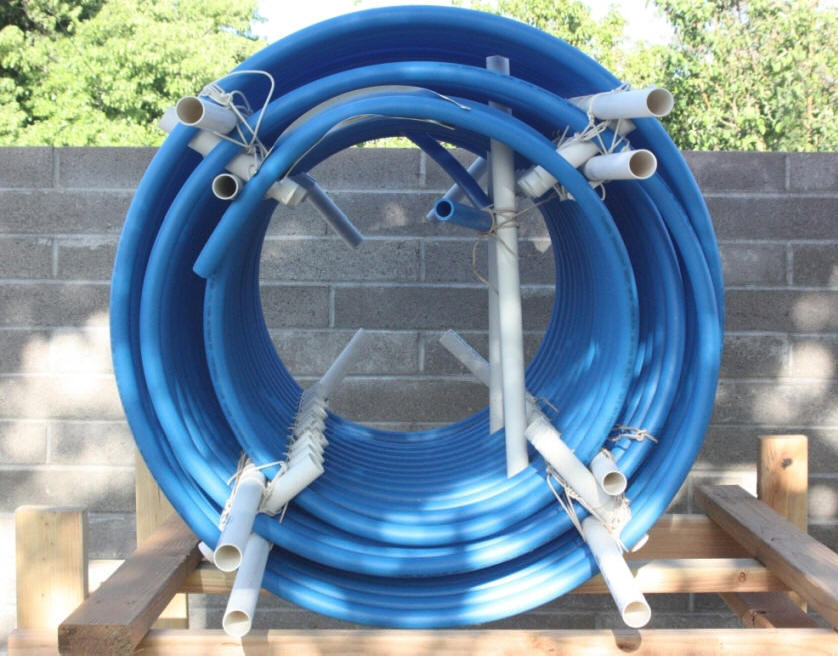
The dimensions of the coil are 32 1/2" by 32 1/2" for 300' of PEX. Basically
3 coils one inside the other starting at the bottom going up, down, then
back up again.
Click on pictures for full size
I plan to use the vertical tubes to push the hot water to the bottom of the
tank on one side and suck the "cool water off the bottom on the other side
by inserting a flexible tube down to the bottom of the vertical PVC. I may
have over done it on PVC elbows that I am using to maintain a 1" space under
the bottom of the coils.
Controller & Pump: I found the Gold-line controller and a Laing D5 Strong
pump on "East Coast Solar".
http://www.eastcoastsolarsystems.com The pump needed to fit these
specs: 14 feet head, 5-7 GPM, 160 F, DC 12-24 Volts, and be less than $200.
I found it for $185 with shipping.
Though my system is not up n running yet, it should be with in the next
couple of months. This whole thing is taking longer as I am also rebuilding
a Hot tub from the ground up and will be incorporating the exchanger tank
next to the tub under the surrounding decking. I plan to build another
system later to use for whole house heating via central air. My biggest
challenge will be a water to air exchanger, but I'll tackle that later
on down the road.
I hope this is helpful for you or anyone else.
Sincerely,
Ken
in South central Arizona
Ken also reports that building the first heat
exchanger (shown in these pictures) took 4 to 6 hours -- he expects the 2nd
one to go faster.
While this is clearly quite a bit of
work, I'm sure there is some gain in heat exchange efficiency to have the coils
so carefully spaced and the good circulation space around each coil. This is so
nicely done with such even spacing around each coil that I wonder how well it
would perform as an air to water heat exchanger -- that is, water flowing inside
the tubes and air flowing outside the tubs. If one were to try it as an air to
water heat exchanger you would want to ideally enclose it in a cylinder a bit
larger than the outer coil and also block the hole running down the center.