This is a really simple, efficient
and cost effective way to heat an ice fishing shack using solar. It
appears to work very well.
Thanks very much to Bob for providing
this material!
If Bob can heat an ice shack with
solar, what are you waiting for!
From Bob:
Being retired and already having
installed Solar Domestic Hot Water and an active Solar Air Heater on our house I
was impressed with the ability to capture meaningful heat even in frigid
conditions. Since I ice fish on the Lake of the Woods and have a friend who owns
an 8 ft X 12 ft ice fishing shack I began thinking about how I could heat the
shack with Solar. It came to mind that such an application would have some key
considerations in its favor.
1) There is no need to worry
about buildings or trees blocking the panel’s exposure to the sun.
2) Since the ice shack is portable a southerly alignment is not an issue.
3) The use of the shack is typically only during the daylight hours.
4) The reflection off the snow should give an added boost to the panel’s
performance.
The insulating, sealing and installation of the panel was done on dry land last
summer.
I was fortunate to acquire 8 used 4 ft X 8 ft boards of 2” foil faced polyiso
insulation so I insulated and sealed the shack first.
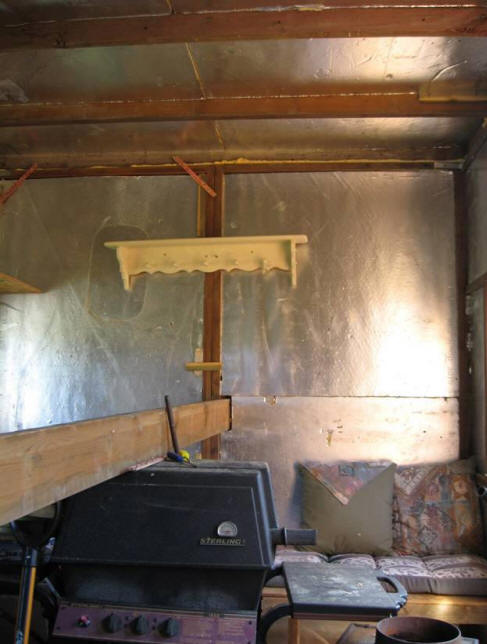
Interior of the ice shack. The 2 X 6 plank resting on the barbeque
is to stabilize the shack during transport.
Since this was to be a low cost/ no cost project the glazing used was 6 mil poly
rather than the more durable, better looking but more expensive clear corrugated
polycarbonate panels.
The treated 2 X 4’s were
recovered from a deck replacement project.
Even the black paint used on the shack was only $10 because it was a wrongly
mixed tin that I just had them add black coloring to.
The only other actual expense was for the 4 ft X 7 ft times 4 bug screen
that was used for the flow through absorption surface.
The construction of the panels was very simple using 2 X 4’s on edge for the
frame and 2 X 4’s ripped in half to support the bug screen.
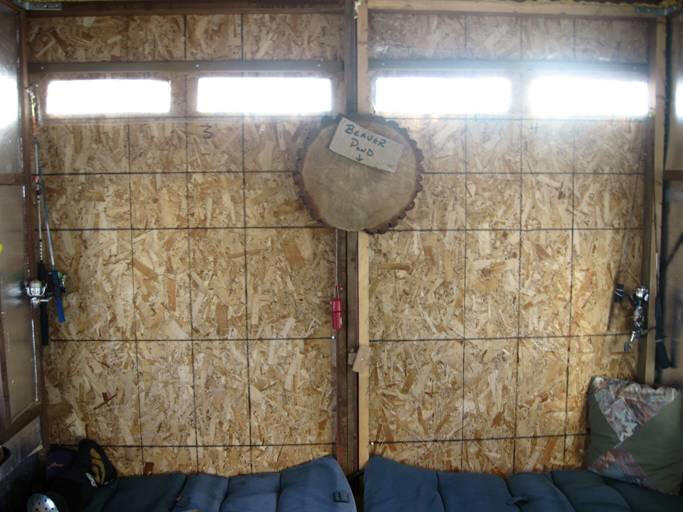
This is an
interior view of the panel wall with slot cut through
for the thermal siphoning heated air to return into the shack.
There are 4 identical holes
under the bench to allow cooler air to enter the bottom of the panels.
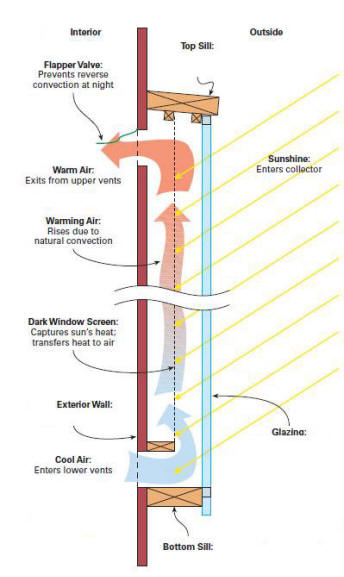
Back draft dampers are installed over the top holes to reduce back flow
on non sunny days.
I initially used 6 mil plastic for the dampers but found they were too
heavy and impeded the weak thermal siphoning forces.
As suggested by Gary these dampers have since been replaced with light
weight garbage bag plastic which do work better.
This interior wall was left uninsulated to take advantage of the radiant
heat emanating through the wall which appears to be quite significant.
Results
Yesterday February 18th on a
beautiful calm sunny day with an outside temperature of 31 F I was pleased to
find temperatures in the shack varying from 90 F at the ceiling to 55 F at the
floor. Midpoint temps were perfect if not slightly too warm at between 70 and 80
F.
Tips
When installing the plastic glazing
it is important to do it on a sunny day otherwise it will stretch and become
baggy.
Sealing and insulation of the structure being heated is very important.
Overall this was a simple cost effective and satisfying project that I hope
others like minded fisherman will find useful.
Bob
Questions and Comments?
Bob will answer email questions --
you can reach him at:
Bob Allan: ballankenora AT gmail DOT com (replace AT with @ and DOT with a period).
Kenora on beautiful Lake of the Woods
in Ontario Canada