Search
The Renewable Energy site for Do-It-Yourselfers
ProMaster Camper Van Conversion -- Installing the Wall and Ceiling Paneling
| |
Important Update
The material on these pages describing our camper van conversion has been moved to our new new site dedicated to efficient RVs and camper vans.
The new site covers all the material here and adds a lot of new material on other camper van conversions, camper van design and build, resources for people converting vans, other efficient camping vehicles, new ideas in efficient RVs and camper van travel hints.
The new site is here...
I'm leaving these pages here as you may have bookmarked them and the Comments section has some good suggestions, but I suggest that you go to the new site -- I won't be updating this material anymore.
Thanks to all the people who read these pages and especially to the people who left comments and suggestions! Feedback on the new site is very much appreciated.
Gary
|
|
Overview
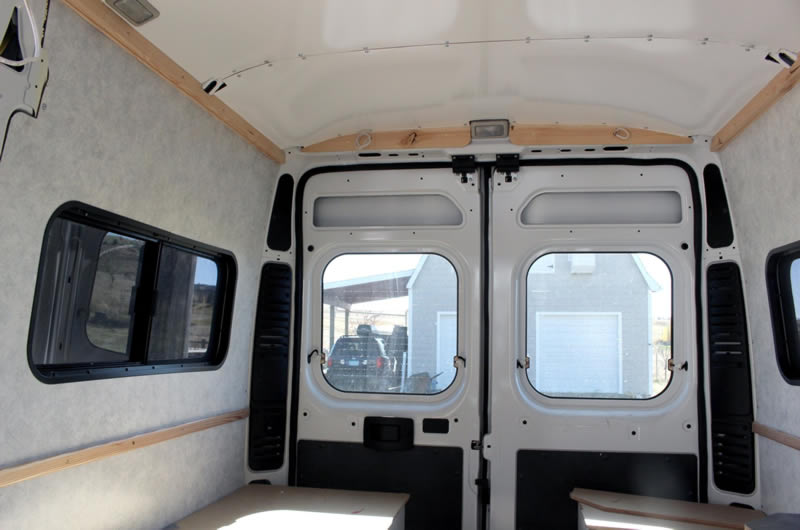
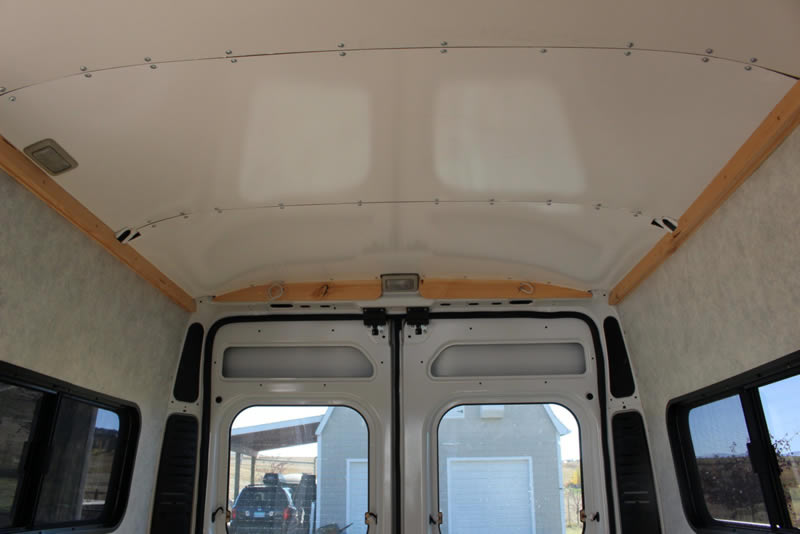
The picture above shows the close to finished wall and ceiling paneling for the camper van.
I've described what I did in quite a bit of detail below -- this is not to say that I think this is the ultimate way to go. It was, in fact, a bit frustrating at times to not be able to quite get where I wanted to, or to be taking a long time to get certain parts done. So, think of it as a place to start for working out how to do yours.
Wall Paneling
Type of Paneling
The choice of paneling is a personal one. We decided to go with something that was pretty light and that had some pattern for the walls. For the ceiling we used white, but that may change to a light colored (and light weight) fabric later.
We did think about wood paneling, but our last couple RV's have been wood paneled and we decided to try something different. I think that plywood paneling is a little more forgiving to work with than this hardboard paneling with a vinyl skin that we used. The bright white ceiling paneling is particularly at good showcasing small flaws or changes in slope.
An advantage of the plywood paneling is that its lighter in weight. The total weight of the hardboard paneling we used was about 84 lbs (wall and ceiling). I think that quarter inch plywood paneling over the same area would be less -- perhaps 30 lbs less?
We were trying for a fairly finished look and got about 80% of the way there. I'm inclined to say that putting up a serviceable set of paneling that does the job well, but does not worry a lot about aesthetics is about a 1 weekend job, but putting up a set of paneling that looks flawless with every do dad finished is a more like a one month job.
The first thing you have to decide (after picking the paneling) is whether to go over the top of the ProMaster main frames, or to use the set of surfaces that are at a level about 3/4 inch behind the main frame. Like most conversions I've looked at so far, I decided to keep the paneling below the level of the main frame and to have one set of paneling forward of the main frame and one set aft. This leaves you with exposed main frames that we have not decided how to cover yet.
The plus side of this is that you gain a bit over an inch of width and you retain easy access to the main frame cavity (where you will probably run a lot of wire. It probably also makes the surface of the paneling more uniform without a sort of gradual bulge for the main frame.
I should mention that one of our objectives was to be able to easily remove the paneling to gain access to the wall/ceiling cavity if needed in the future -- so, we did not glue anything down.
Patterns for Cutting Panels
You have to work out some kind of template or measuring scheme to cut out the wall panels. The ProMaster contours are generally pretty rectangular and not to difficult to get right -- mostly its just trimming the corners to a rounded shape and working out how to handle the window openings.
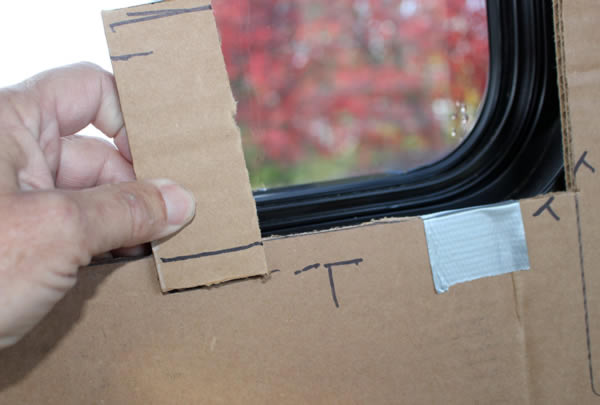
For the first panels, I used large pieces of cardboard. I would hold the cardboard up in position below the curve around the top, and then trace a pencil line on the cardboard eyeballing where it was to go along with measurements at a few points. Then trim the cardboard to the line you just marked. Then, holding the cardboard up to where it is actually to go, I trimmed back any places that went too far, and marked the places on the template where it fell a little short of where it was supposed to be -- usually these were just an eighth of an inch or so.
Picture showing cardboard template with the marks to indicate where the final cut should deviate from the template.
For one of the other panels, I just took a lot of dimensions without the cardboard template, and that also worked pretty well -- aided by the relatively square shape of the PM cargo compartment.
Getting the opening in the wall paneling for the windows was the most difficult. Our windows have an internal trim ring that comes off, and the wall paneling goes under the trim ring, and then the trim ring goes back on. So, the trim ring not only holds the window frame in place, but also captures the inside wall paneling. The lip on the trim ring is not very deep, so the cutout in the panel has to be to better than 1/8 th inch. See the diagram in the window section...
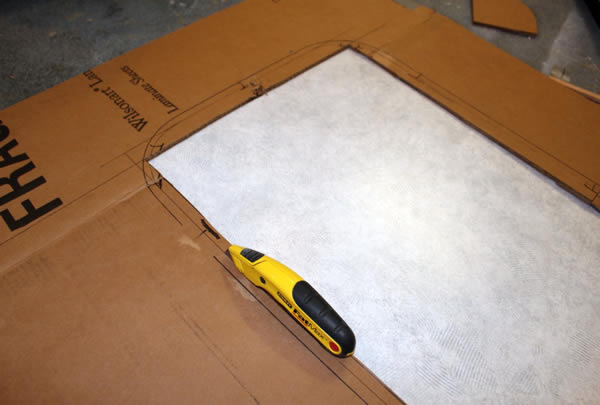
The scheme I worked out for the window cutouts was to measure from the edge of the template to where the window is, then cut an undersize rectangle in the cardboard template that is a half inch or so smaller than the final window cutout will be. I then placed the template in its final position in the van, and measured from the edge of the template cutout to the corresponding edge of the actual window frame -- this marks the exact edge of the window frame on the cardboard template in several places.
To get the final cutout opening in the template, 1) lay the template on the floor, 2) place the trim ring over it, 3) position the trim ring on the template using the measurements from the undersize rectangle in the cutout, and 4) once the trim ring is correctly placed, use the trim ring as a template to trace the final cutout location. You may have to adjust the line in our out the thickness of the trim ring material depending on how your trim ring is made. Using this technique, all 3 windows came out right on for the first try.
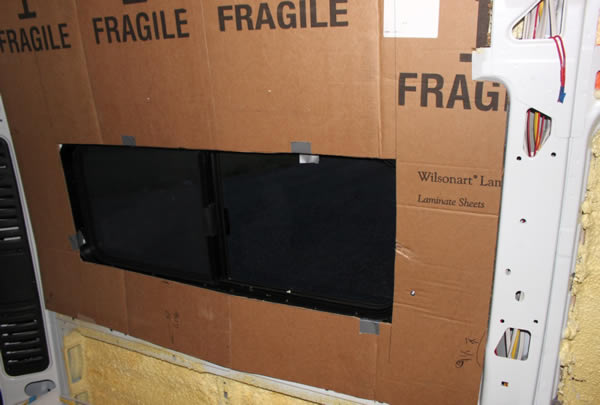
Marking and cutting undersize window rectangle cutout in template.
|
Measuring from rectangle in template to actual window frame so that window trim ring can be precisely located on the template.
The little piece of cardboard is used mark the distance from the template to the window frame, and then the distance is marked on the template. The trim ring is then laid out over these marks. |

Using the markings on the template to precisely locating the window trim ring on the template.
The trim ring is then traced onto the template. |
Cutting out the template window opening based on the window trim ring tracing.
|
Adding some insulation
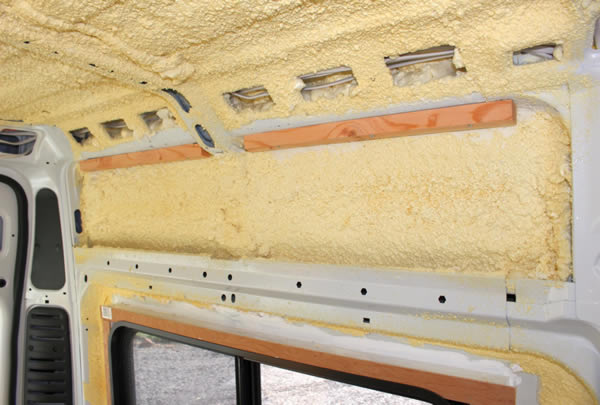
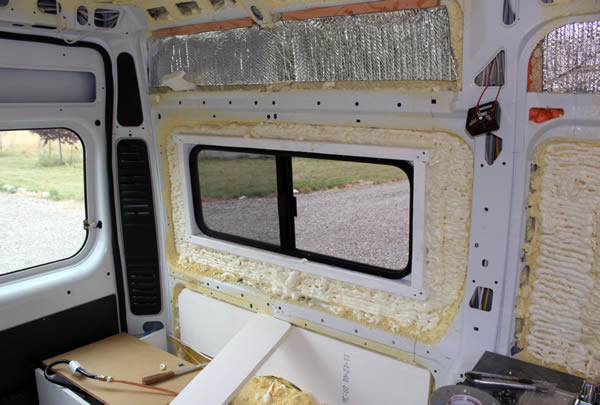
Before closing off the wall cavity, I added some additional insulation. Earlier, the whole back of the van was spray foamed with polyurethane spray insulation, but this still left room for more thickness of insulation in the side walls.
No new insulation was added to the ceiling as the spray foam insulation was close to filling the cavity. One could fur down from the ceiling ribs to make more room for insulation if desired -- this would also provide a nice set of wood members to screw the ceiling paneling to.
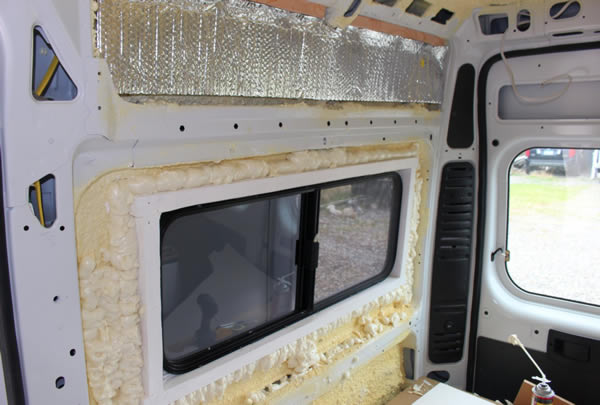 Used Great Stuff polyurethane foam in can to fill in some of the thin areas near the window where it was not sprayed much. Also used some Reflectex above the window. Used Great Stuff polyurethane foam in can to fill in some of the thin areas near the window where it was not sprayed much. Also used some Reflectex above the window. |
Using some rigid polyurethane foam board in the lower part of the wall -- it is glued to the wall using Great Stuff foam.
|
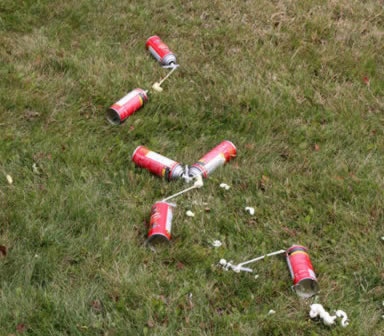
A small part of the graveyard of used up Great Stuff cans.
Wood Paneling Attachment Strips
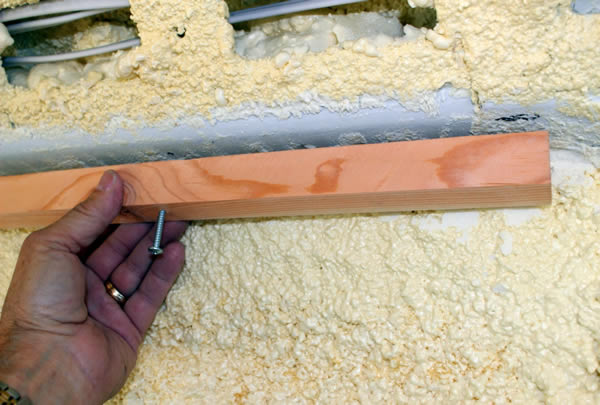
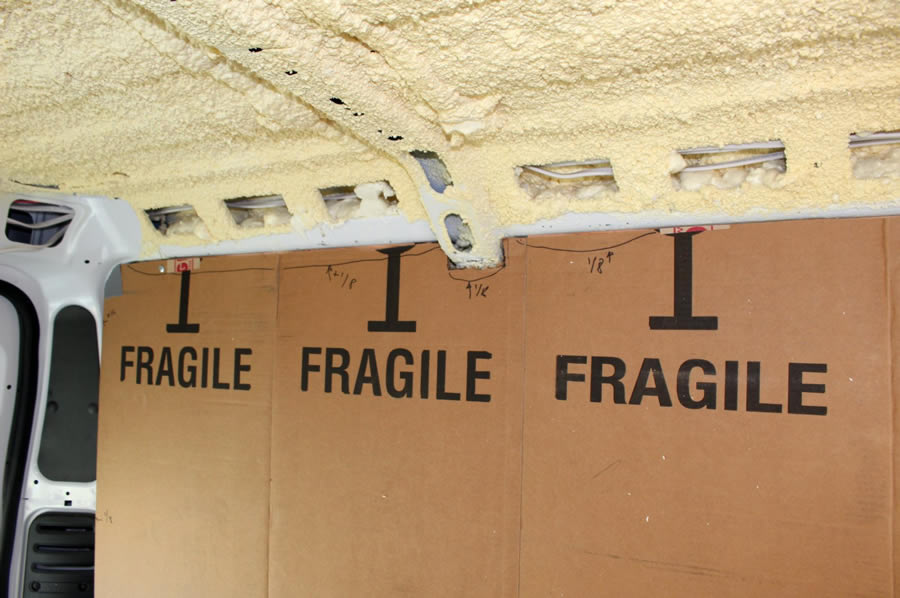
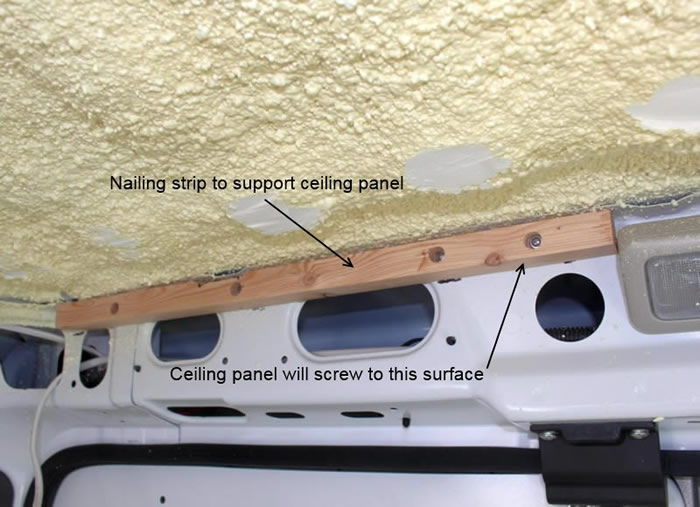
In some places, the wall paneling can be screwed directly to the ProMaster ribs or frames (be careful not to poke a screw through the van skin). But, in other areas there is no backing for the panels. In these cases, I added wood nailing strips to screw the paneling to.
The strips shown above are screwed to the PM frames, and the wall paneling upper edge is in turn screwed to the wood strip.
The windows already had wood frames around them that the wall panels could be forced against by the window trim ring. However, the wood frames proved to be not quite deep enough, and I had to add a 1/4 inch thick wood spacer to the wood window frames. For details on the window install...
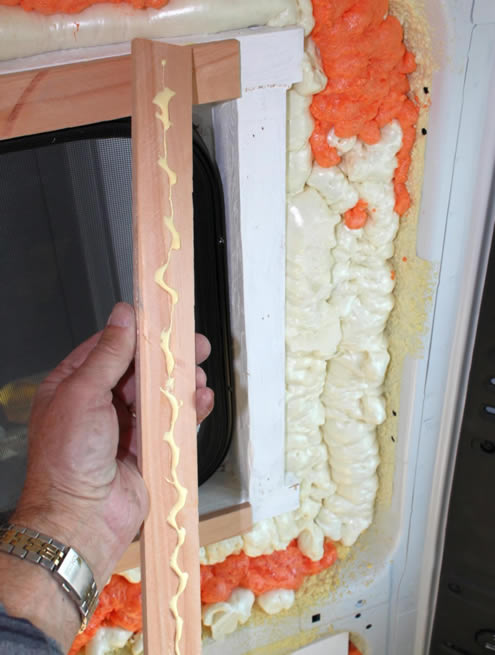
The 1/4 inch wood spacer strips that went over the window wood frame. Attached with glue and brads.
|
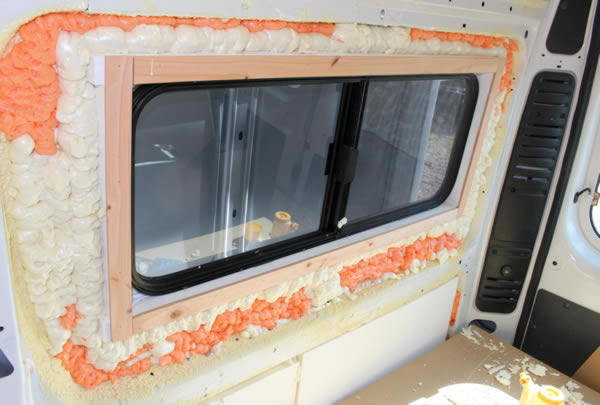
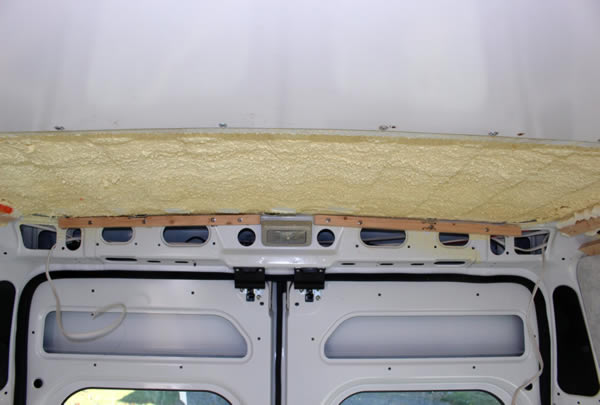
With the spacer strip in place (and with the added insulation).
|
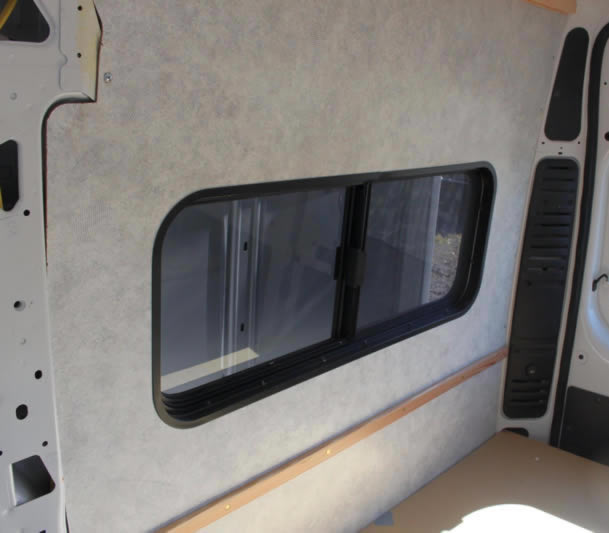
Installing the Wall Paneling
The wall panels were installed with self tapping screws along all the edges where the ProMaster provided a metal surface to screw to. For the window, the window trim ring (or clamp ring) placed over the paneling and pulled into the window frame with screws holds the paneling in place around the window frames. For the areas where wood nailing strips were added (see above), the wood paneling was secured by wood drywall screws.
If you do a good job of cutting out the panels, they go up quickly -- most of the work is in marking and cutting out the panels and installing the attach strips.
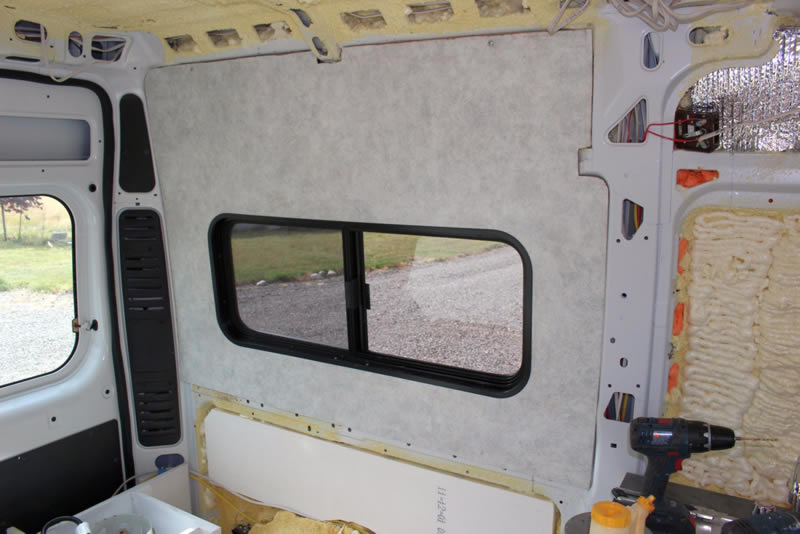
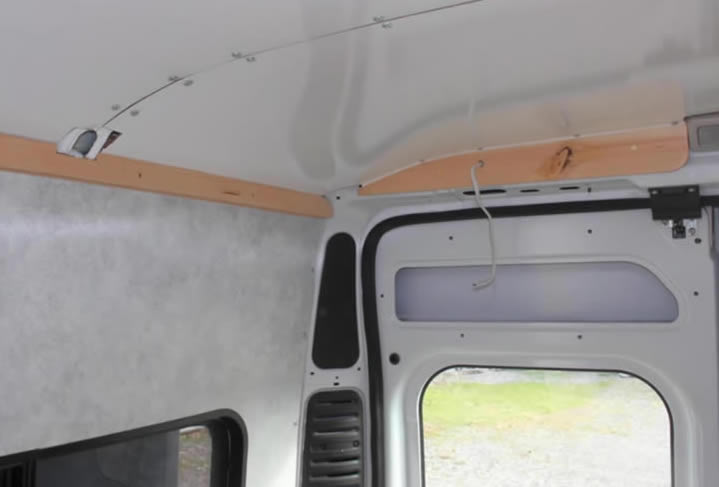
First wall panel in place but not screwed down yet -- a 2nd panel will go below this one to finish this segment of the wall.
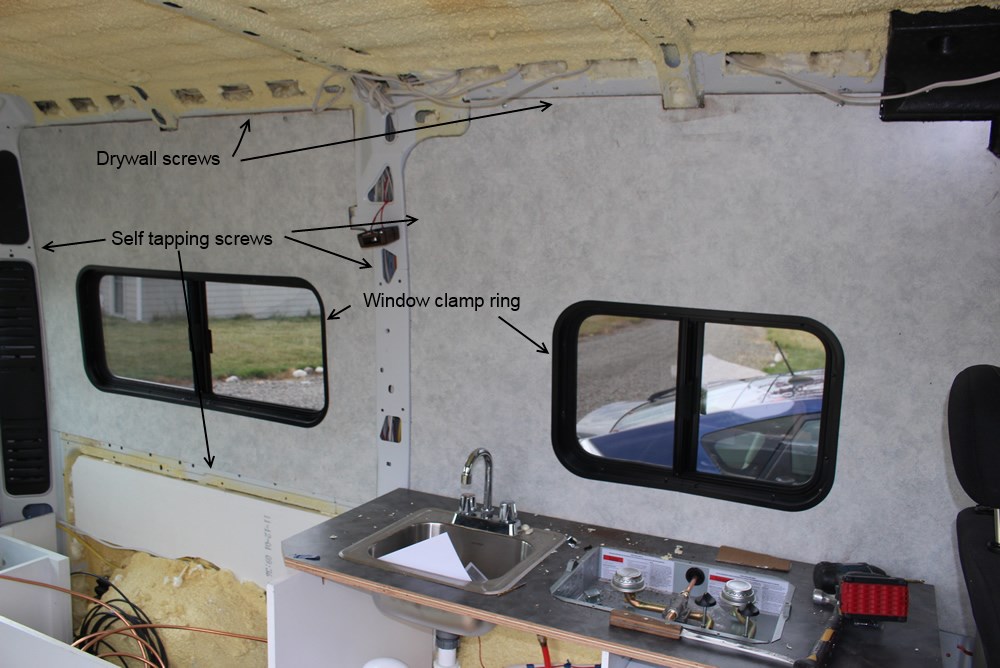
In the above picture, most of the screws are not in yet, but the arrows show where each type goes.
Most of the exposed screw heads were later covered by trim strips.
Ceiling Panel Installation
I looked at a number of ways to cut up panels to fit the ceiling. I even considered making up one big panel in the shop and installing the whole thing as one unit. In the end I went with the same scheme as most of the conversions I've seen. You use 4 separate ceiling panels with each panel spanning a pair of the ProMaster metal ceiling ribs. This results in four ceiling panels that each measure about 62 inches side to side, and 27 to 30 inches forward and aft -- pretty easy to handle. This seemed like the most straight forward way to do it and looked like it would make the panels easier to cut and fit, and also easier to take out if access is needed to part of the ceiling. One downside is that this method is very wasteful of material if you are using 4 by 8 ft sheets -- It takes one full sheet for each of the 4 panels, with only about 12 sqft of the 32 sqft panel being used -- lots of scrap for future projects.
The forward and aft edges of these ceiling panels could be screwed right to the ceiling metal ribs with SHOIRT self-tapping screws, but the left and right sides needed some form of backing board to screw into as did the aft end of the aft most panel and the forward end of the forward most panel. In my case these are all handled with added wooden "nailing" strips.
Side Nailing Strips
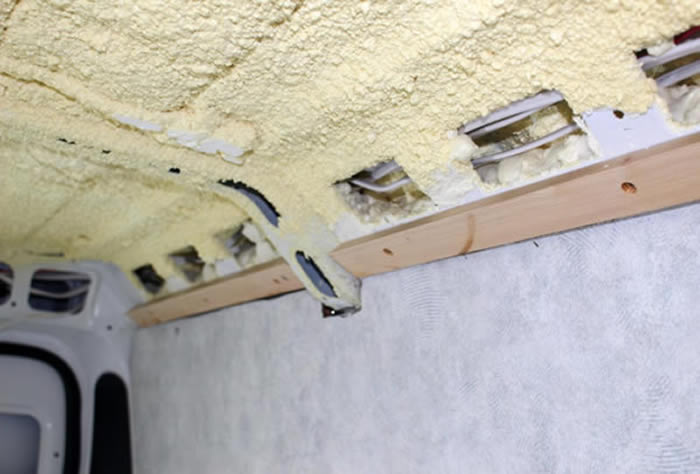
The side nailing (screwing) strips for attaching the ceiling panels along the sides.
|
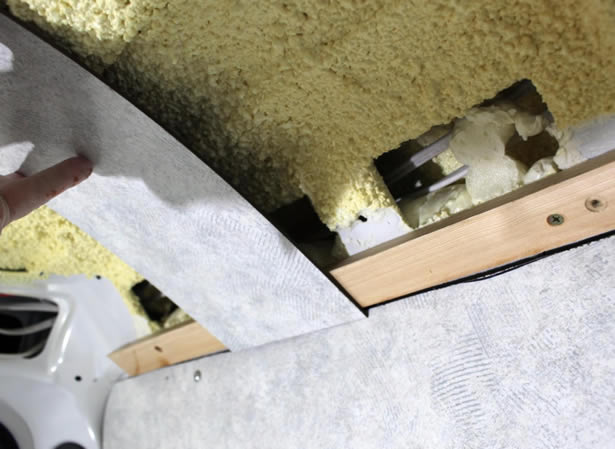
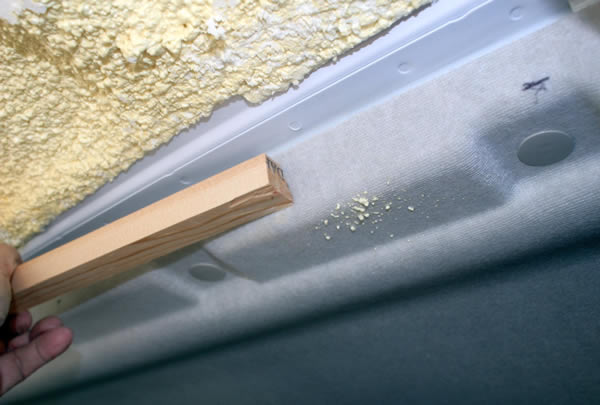
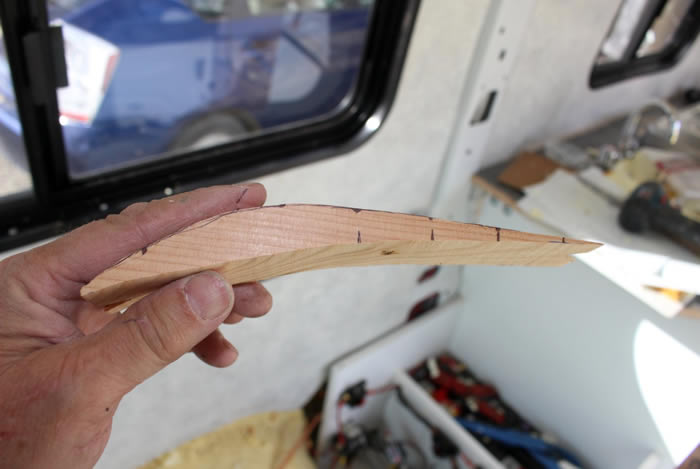
Showing how the ceiling panel will come into the nailing strip. Note how the curvature of the ceiling panel would have to be very tight to follow the van roof contour near the edge of the van -- this necessitated a 2nd nailing strip above the first to allow the panel to curve more gradually and not break.
I did not want to have to contend with screw heads in these panels, so they were screwed to the van metal (unconventionally) with flat head drywall screws counter sunk in the wood strips -- they hold surprisingly well. |
Note that the curvature of the van roof becomes quite tight at the edges of the roof, and the hardboard ceiling panels cannot be bent sharply enough to make this curvature. This means leaving them without support in the span near the edges, or adding a 2nd thicker nailing strip to above the first one to come down and support the ceiling panel in the high curvature section.
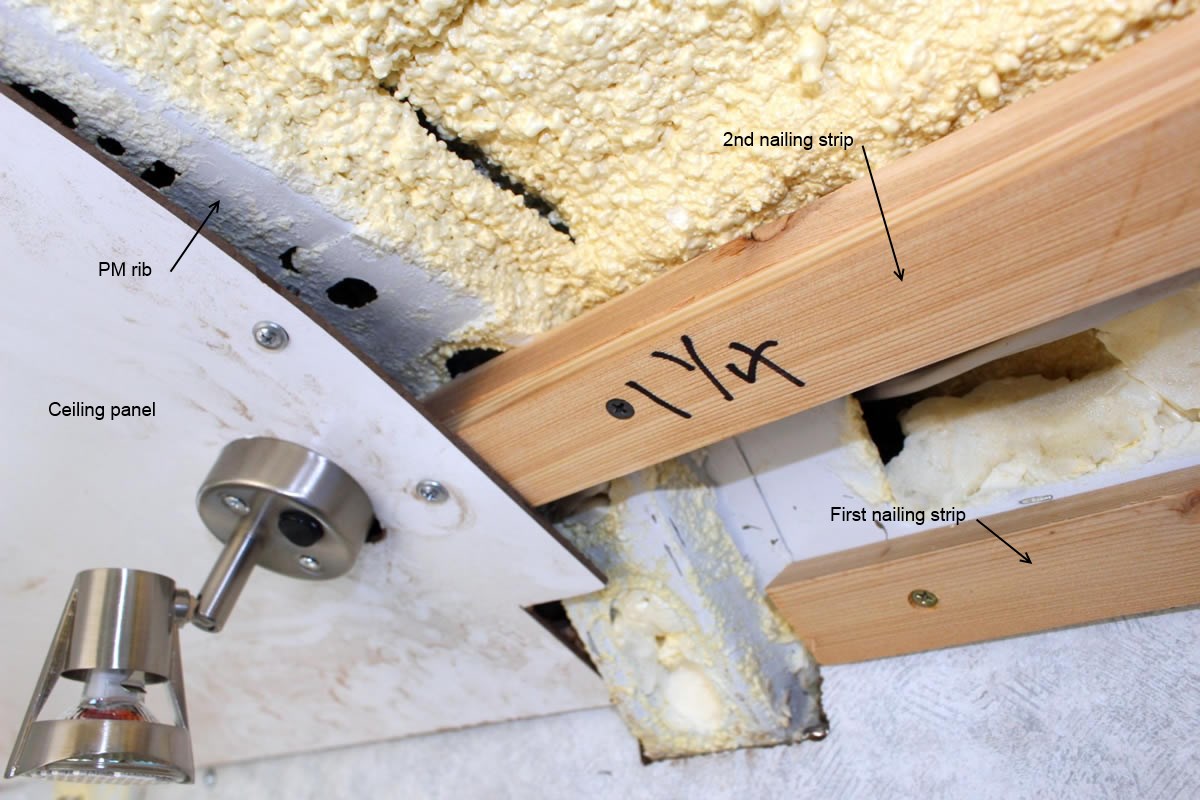
The 2nd nailing strip runs full length of the ceiling along each side above the first nailing strip. If placed as in the picture, it needs to be about 1 1/4 inch thick to allow about the right curvature of the ceiling panel.
I also considered a sort of shim piece between the roof rib and the ceiling panel to allow the ceiling panel to curve more gradually than the roof rib -- it looked like this:
There would be two of these for each roof rib.
While I think this would work OK, the continuous 1 1/4 inch nailing strip shown above appears to be both easier and holds the roof panels more securely.
Forward and Aft Nailing Strips
I call all of these nailing strips for lack of a better name -- only screws (no nails) are actually used -- none were harmed.
The aft end of the aft ceiling panel has to be supported by a nailing strip as there is no PM rib to attach it to.
 |
Both of the two aft nailing strips.
|
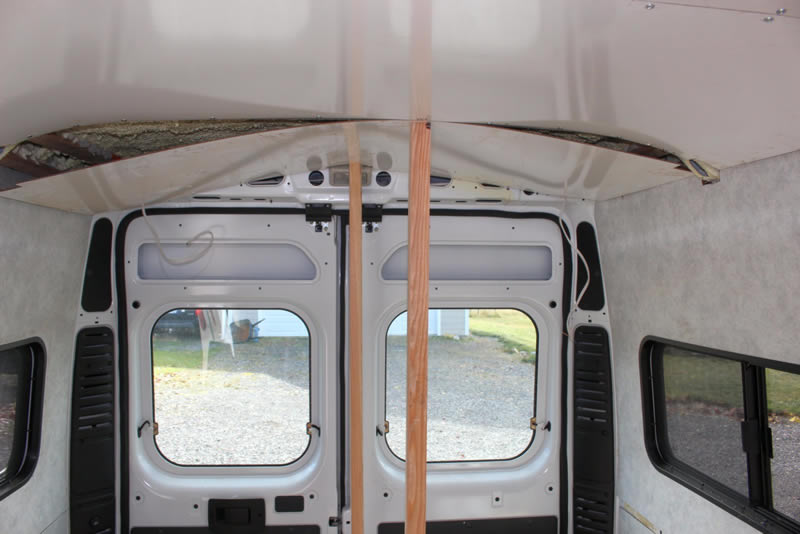
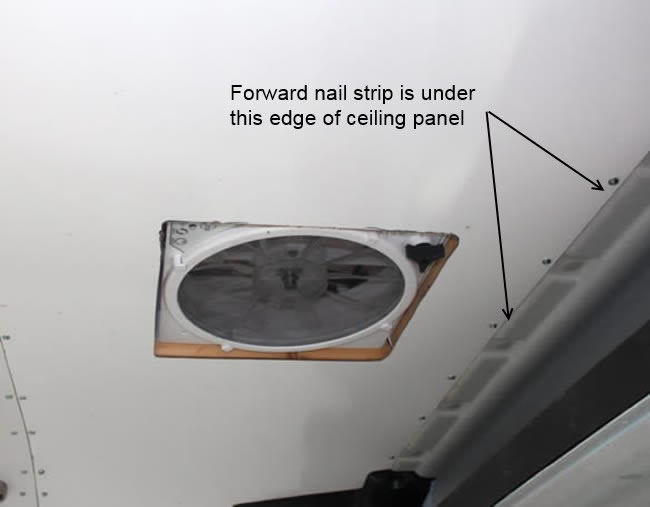
The forward end of the forward ceiling panel also has to be supported by a nailing strip as there is no PM rib at that location.
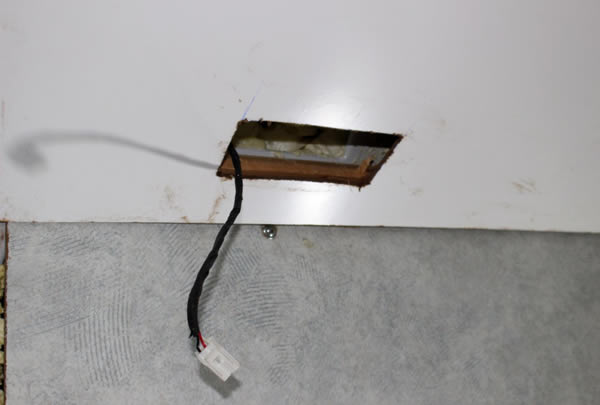
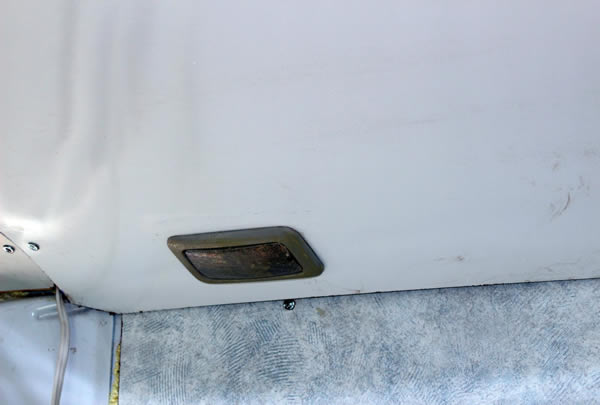
Ceiling Light
The ceiling panel would cover the PM regular ceiling light, so I cut a hole to fit the existing ceiling light in the new ceiling panel, and reinstalled the old PM ceiling light in the new ceiling panel.
Installing the Ceiling Panels
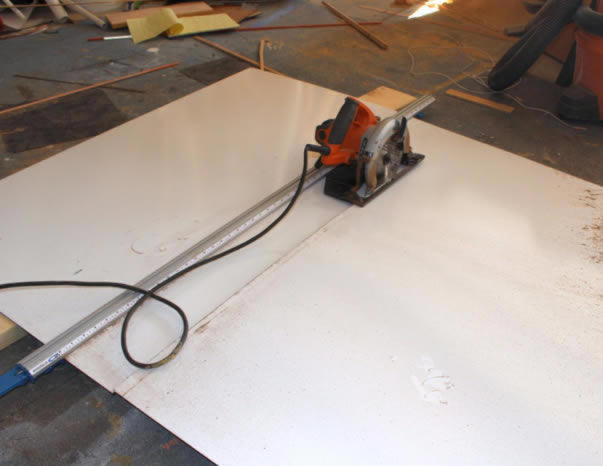
The wall and ceiling panels can be cut quite accurately with a Skil Saw and a straight edge to guide -- with a plywood blade, cuts are quite smooth.
Trimming off the corners and rib notches is easily done with a sabre saw with a fine tooth blade.
Its easier to get the ceiling panels lined up and to get the first couple screws in if you use a couple props to support the panel in place while you fuss with the alignment.
Just starting to put up a ceiling panel with the two props holding it in place.
Panel with the first few screw in aft edge and prop still holding up the forward edge.
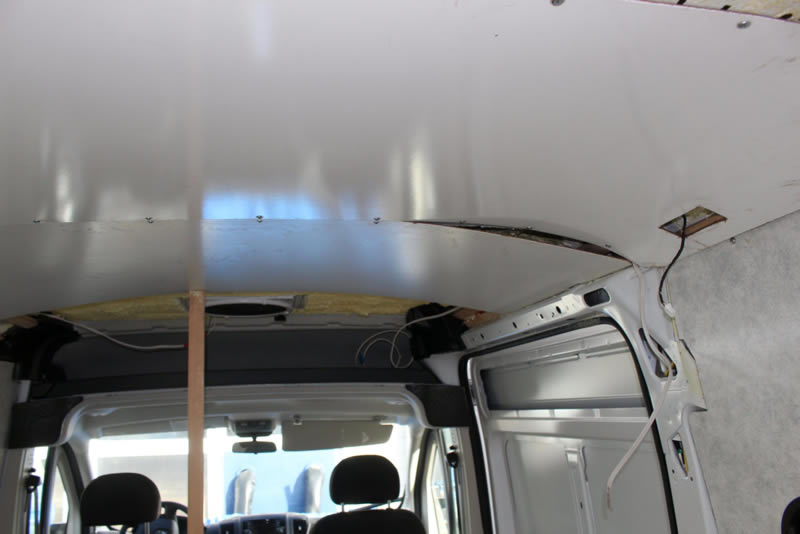
Forward ceiling panels in place.
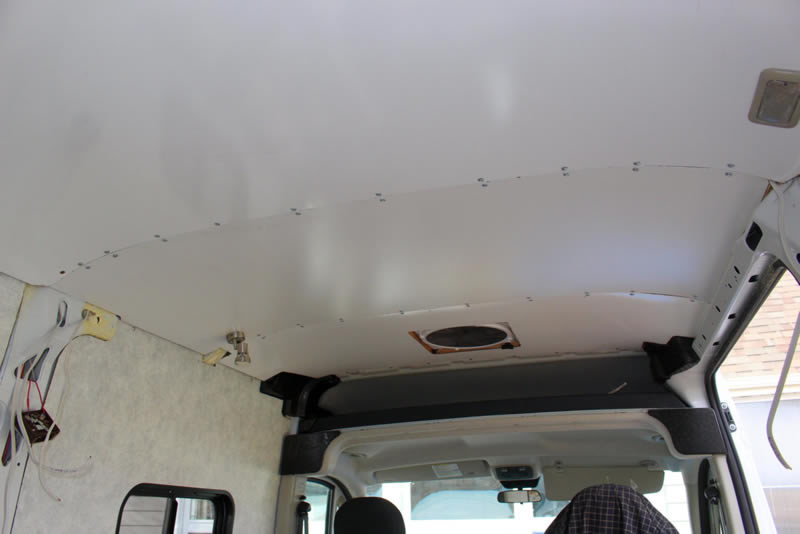
The forward ceiling panel that goes around the Maxx Fan.
The screws holding the ceiling panel to the wood frame around the Maxx Fan have not been placed yet.
More on the Maxx Fan just below.
MaxxFan Frame
The Maxx Fan (installed earlier) had to be accommodated in the ceiling panel. I wanted the ceiling panels to be supported around the fan opening. To do this, I glued a wood frame to the van roof metal around the fan opening. Had I thought of this earlier, I would have used the same screws that hold the fan to the van roof to hold the wood frame, but these screws were already installed and carefully sealed, and I did not want to distribute them.
The wood is pressed against the fan mount screws to mark the screw positions, then oversize holes are drilled in the wood to allow the wood to slip over the screws and contact the van ceiling.
|
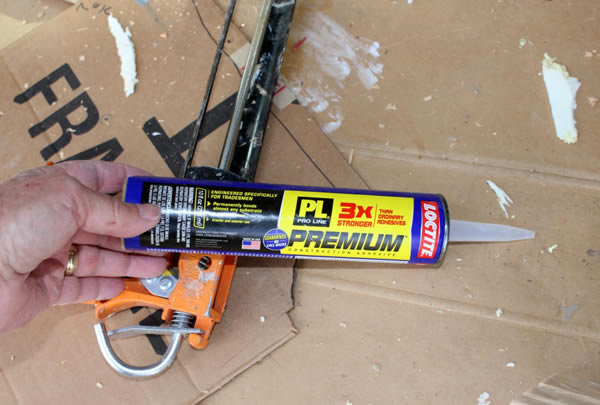
The polyurethane adhesive used to hold the wood frame in place -- this is tenacious stuff. I glued two metal bars together with this as a test and I cannot break them apart. |
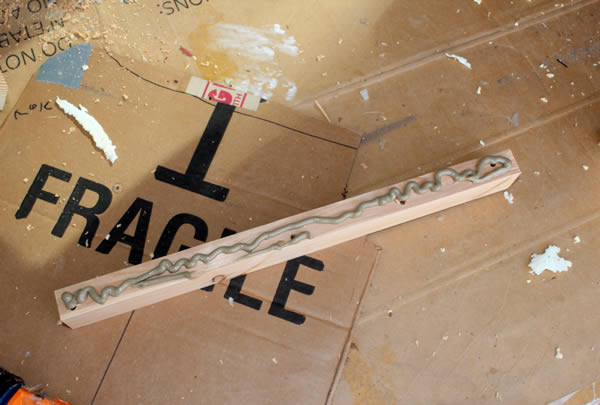
Glue applied to top surface of wood frame.
|
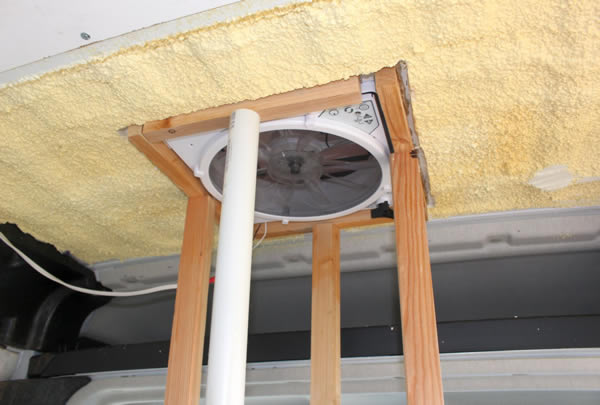
Wood "frame" being propped in place while the glue sets. |
Once the glue is set, the wood strips provide a place to screw the ceiling panels in, and then the decorative plastic fan fairing for the inside is trimmed to length and screwed to the wood frame.
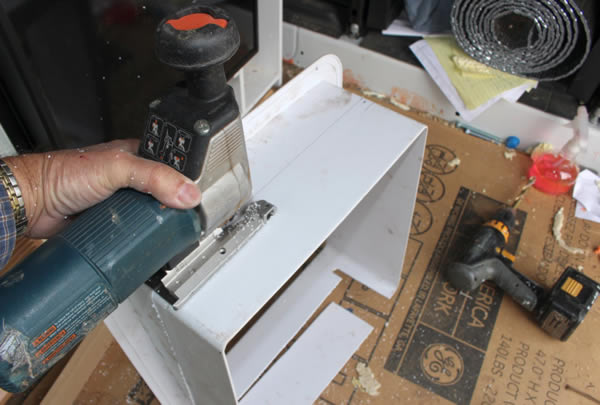
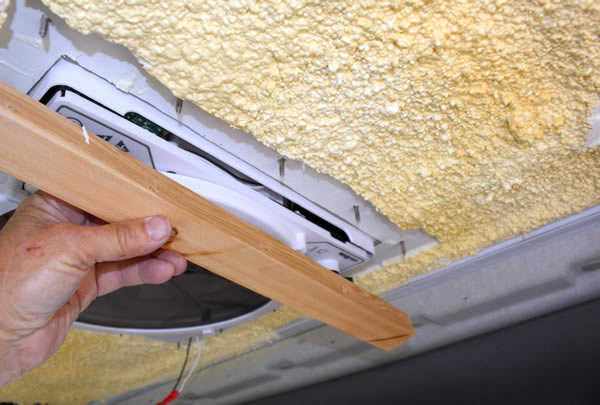
Cutting the decorative frame that comes with the Maxx Fan to the right depth. |

Maxx Fan decorative frame screwed into the wood frame above the ceiling.
|
Trim Strips
For aesthetic reasons only, most of the exposed screw heads for the screws holding the wall panels in place and the gaps where panels meet were covered with wood trim strips.
I made the trim strips from Douglas Fir. When I go to Home Depot, I check the 2 by 4 pile and sometimes (at least in our location) you can find some very nice, near clear, and near vertical grain 2 by 4's -- I just pick them up when I see them. The trim pieces for the van were ripped out of some of these 2 by 4's. They are planed, sanded and finished with three coats of Polycrylic. I like the look, but I'm sure its not for everyone. It does help to have a table saw if you take this approach as there is a lot of ripping.
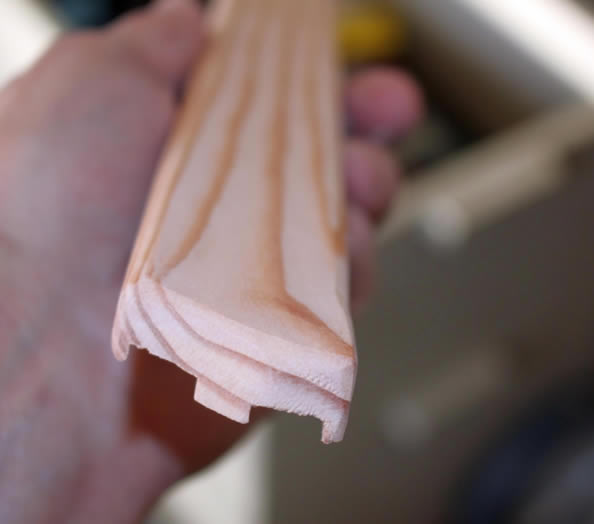
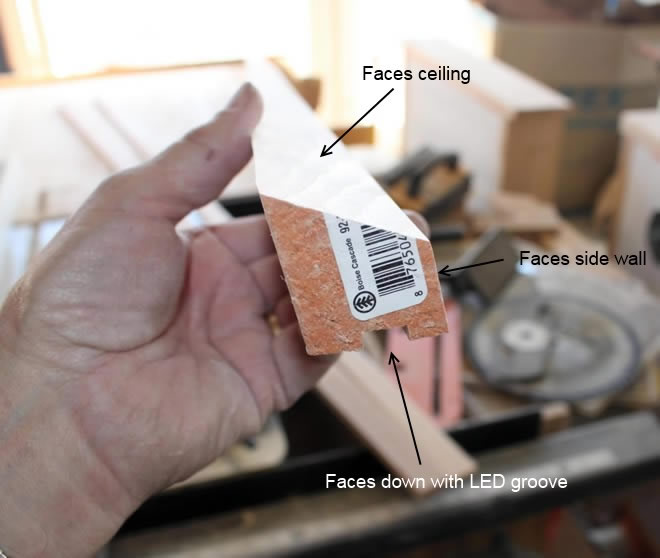
Panel Joints
The first pictures shows the trim pieces used between the upper and lower panels to cover the edges and screw heads. The two dado grooves are to accommodate the heads of the self-tapping screws used fasten the panels to the PM. The strip is ripped from a 2 by 4.
The right photo shows the trim strip in place.
Back Door Trim
There are a bunch of open holes in the PM back wall just above the back doors. These trim pieces close these off, and also provide a place to install the bed lamps.
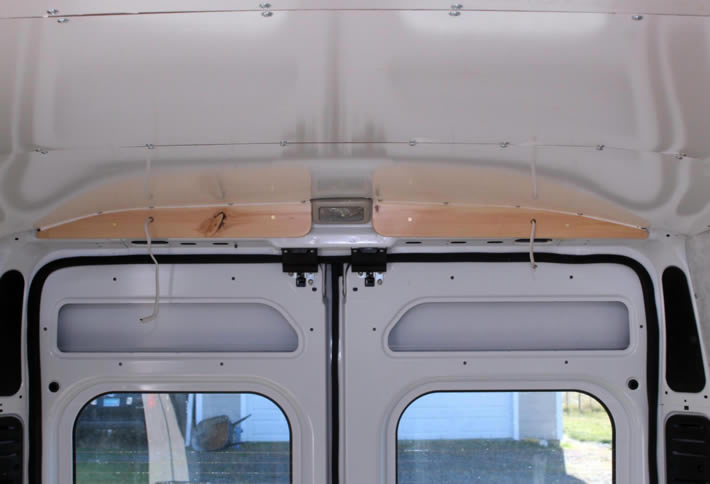
The back trim pieces close off the holes above the PM back doors.
I did use the piece with the knot on purpose.
Obviously there are more holes to go :)
|
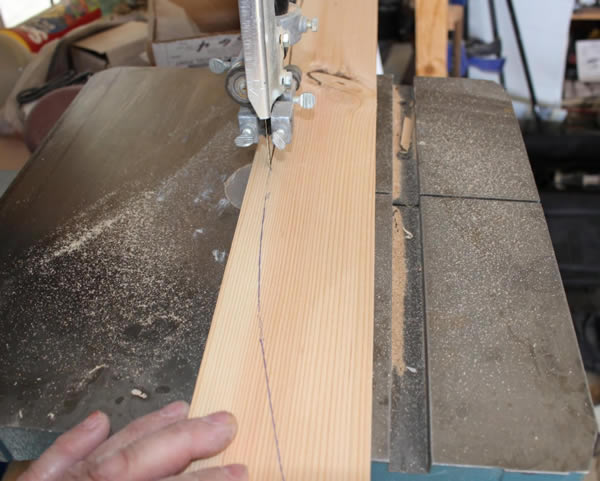
Bandsawing the back trim pieces to shape -- a sabre saw would work just as well.
The shape of the top was just scribed down to the trim piece with dividers.
|
These pieces are ripped to about 3/8 inch thick by 3.5 inches tall from 2 by 4s.
Top of Sidewall Trim
The trim piece that runs along the top of the wall panels over the length of the van hides a bunch of screw heads, gaps, and also provides a place to install down pointing LED strip lights.
Shows the upper sidewall to ceiling trim and the over back door trim. While it does not look like it, the right face in the picture above is ripped at an about 10 deg angle to match the side wall angle.
The sidewall to ceiling trim pieces had to have notches taken out to fit the ribs and main frame.
LED light strips
The wood trim strips that go along the top of the wall panels have a dadoed groove to hold LED strip lights.
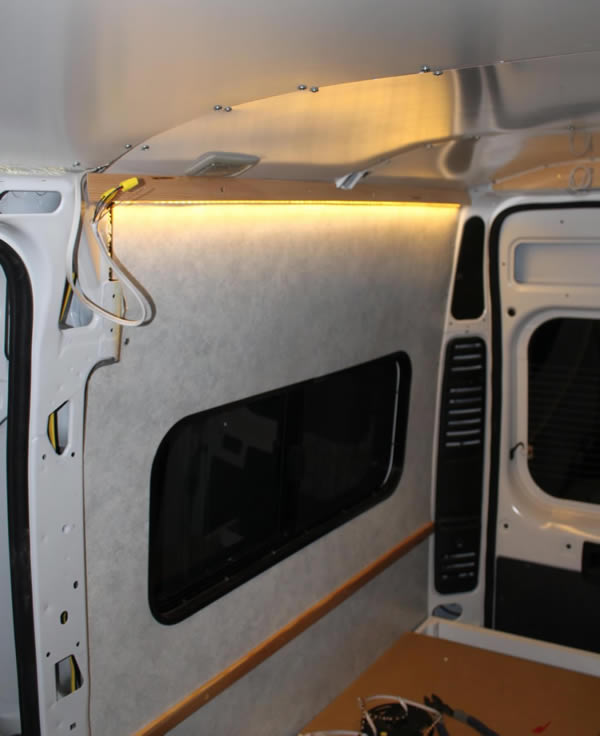
Shows the LED strip light installed in the groove -- its a nice pleasant light.
Upper trim strips mostly done.
Trim Fasteners
I wanted to either hide or use pretty fasteners on the trim where they show.
This picture shows three candidates:
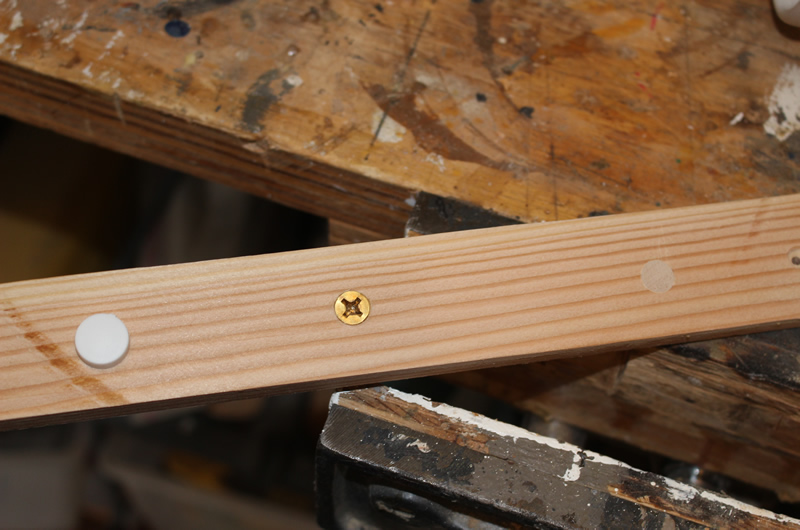
The left one is a pretty slick fastener head cover, the one in the middle is a #12 brass flat head wood screw in a countersunk hole, and the one on the right is a fastener of any kind with the hole bored down about a quarter inch, and then it has a wood plug pushed into the hole and than sawed of flush.
I think they all look nice, but I liked the brass the best -- maybe I always wanted a boat?
Still Not Done
Eventually will probably ....
- Work out what to do over the main frames to cover the exposed frame and all the holes.
- Decide what to do about the back and sliding doors for paneling and insulation (if anything)
- Probably put some type of fabric over the ceiling panels.
Labor, Cost, Weight
I'm not sure about the labor as it was spread out over some no activity on the van periods -- I think it was about the equivalent of six or seven 6 hour days. The longest of any job on the conversion so far.
| Item |
Cost ($) |
Weight (lbs) |
| |
|
|
| Wall Paneling - 4 sheets (much waste) |
$84 |
50.0 |
| Ceiling Paneling - 4 sheets (much waste) |
$56 |
34.5 |
| Trim and Attach Pieces (from 2 by 4s) |
$10 |
12 (?) |
| Paint, screws, ... |
$30(?) |
2 (?) |
| Totals |
$180 |
98.5 lbs |
I did not take any cost credit for all the scrap paneling I'm left -- probably a lifetime supply.
Comments and Questions
For comments or questions, please the the comment section on the main page of the ProMaster conversion...
Gary
October 22, 2014