Search
The Renewable Energy site for Do-It-Yourselfers
A Medium Sized Rain Water Collection
System -- Collection Plumbing
|
This page goes through the major part of the job,
which is positioning the rain water tank, installing the collection
gutters, and installing the collection plumbing including the first flow
diverter.

Back to the main page for this project... |
|
Picking and Placing the tank
We looked at several tank types, and ended up choosing a polyethylene tank.
This is probably the least expensive option, and with sun protection, this kind
of tank should last many years. We chose a dark green (opaque) tank to
discourage growth in the tank. Its important when you buy the tank to
specify which fittings you want installed where -- or, at least, make sure the
ones it comes with are OK for your use. You can look in the
references section for the low down on all the
different tank options. See the Sizing Section
for the logic on tank size.
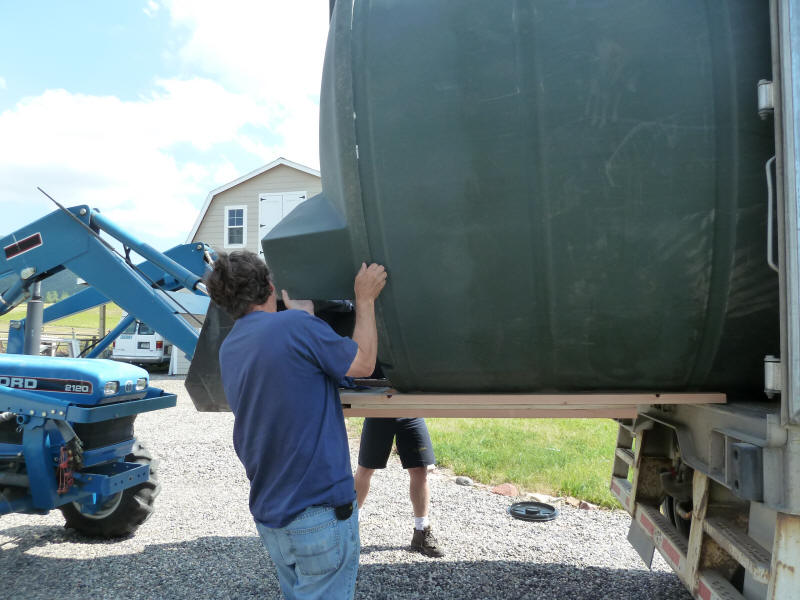
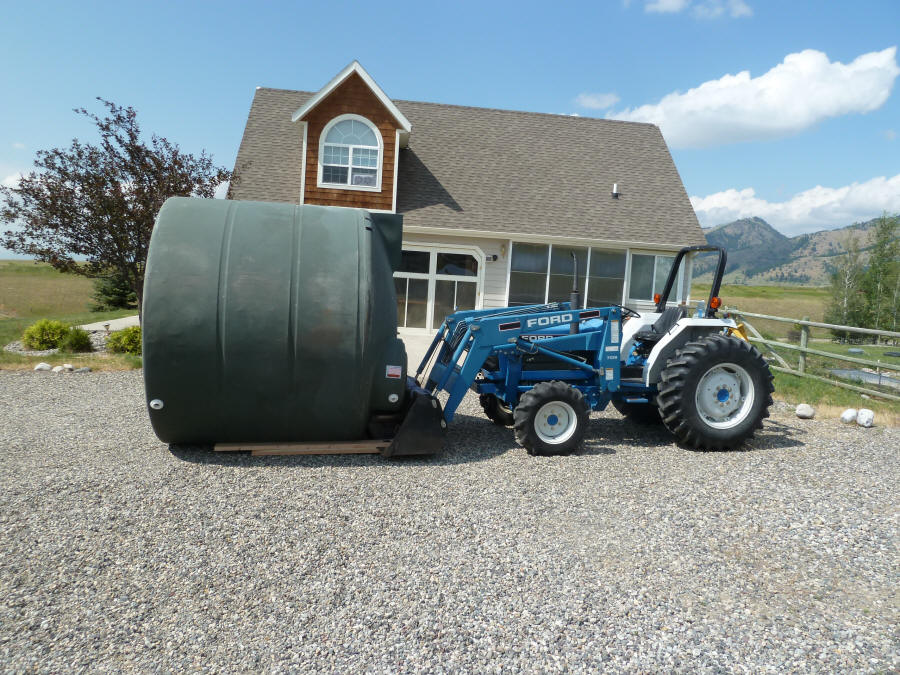
I thought that getting the tank off the truck and over into place was going
to be a real adventure. Before the truck arrived, I made some extensions
to fit on my tractor bucket so that I would be able to pick up the tank from the
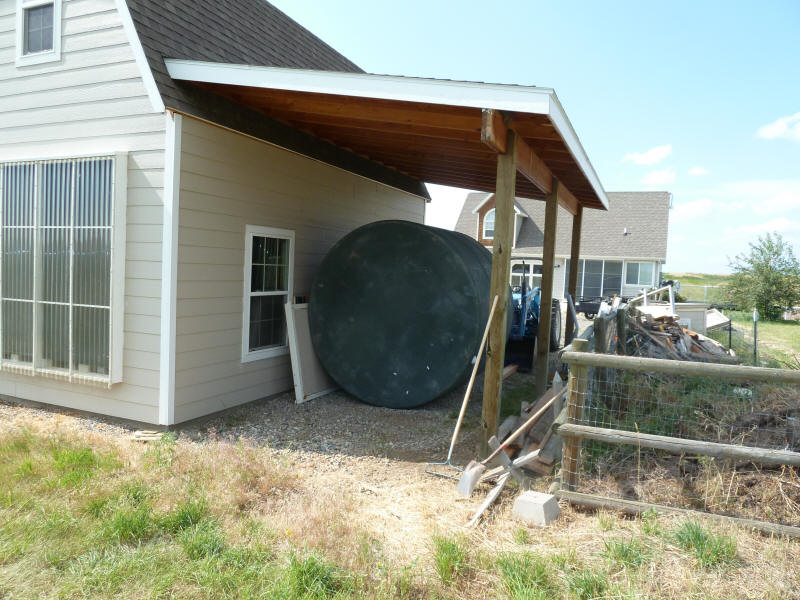
truck bed and carry it over under the lean-to along the building where it was
going to live.

Getting the tank off the truck and onto
the tractor. |

Sitting on the bucket extensions -- works
pretty well. |
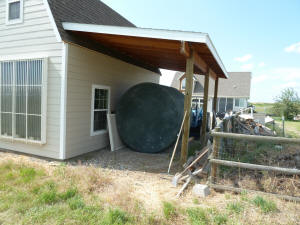
In position and ready to be tipped up. |
As it turned out, the tank is light enough that two or three people could
probably have let it down from the truck without the tractor. Once on the
ground and sitting on its side, the tank rolls very nicely to where you want it.
A couple of people can then tip it up into place.
All of this was much easier than expected just do to the light weight of the
tank.
Before the tank arrived, I spread some 3/4 washed smooth gravel out in a
level pad for the tank to sit on. I think the washed gravel or something
light that is fine, but larger angular and sharp edged gravel might be too hard
on the tank bottom. The pad for the tank should be level, but not
painstakingly so.
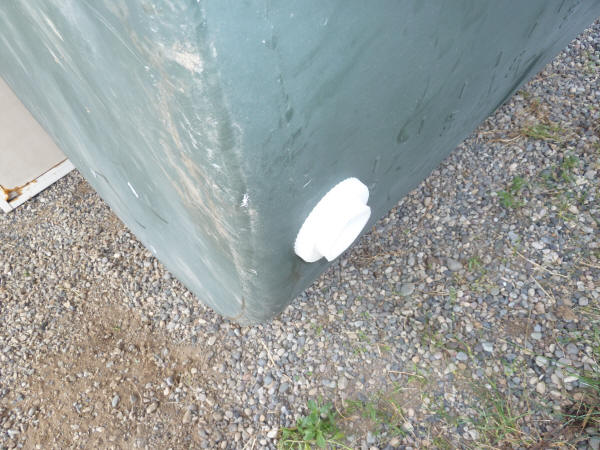
The tank came with a "manhole" and with bulkhead fittings for the inlet and
for a drain fitting.
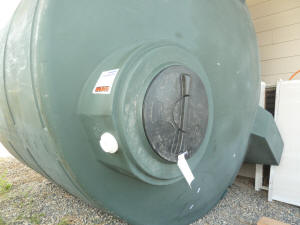
The manhole (more like a small boy hole), and
the inlet fitting. |

The outlet or drain fitting on the tank. |
The gravel pad that the tank rests on is more of the same material that you
can see in the two pictures above.
Note that the manhole cover is large enough for kids to get into and could be
a safety hazard once the tank has water in it. So, if you have kids, work
out some way to lock the cover in place.
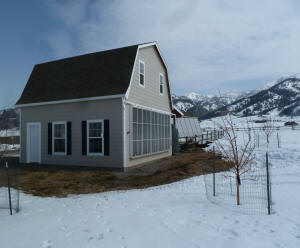
Gutters
We decided to have the gutters installed by "Gus the Gutter Man".
He does very nice aluminum one piece gutters with no seams and a good hanger
system. This is the type of gutter that starts in his truck as a roll of
painted aluminum sheet. He feeds the end of the roll into his magic gutter
bender gadget, and out comes a very nicely formed gutter of just the right
length.
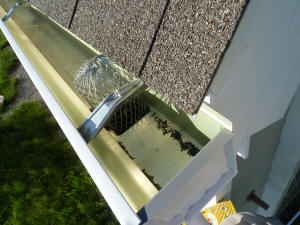
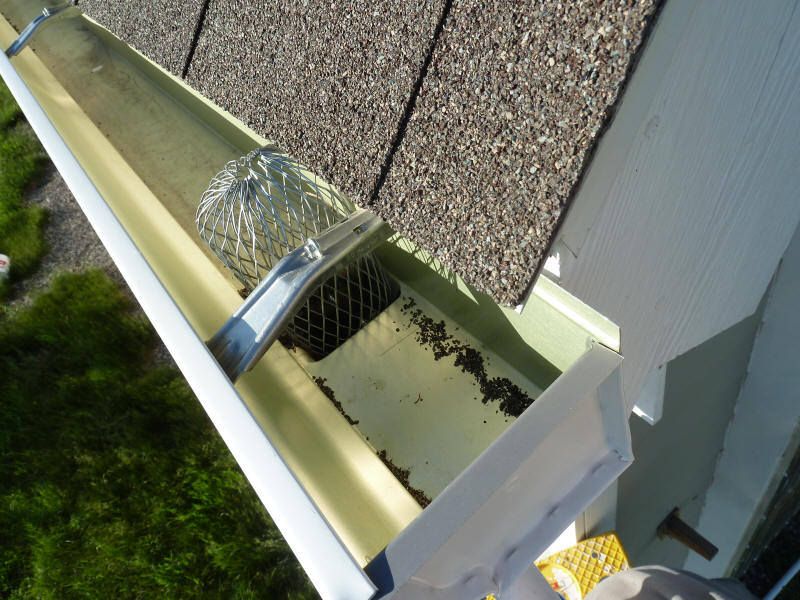
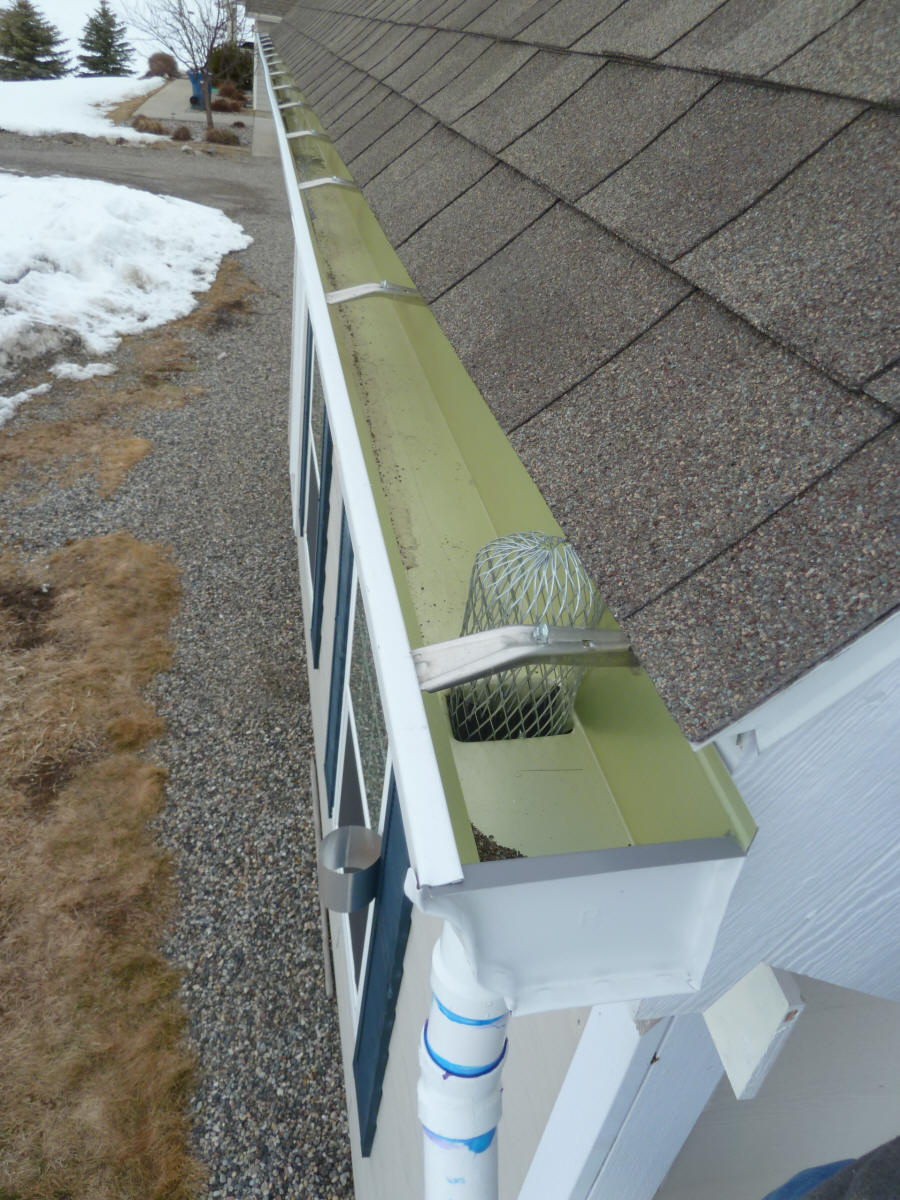
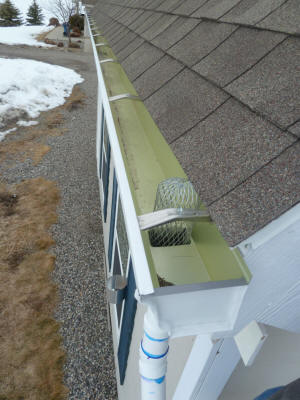
The installed gutter. Very solid.
I added the screen basket to keep any large
debris out of the pipes.
It would probably be a good idea to
add some screening fine enough to keep
insects from going down the collection
plumbing. |
 |
 |
We chose these gutters because they were not a whole lot more expensive than
buying the 10 ft lengths at the hardware store and splicing them together
ourselves. The end quality and sturdiness seems much better.
I guess its obvious, but the gutters need to slope down toward the end where
the collection pipe picks up the water.
If you live in an area with lots of trees and a lot of leaf accumulation,
then you will have to deal with keeping as much of that as you can out of the
collection system plumbing. One of the screen products that send the
leaves out over the gutter edge may be in order.
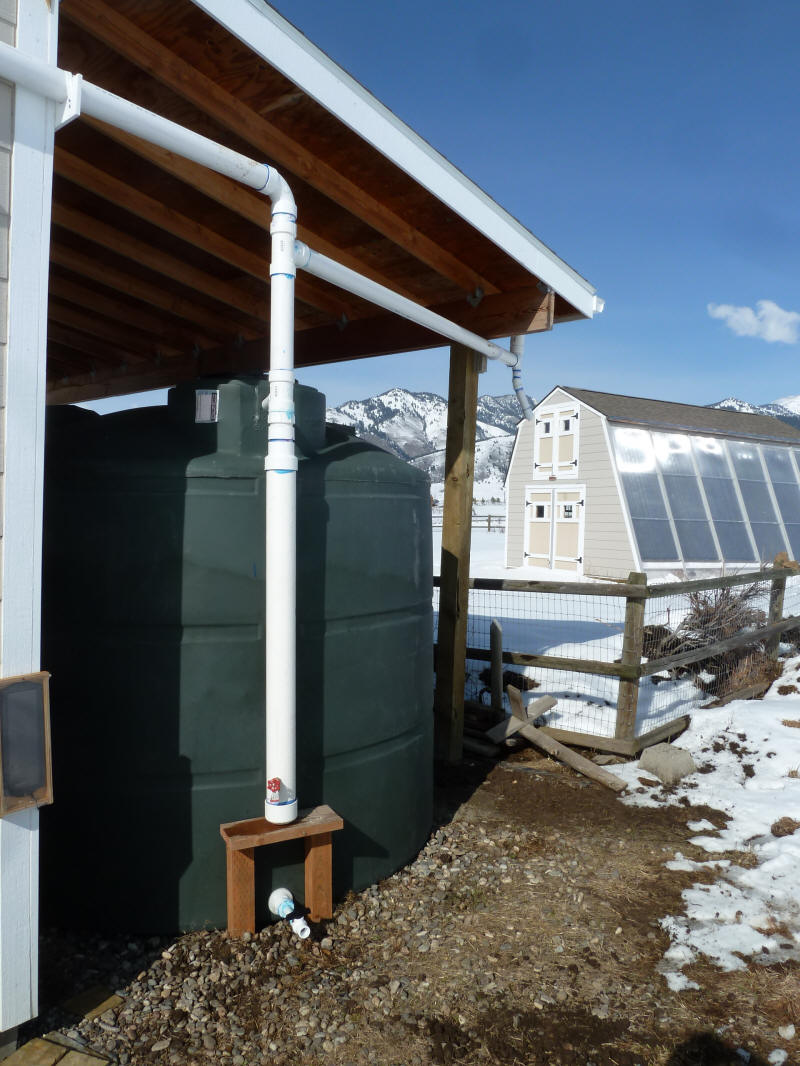
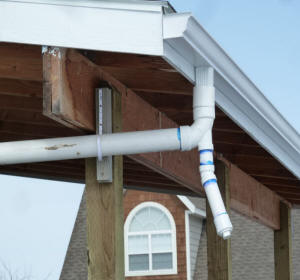
Collection Plumbing
Here is an overview picture of the whole plumbing connection system:
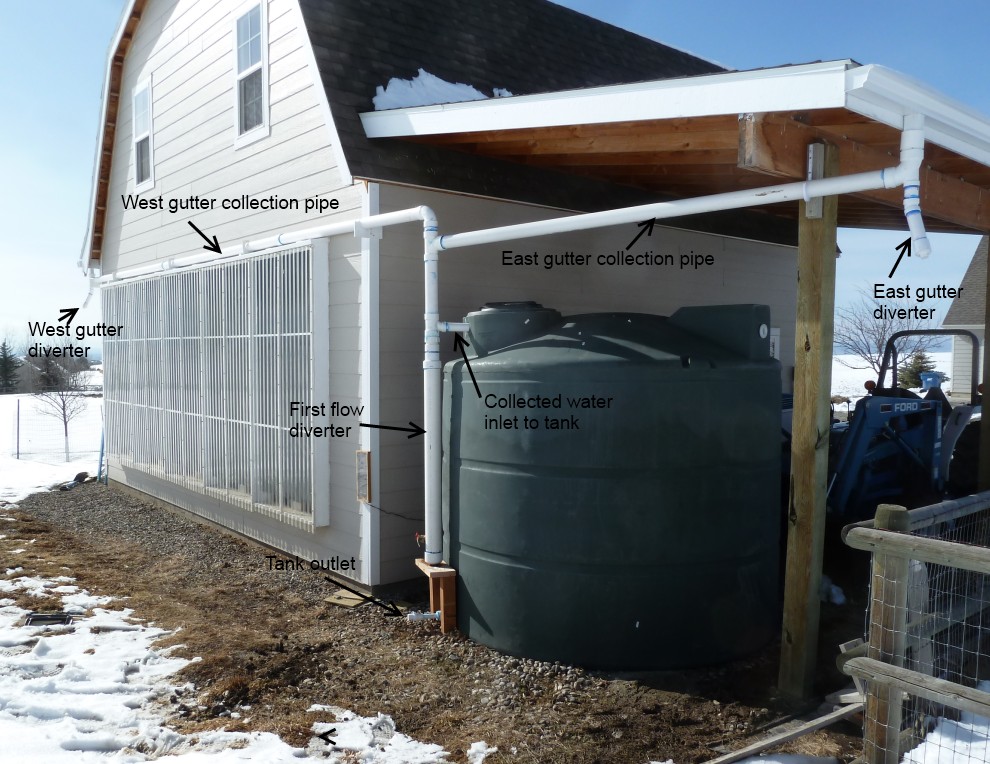
This collection plumbing is the kind of system shown in the rain water
collection system books, but tailored and simplified to our situation to some
degree. You will want to read over the systems described in some of the
references before deciding on exactly what design you want to use.
Collection Pipes
The collection pipes that extend from the gutter to the tank are 3 inch
schedule 40 PVC pipe. The fittings are standard PVC solvent weld
fittings. I was not able to find any good design information on what size
pipe should be used to support a given size of roof, but the 3 inch seems like
plenty for our relatively modest roof areas and for the normally not to heavy
rain falls we get. If you are in an area (like some desert areas) where a
good fraction of the yearly rain fall can come in a small number of very intense
thunderstorms with heavy rain fall, then it would be good to investigate the
size of the collection pipes
more thoroughly and make sure that you don't miss a lot collection opportunity
because your collection pipes don't have enough capacity for a heavy rain.
The Reynolds book "Water From the Sky" discusses this issue.
The collection pipes are sloped down toward the tank. This is important
to keep them dry and prevent any kind of growth and to prevent ice damage.
I used about 1/8 inch per foot of slope on the longer pipe.
I used 2 inch PVC for the last 6 inches going into the tank. The
bulkhead fitting that came with the tank for the inlet was smaller than this,
so, I just took it out and ran the 2 inch pipe through the same hole, and
caulked around it. I plan to get a larger bulkhead fitting for the 2 inch
pipe later. My feeling is that its a good idea to make sure that all the
openings into the tank are sealed up to keep bugs out.

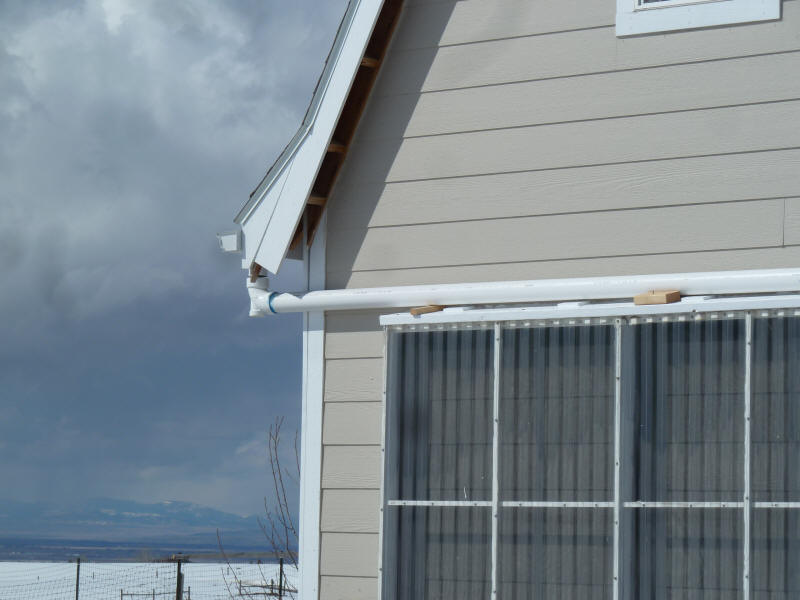
Putting in the collection pipe to the
west gutter. Not temporary blocks
to establish slope.
The glazed thing is the solar heating collector
for the shop. |
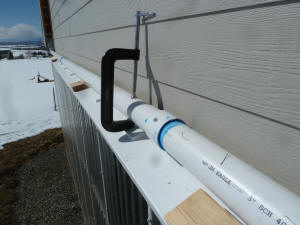
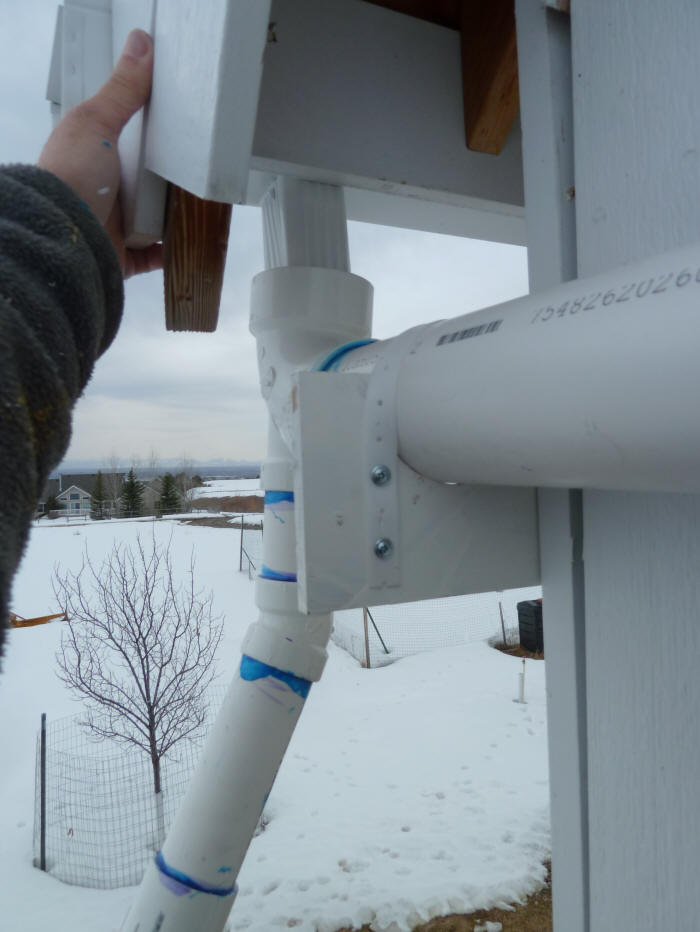
When joining the 3 inch diameter PVC pipes
its handy to have something clamped
to the pipe to hold onto when pushing the
next pipe in. |

The tank end of the west gutter
collection pipe. |
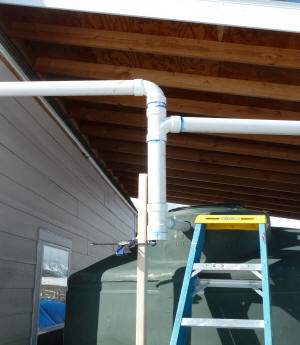
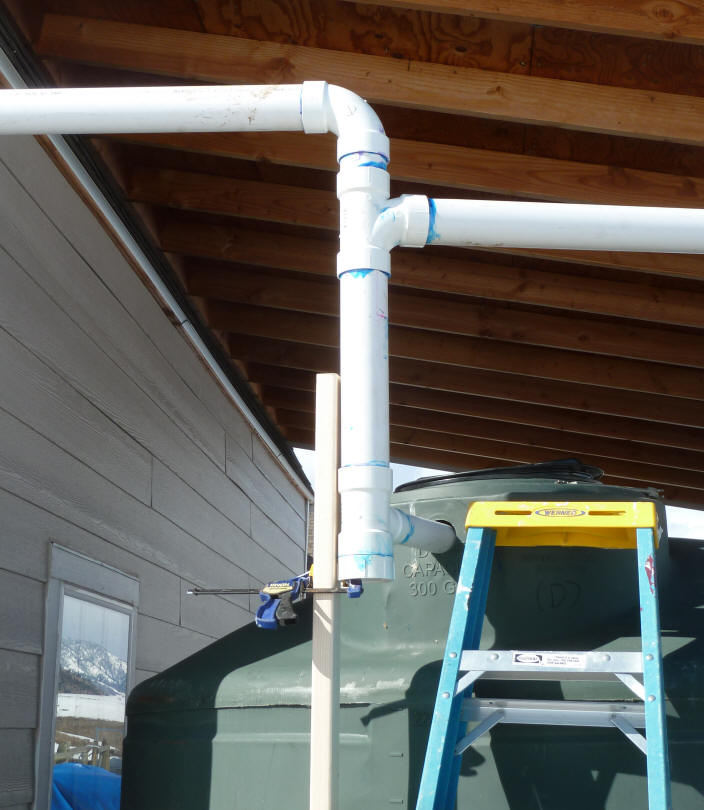
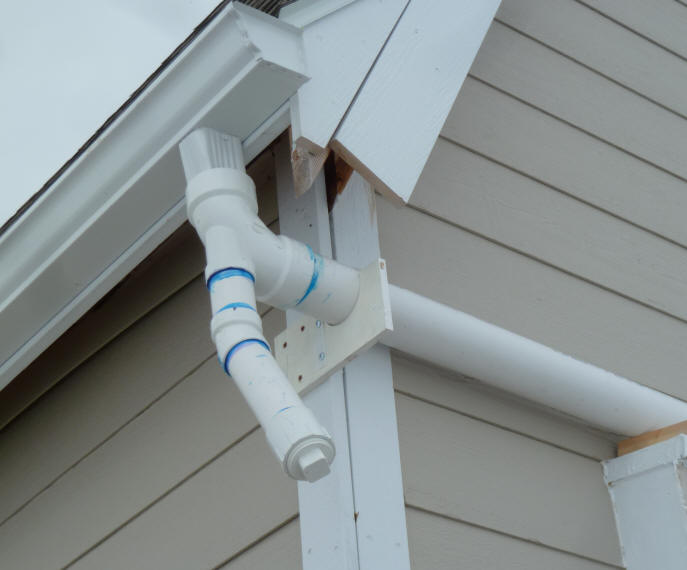
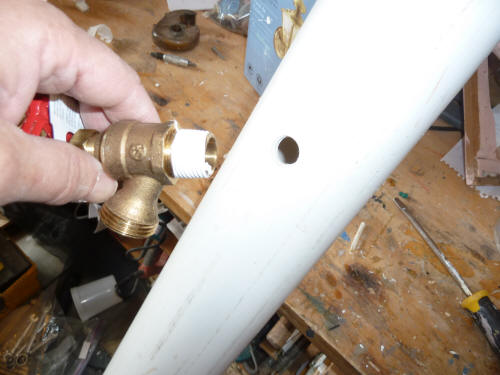
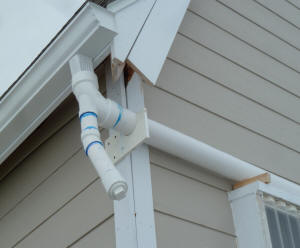
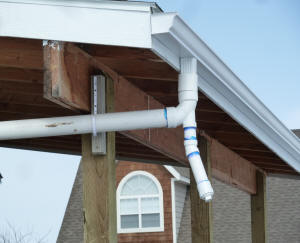
Plumbing the area where the collection pipes from
the east and west gutters drop down
to the tank water intake.
The first flow diverter hooks on to the
bottom just below the inlet pipe to the tank. |

Completed collection plumbing with the
first flow diverter in place. |
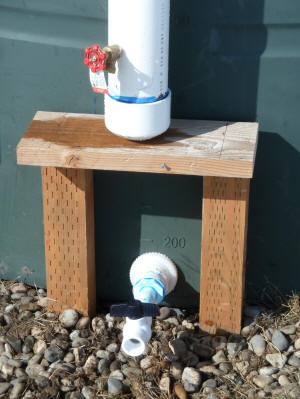
Showing the support for the first flow diverter
and the tank outlet connection. |
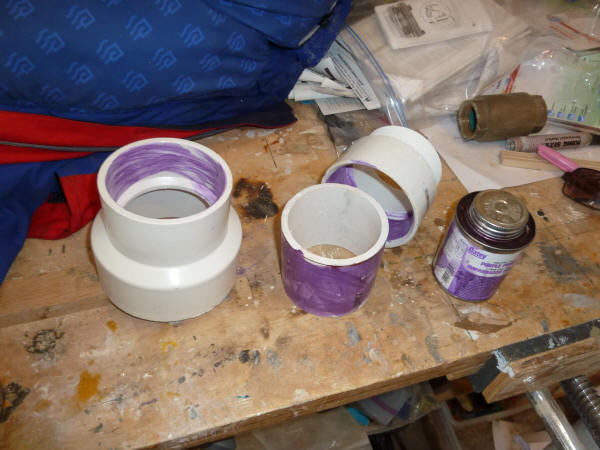
If you have never done the PVC glued pipe fittings, its straight forward.
- Cut the fittings/pipes to length with an ordinary wood
cutting saw and clean up the burrs
with a knife.
- Dry fit the pipes together.
If its a somewhat complicated collection of fittings you are glueing,
then put witness marks across the fittings with a marker pencil when they are in
the dry fit position. These will allow you to quickly get the same
alignment when you are doing the actual glue run.
- Take the fittings apart, and apply the purple primer to all the pipes and fittings
--you can do them all at once.
- Apply the PVC glue to the fittings and push them
together until they fully seat -- use a slight rotation as you push them into
place. Hold them for a 5 count.
You only have a few seconds from applying the glue to get the pieces pushed
together, so if you are new to this, I'd stick with one joint at a time.
As you get more experienced, feel free to go for several at a time (warning --
its easy to get yourself in trouble trying too many).
- Again, if you have not done this before, its best to
start with some of the smaller diameter and easy fittings and work your way up
to the large ones. The larger ones can be a bit of a challenge to fully
seat if they are not lined up well.
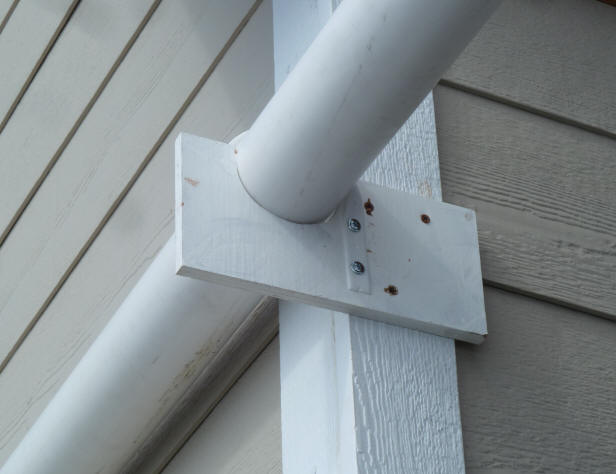
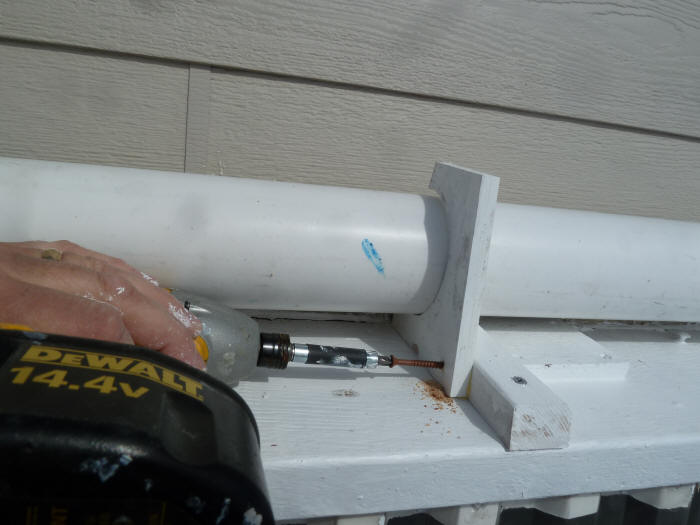
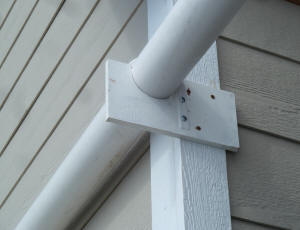
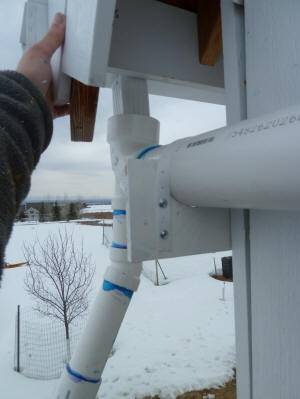
I did not find any really good clamps to attach the 3 inch PVC to the wall,
and ended up making some of the supports from scraps of MDO plywood. MDO
is a very water resistant plywood used for tanks and concrete forms -- it should
last as long time, but it would be nice to find some good weather proof clamps.
Clamps made from MDO scraps.
Note plastic strapping over the top of
the pipe. |
Clamps to hold the pipe in place and on slope where
it crosses over the top of the solar collector. |
A somewhat Mickey-Mouse commercial
plastic pipe support. |
Connection to the Gutters
I'm sure there are lots of ways to do this, but the scheme we worked out is
shown just below.
West gutter to collection pipe
connection. The plug comes out
for the winter. |
Another view of the west gutter
connection. |
East gutter connection. |
All of the fittings are standard hardware store PVC fittings glued together
in the usual way.
The 3 inch elbow fits nicely over the gutter downspout stub and makes a nice
easy connection.
The branch that takes off from the middle of the elbow is intended to capture
any junk that comes off the roof -- like the little rock granules that fall off
the shingles. It has a standard pipe plug at the bottom that can be
unscrewed to empty it.
During the winter, I plan to take the plugs out and just let the gutter water
drain out where the plug socket is. This should keep the system mostly
free of water and ice. I angled the stubs out to try and get the
winter water a ways away from the building.
After several months of operation through the spring rains, and with the tank
full, I took the plugs out just to see what had accumulated. There was
about 1/4 cup in each stub of the shingle granules and that was all.
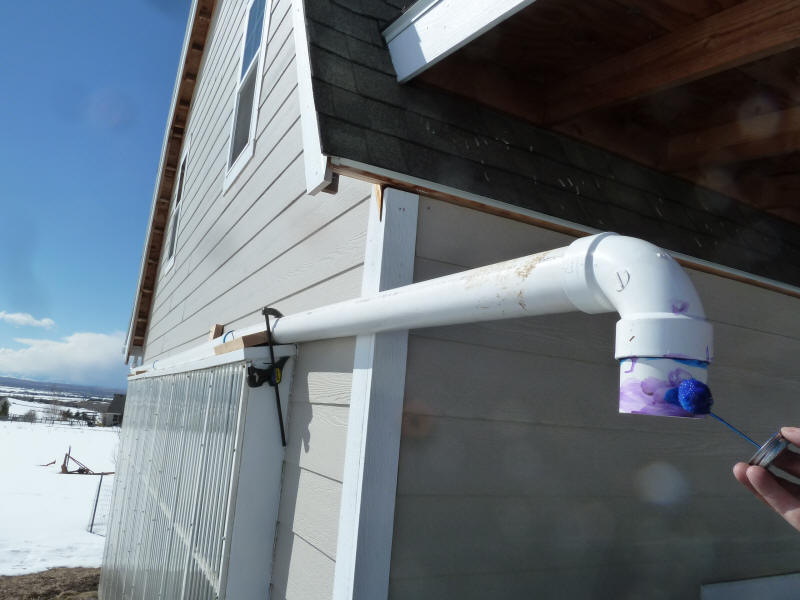
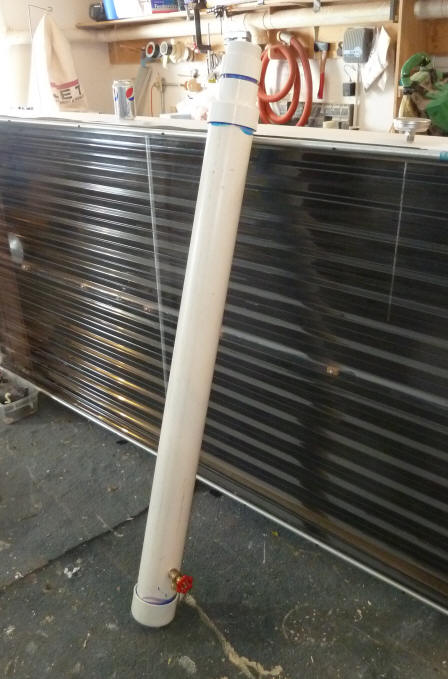
First Flow Diverter
The first flow diverter diverts the first few gallons of water away from the
collection tank so that any dust and dirt etc. accumulated on the roof does not
end up in the tank. There are some very fancy designs for these system in
the references, and you should look them over and see what works out the best
for you.
We decided to do a very simple one. The larger diameter section of pipe
just below the 2 inch tank inlet is our first flow diverter. At the start
of a rain, this 3.5 gallon capacity section of pipe is empty, and all of the
first rain flows into it. After it fills up, the water then flows through
the 2 inch inlet that goes into the tank. Sometime before the next rain,
the small faucet on the bottom of the diverter is opened and the accumulated
water is allowed to drain. Then the faucet is closed and the diverter is
ready for the next rain.
This is the bottom of the scale as far as first first flow diverters go: 1)
its on the small side, 2) if you don't remember to empty it between rains, it
does not do anything, and 3) if you forget to drain it for the winter and leave
the drain open, it could be damaged by freezing. We decided we were OK
with the limitations and just decided to keep it simple -- if we screwed up its
not so hard to fix later. One thing in our favor is that the roof
stays pretty clean -- there are no trees close enough to be a problem.
Here are the details on building the diverter.
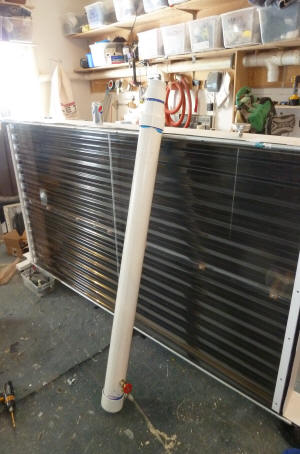
The diverter is made out of the larger diameter 4 inch PVC pipe in order to
get is capacity up to a useful level. As it is, the capacity is about 3.5
gallons, which is on the small side for our size roof. One could go up to
6 inch diameter, but the pipe and fittings get heavier and more expensive.
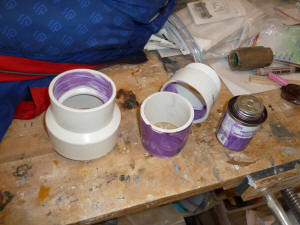
Fittings that adapt the top of the 4 inch
first flow diverter pipe to the 3 inch
collection pipe.
The purple is the primer, which cleans the surface.
This is followed by the PVC glue that is applied
just before pushing the fittings together.
|
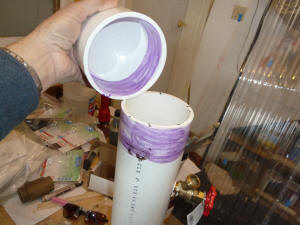
Pipe cap that makes the bottom of the first flow
diverter vessel. |
The finished diverter ready to install. |
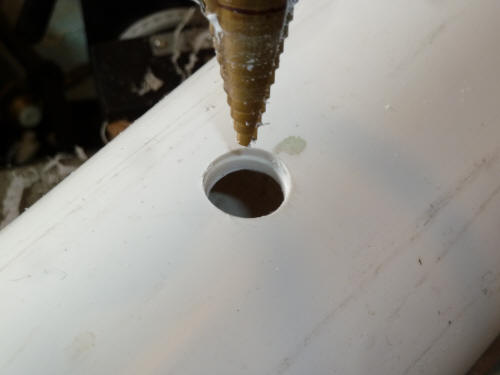
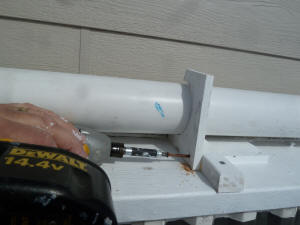
Installing the drain valve in the first flow diverter. This is the valve
that allows you to drain the diverter after each rain and for the winter.
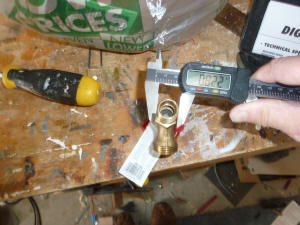
Measure the thread size on the faucet
and go with a hole in the PVC that is
just enough smaller for a good tight fit. |

Drilling a hole to thread the drain faucet
into. You need to get the hole size just
right so that the faucet makes some threads
as it screws in. |

Put Teflon tape on the faucet threads and carefully
screw it into the hole. It should be a tight fit so that the
faucet threads cut into the PVC for a water tight seal.
|
Go on to installing the water delivery system...
Back to the main page for this project...
Comments or questions...?

The Boss |

Knows who the boss is. |
Gary July 6, 2011