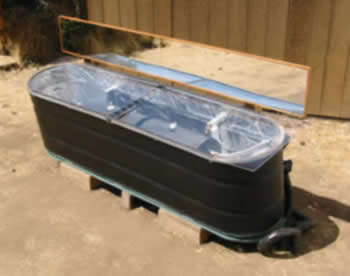
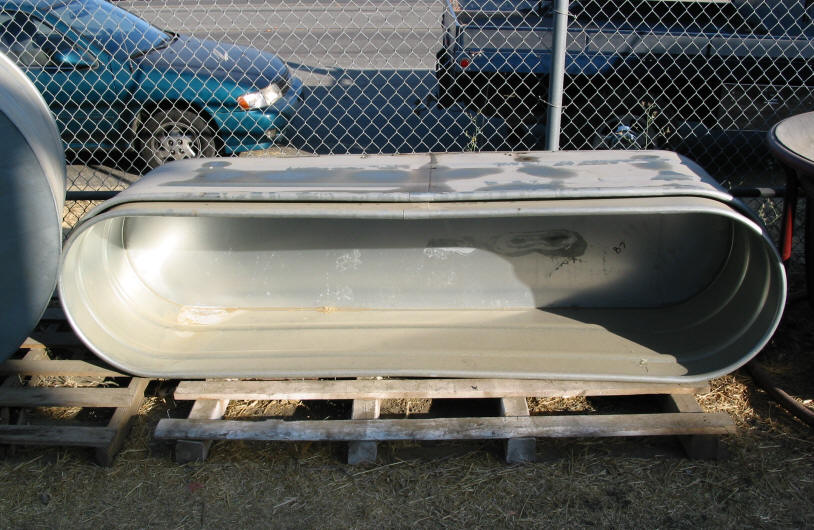
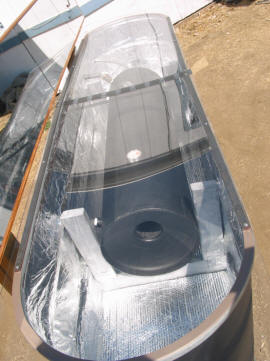
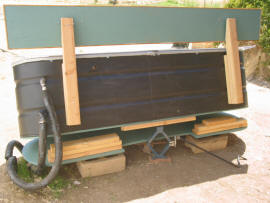
Picture shows the outer batch heater enclosure made from a stock watering tank
-- the stock tank is
not very expensive, and should last for many years.
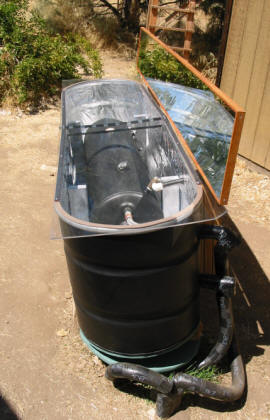
The reflector increases solar radiation on the tank without increasing losses --
a nice feature.
Ron has a way to tilt the entire assembly so that the glazing faces more
directly at the sun.
Design and Construction:
I was going to build a similar batch collector to that on the
""http://www.byexample.com/projects/current/batch_collector/""
which is a nice design, then I thought that I just wanted something
lighter, stronger, easier and cheaper. First I obtained the 30 gal. core
of a gas hot water heater (with some difficulty as almost no one -
appliance store or plumbing co. - wanted to let a used one go, even when
I offered to pay for it). When I finally obtained a leak-free one from a
very nice guy named Gary at a hardware store I stripped it and painted
it flat black. Here is a paint available specifically made for this job
"http://www.dampney.com/Products/Products.asp?ProductID=28"
.
|
 |
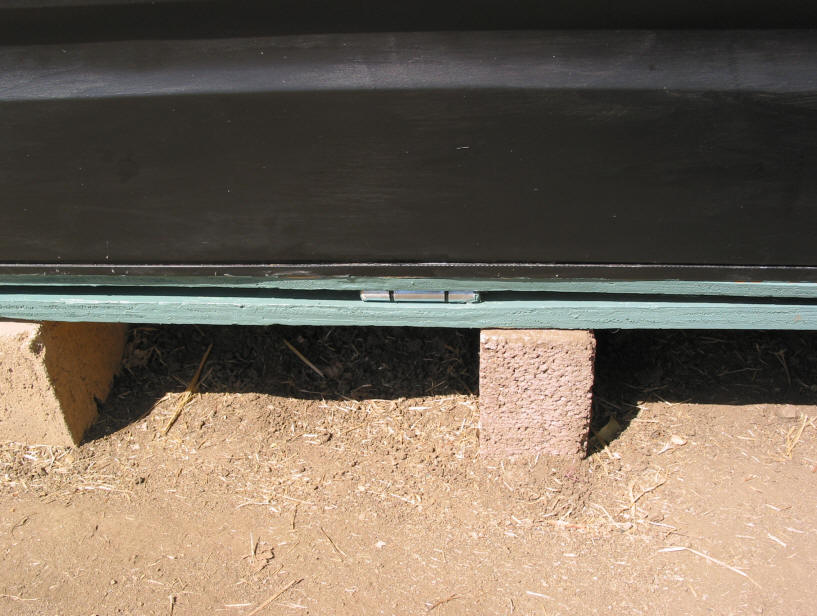
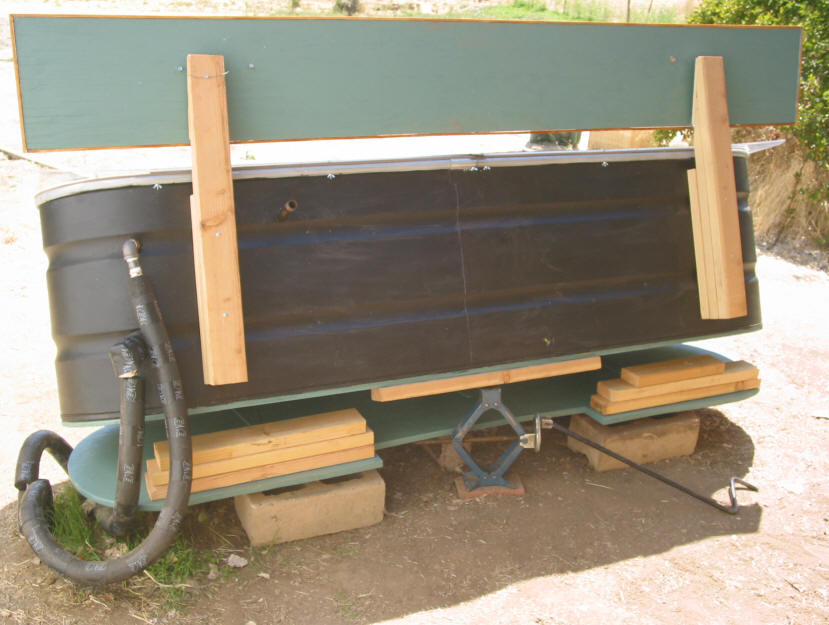
View from end showing the 2X4 cradle
that the tank rests on. |
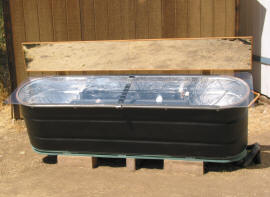
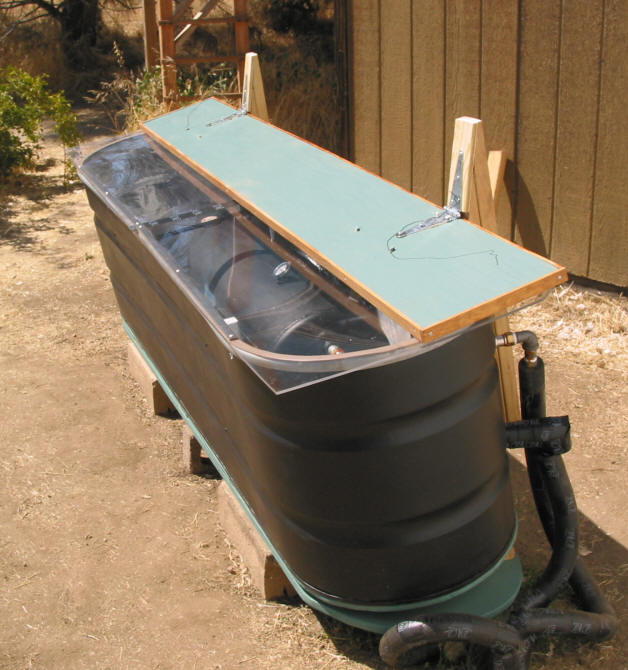
Note how much the mirror increases the collection area. |
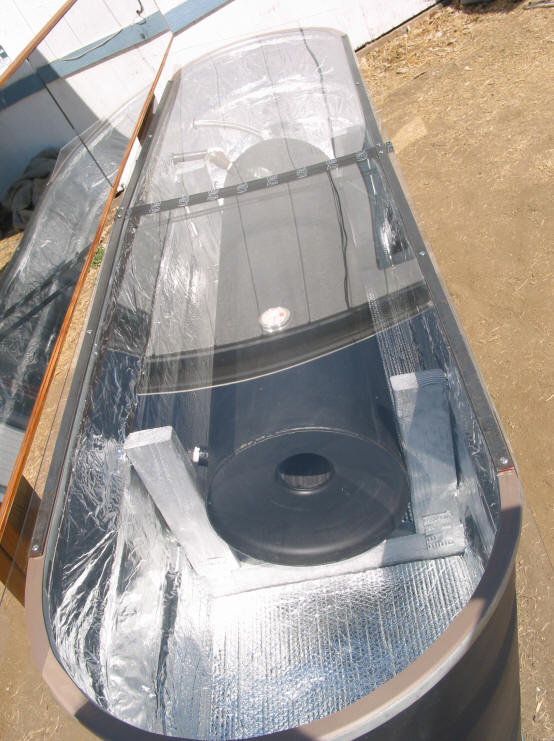
Additional overview pictures of the collector
-- click pictures to see full size
Next I bought a cattle/horse water trough for $99 at a local feed store.
Inside I screwed a simple 2" X 4" frame to hold it in place and to keep
if from touching the sides or bottom of the trough. The core fits
perfectly inside it. I then drilled three holes with a hole saw which
were just the right size for the piping (hot, cold and TPR valve) to go
through, added rubber grommets to seal. After that I put on some weather
proof vinyl weather stripping on the rim and on top of that two pieces
of Plexiglas which I bought from Home Depot for $43 each for a 2' X 4'
piece. On top of those I put some metal hold down strips that I attached
with screws and wingnuts after drilling some holes through the rim of
the tank (and making sure to aim the drill so that the lower hole went
outside the trough). Since the tank does not have perfectly
straight sides I had to bend these strips to match before attaching. I
discovered that it is easier to first drill the holes in the hold-down
strips and then one matching hole in the rim of the trough closest to
the center on each side. After that attach the strips to the trough then
drill the rest on the tank to insure that the holes through strip,
glazing, weather-stripping and tank all line up. As it was slightly
bowed inwards at the middle I stuck a piece of rebar at the top center,
held on with some moldable metal epoxy putty.
Also since the Plexiglas itself can bow downwards some as it begins to
get hot I placed a thinnish, flat metal bar just under the middle where
the two pieces meet, across the width of the trough, on top of the rim
for support. Over these I have a piece of pipe wrap tape.
I added some door mirrors (that I bought from a large discount store for
$5.88 each) that I made adjustable so that I can point the sun's rays
directly at the core. They are attached to a piece of 3/4" plywood with
construction adhesive. As this board is somewhat heavy, rather than use
wood screws to attach the hinges to the 3/4" plywood I came in from the
mirror side with flathead machine screws that I countersunk some to make
flush with the wood surface so that I could bolt them down onto the
hinges with washers and nuts for added strength. The mirrors can also
lay down flat on the top of the Plexiglas in the event of a storm. (As
an anecdote to the amplifying effects of mirrors, in the process of
working on the collector, as I was walking in the area I suddenly felt a
blast of heat and light hit my face from a mirror that had been propped
against the side of the house about 30' away reflecting the sun!)
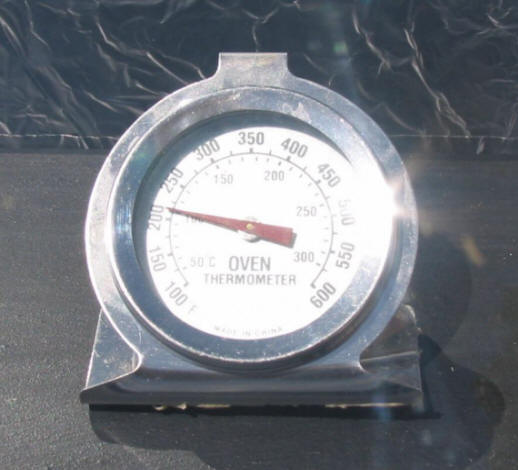
I was getting about 185 to 190 degrees F then. I later added some foil
and Reflectex inside attached with foil tape and made a few other
changes as outlined below. After these changes the temps went up to
about 210 degrees. But again, it is summer and we are having hot days.
It remains to be seen how well it does at other times of the year.
I'm going to connect a water filter to the inlet to keep sediment out. I
also have a shut-off on this line so that if I need to cut water
pressure to work on it, or possibly turn it off in the winter I can do
so without having to turn off the water to the entire house. Depending
on if I do need to turn it off in winter I will put another cut-off
between the hot water outlet and the house so water from the normal
house water heater doesn't flow back into the tank.
|
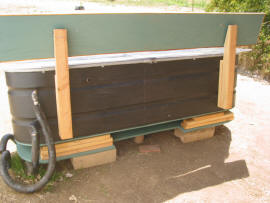
Mirror support from back |
Mirror hinged down -- this might be helpful
in mid-summer to reduce gain, if the
water is getting too hot. |
|
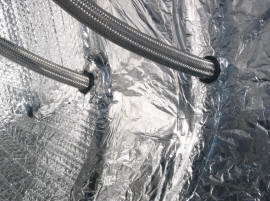
Flex hoses penetrating side
of tank and Reflective insulation. |
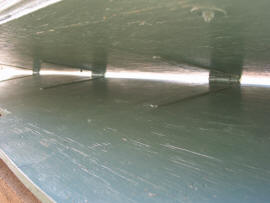
Center support bar for glazing. |
Construction detail pictures -- click on
picture to see full size
Locating and Aiming the Heater:
Since the best location to put it was on the side of the house that was
unfortunately away from the existing house hot water heater (but
fortunately closer to the shower) I had to do some rerouting of the
water pipes in the cramped space underneath (which was not fun). The
area is in a corner between the house and a shed. Another mixed blessing
of this location is that while the area holds heat as it blocks cooling
wind, the house also blocks the sun until about 9:00 AM with full
exposure only beginning at about 10:30 (I've noticed that the peak temp
period inside the trough, at least in summer, is between 2:00 and 3:00
PM). Anyway, I then tied in a direct line from the tank to the shower.
To aim the heater, I
found geographical south
with declination taken into consideration, and turned it that
way. Then, to maximize the light potential, I made the entire unit
adjustable so as to be able to point it optimally towards the sun at any
given time of the year. This I felt I needed to do since unlike the
by-example collector mine is not low in front of the tank which affords
more solar rays, a disadvantage of my method.
I put three of the biggest hinges I could find on one side between the
1/2" plywood board the trough is attached to and a 3/4" plywood board
under it. The whole thing is on concrete blocks to keep the unit off the
ground from water and cold. On the other side I cut out a piece of the
3/4" board just big enough to fit an about 2' long 2" X 4" board. This
piece is not attached. When I want to tilt the unit I place the board
under the trough there and under that I put a scissors car jack and
begin cranking. It goes up and tilts quite nicely. Right now I have it
pointed at about 63 degrees from southern horizontal, about where the
sun is angled at currently relative to my location. Probably every
couple of weeks as winter comes on I'll go out and tilt it some more. To
be flexible I had to change the PVC I had attached outside the
trough (cold & hot piping) to some flexible metal washing machine hoses.
These I wrapped in foam insulation, as are the pipes under the house. I
also added the foil and the Reflectex insulation at this time.
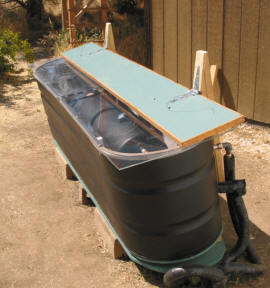
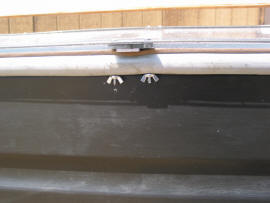
|
Front side view of hinges that allow
collector to tilt. |
Back side view of collector
tilt hinges. |
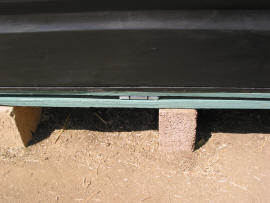
|
Tilt adjustment arrangement |
Pictures showing the collector tilt
arrangement -- click for full size
Lessons:
What's gone wrong so far is 1) condensation inside on the two ends which
I think was because it was apparently not sealed as well there as on the
sides and because a tiny leak had developed at the PVC fitting which is
connected to the TPR valve inside the trough - I found a small pool of water
inside. 2) A PVC fitting that was glued outside the trough with PVC cement
developed tiny pinhole leaks as it couldn't hold up to the heat. I've
replaced this with a threaded metal fitting and plumber's putty. 3) I
cracked the mirror a bit on one corner and fixed it with aluminum tape.
While it doesn't affect the working it was a bummer.
If I did it again I'd probably do a few things different. First I'd use
one length of polycarbonate glazing as Gary mentions below instead of two
pieces of Plexiglas. One issue to be aware of with Plexiglas is that it can
expand and contract some with temperatures beginning at a little less than
200 degrees F. If you can afford it double paned is best.
Then, instead of a fragile mirror I'd use a piece of aluminum flashing
that is available locally for about $20.00 for a 20" X 10' foot roll
(it's about seven inches wider than the door mirrors I used which would
also bring in more light, and cover the top better when laid
down) then cut to size. The flashing I'm told can be polished with a
buffer and some compound to a mirror-like finish. They say it will
tarnish with time and will need to be re-polished but that can be
reduced by waxing it - though I don't know how well the wax will hold up
to heat. You can also buy a piece of polished metal through a metal shop
but it's more expensive, or look in a scrap yard. Or the piece of
aluminized Mylar that Gary recommends.
I like the metal tank because being built to be able to hold water it is
leak-free and thus can hold up to pressure well. If there is a leak it
wouldn't be a disaster as it is meant to hold water. Additionally, it
has a screw-in drain plug at the bottom center. Also being galvanized it
should be rust resistant. I think that the metal holds heat better, but
maybe I'm wrong about that. But metal is just stronger. I am hoping that
this will be a sturdy unit that once I am done I can forget about for
years afterwards.
Lastly, I'd like to thank a few people who contributed and whose help I
appreciate. First the creator of the byexample batch version which was
an inspiration. Next is Gary at the hardware store (and the woman at the
heating and repair company whose name I've lost) who, bucking the
stinginess of the majority, paid it forward by giving us the tanks. Next
is my brother Rod, who lent me his drill, bit set and back as we hefted
this baby around. Then there's my family which patiently put up with
cold water while I was working with on it. Last, but not least, the
other Gary (not the same Gary) at this site, Build It Solar, who
provided me this page on his great solar website and gave me some
further ideas.
Oh, and of course I don't want to forget Big Oil whose rank greed,
avarice and polluting product were my original impetus.
To all of you, thanks,
Ron Rayborne
You can address email questions to: zephyray AT gmail dot com
(replace AT with @ and dot with a period)
This is a nice design that is very
simple to build. Using the galvanized stock tank for the outer casing
provides a ready built enclosure that should have a good long life.
Using the external reflector adds to the solar gain without adding losses, and
helps to make up for the relatively small glazed area.
While batch solar water heaters have
a long list of good features, they do tend to have the disadvantage that they
lose a lot of heat overnight. This is primarily due to the losses out the
glazed face. Both of these suggested improvements would reduce heat loss
and temperature drop at night. I believe that having a larger adjustable
reflector would probably eliminate any need to change the tilt on the stock tank
-- it could be set to a fixed tilt, and the reflector angle adjusted every month
or so.
Note (1) Polyisocyanurate rigid
insulation board is carried by most lumber yards, but they may not know it by
that name. It usually has aluminum foil face sheets, and is usually a tan,
fine grained foam. It will say Polyisocyanurate somewhere on the sheet.
Atlas and Firestone are two common brands. The typical blue, pink, or
white polystyrene insulation boards will melt inside of a batch collector -- I
have proven this experimentally :)
It costs only slightly more than polystyrene.