Search
The Renewable Energy site for Do-It-Yourselfers
Building the DIY Blower Door
Building the Blower Door
The pictures below show the blower door (actually a blower window) in
progress. Basically, its just a salvaged furnace blower mounted on a piece
of plywood that is cut to fit one of your windows. You could, of course,
cut it to fit a door if you want to, but window makes for a smaller and simpler
mounting of the blower.
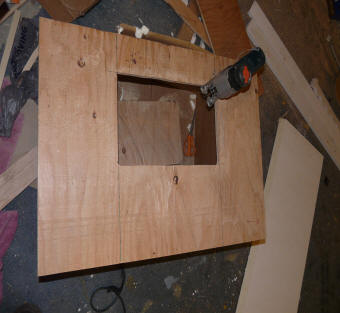
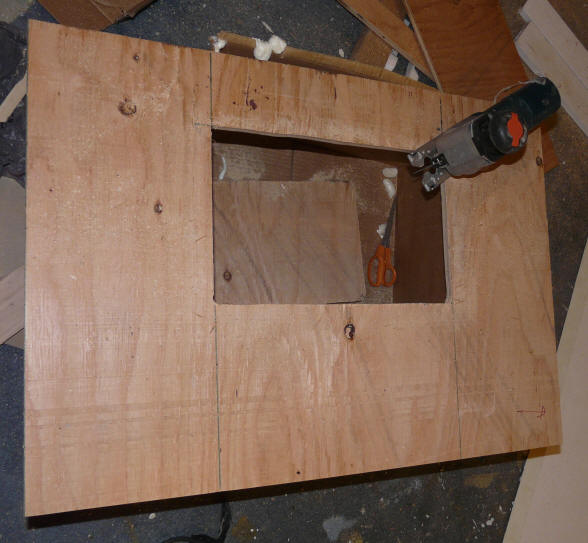
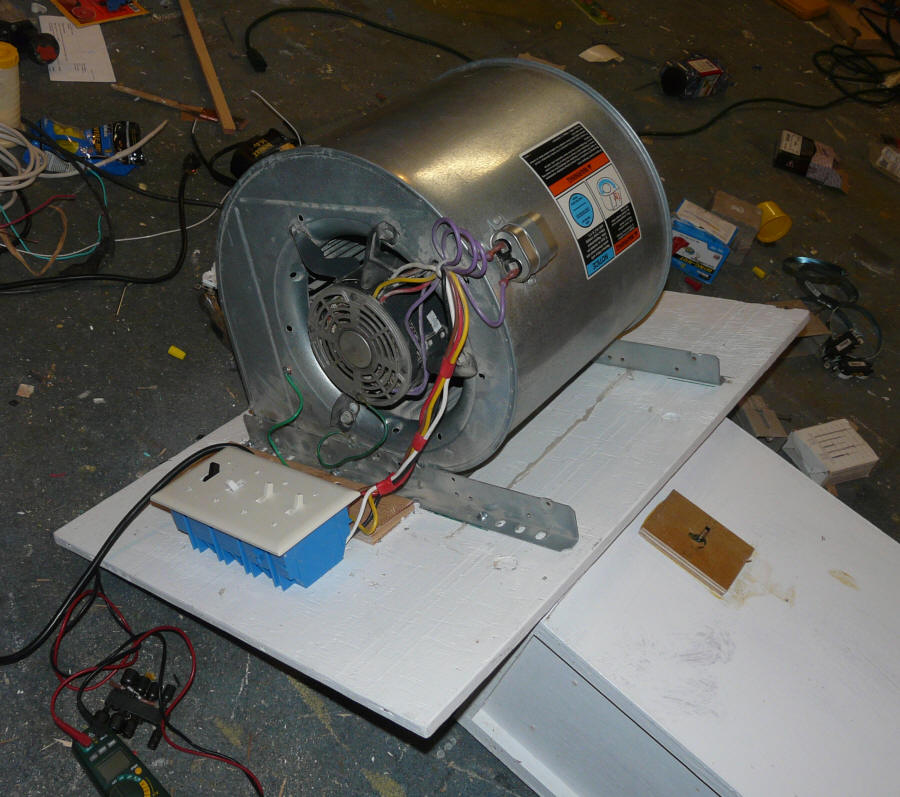
The furnace blower is mounted to a piece of
5/8 inch thick plywood.
The opening is for the blower exhaust.
The plywood outer dimensions are cut to fit in
the window. |
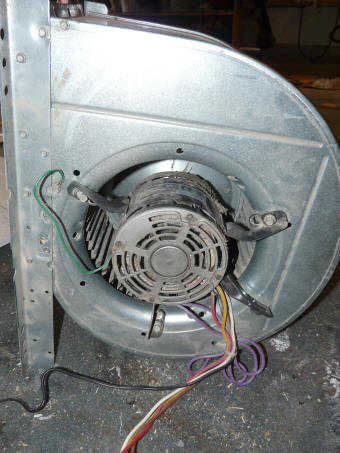
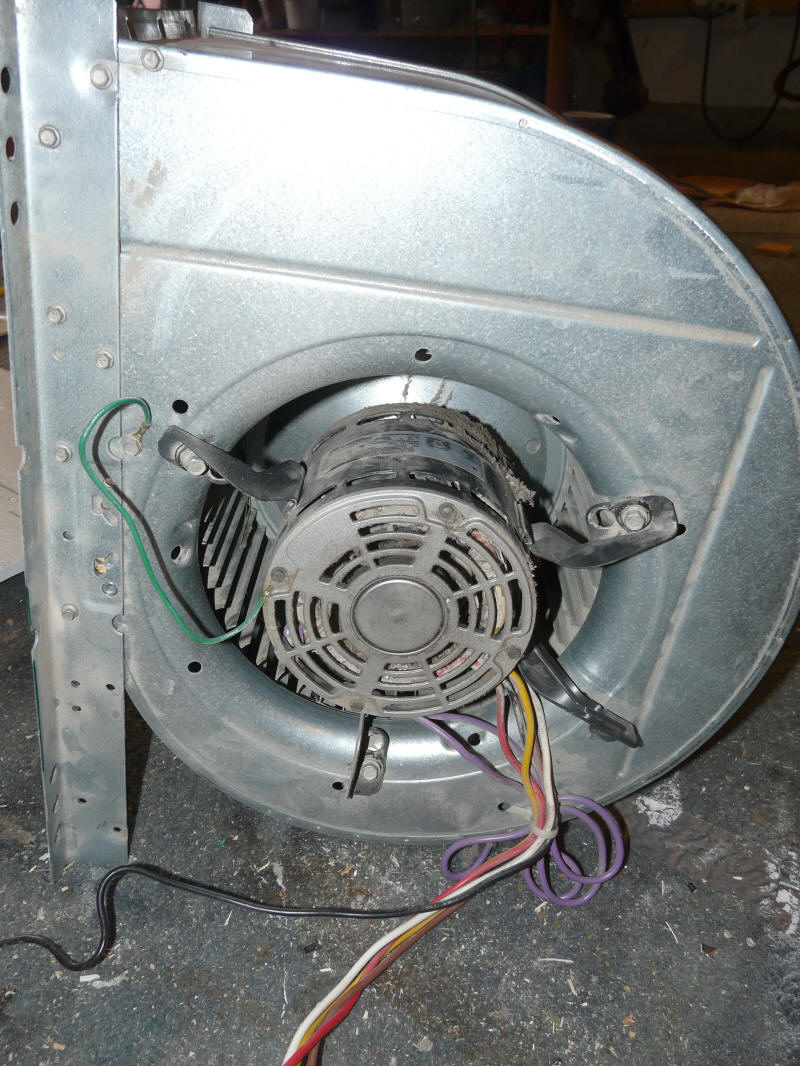
The half hp used furnace blower just
before mounting on the plywood. |
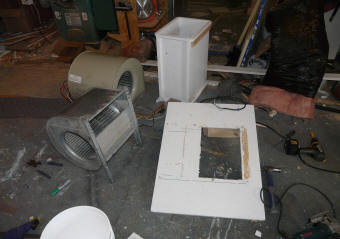
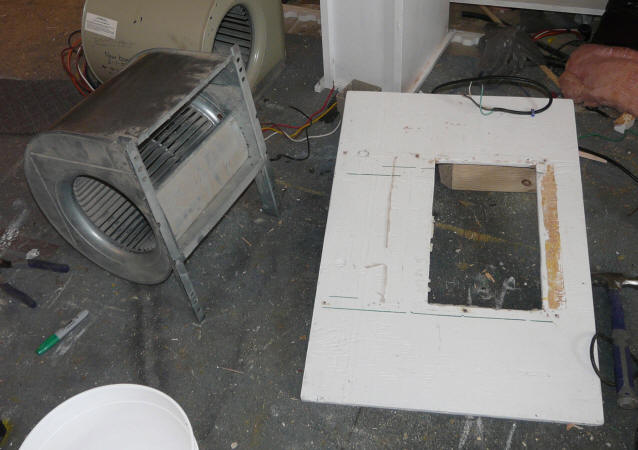
Plywood and blower -- ready for mounting. |
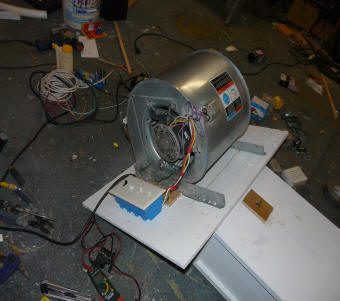
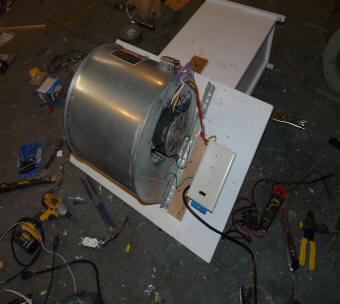
Furnace blower mounted on plywood.
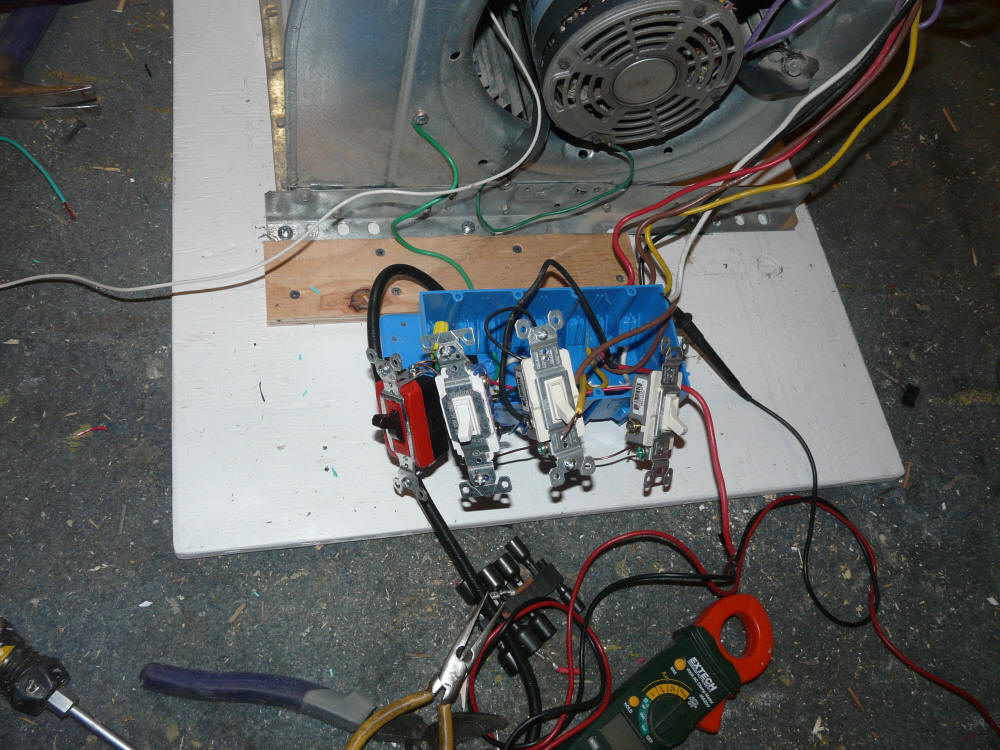
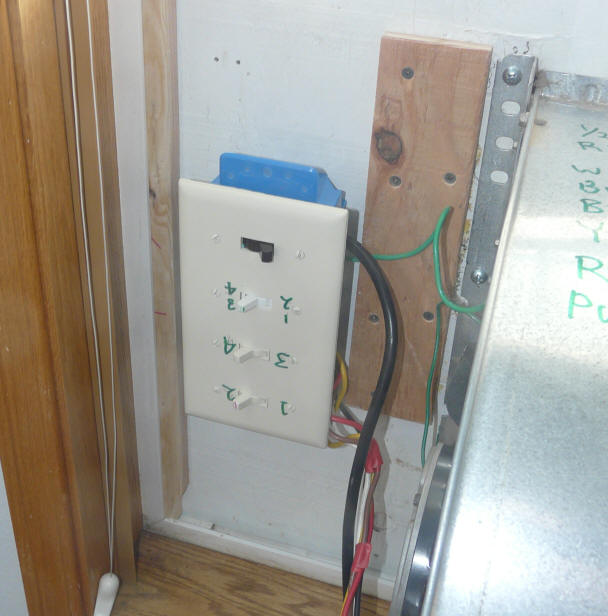
The switch box that sets the fan speed
is a regular 4 plex electrical box.
The switches are ordinary hardware store switches. |

Wiring the switches that select the
fan speed. See wiring diagram below. |
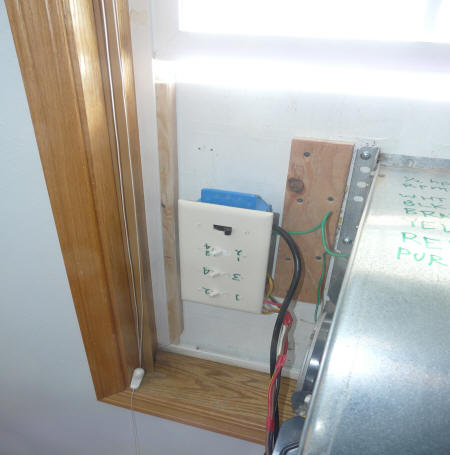
Ready to go in the window. |
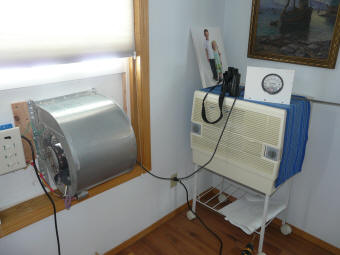
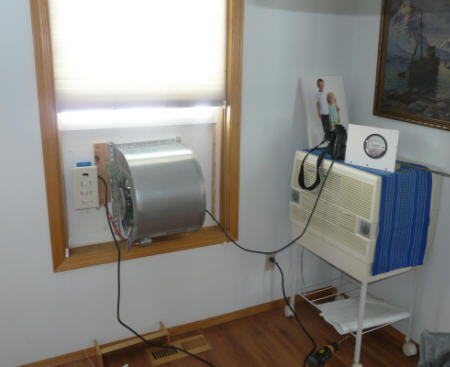
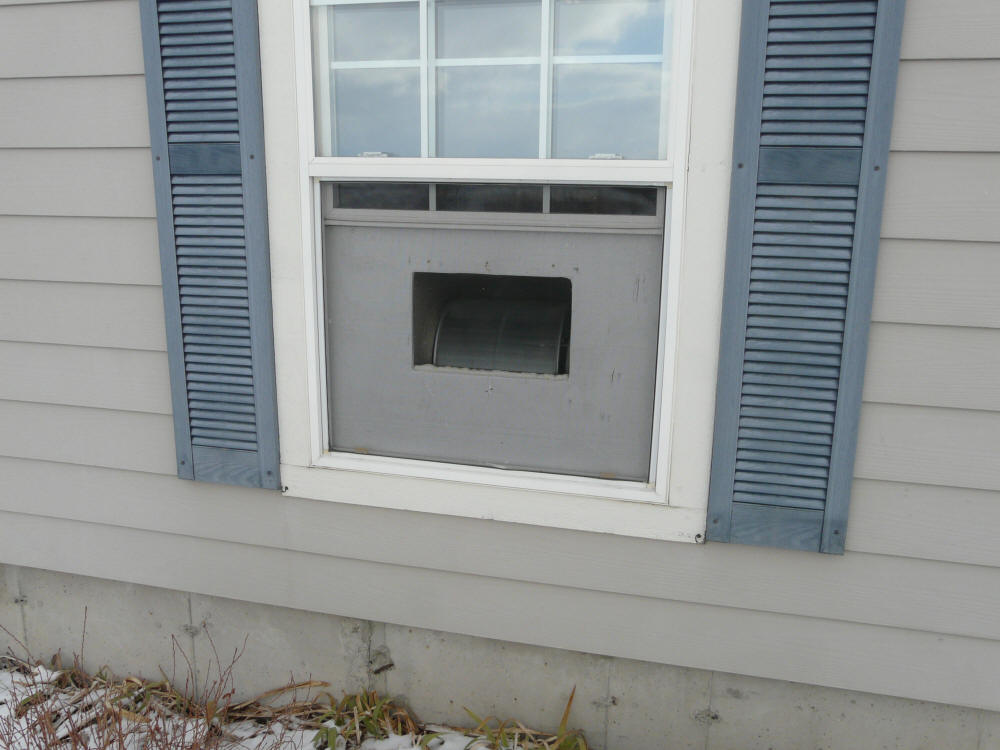
Blower door mounted in a window.
The pressure gage is sitting on top of
the roll around cooler. |

Spacers are used to push the plywood to one
side of the window frame so that it seals
against the frame.
You can see the tubing going out through a hole
in the plywood -- the tube carries outside pressure
to the meter. |
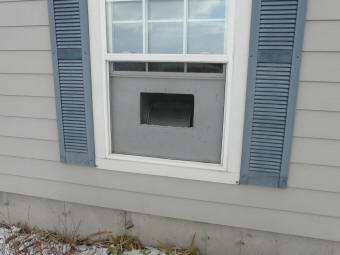
Outside view of the blower door installed
in my shop window. |
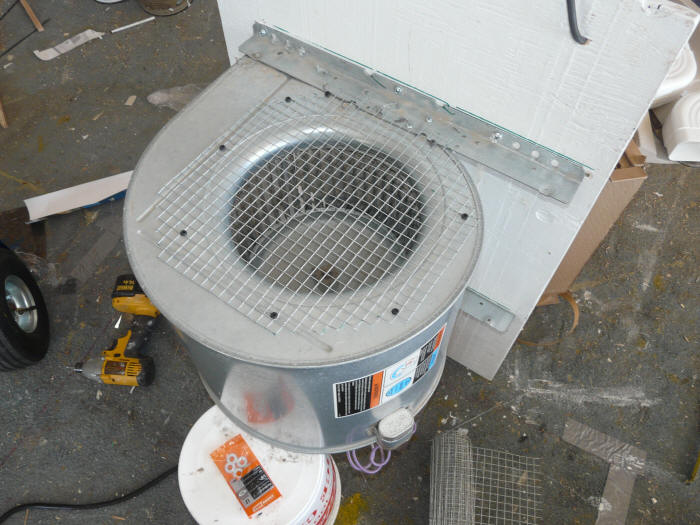
A screen over the open side of the blower intake made from half inch hardware
cloth.
Be sure to seal around any gaps between the mounting board and the blower
outlet, and also seal any holes in the blower housing. I used
silicone caulk for sealing.
You should provide a protective screen over the fan inlet to prevent it from
pulling valuable stuff into the fan.
For my windows, I was able to cut the mounting board just a bit wider than
than the window frame opening, then when installing the mount board, I push it
all the way to the left inside the window frame (where the window slides up and
down), then push the right side into place, and then slide the mount board a bit
to the right so that it is held by the window frame on both sides. Then
the spacers go in to push the mount board firmly against the outside flange of
the window frame.
Once the fan is in the window frame, slide the window back down so it rests
against the top of the fan mounting board. You may want to use something
like painters tape to seal any gaps -- this is more easily done from the outside
on my window.
Finding & Choosing A Furnace Blower
You can probably pick up a used furnace blower for free or cheap. I got
one some time back for another project for free from a local HVAC business -- I
just had to remove it from a furnace in their boneyard. The one I used on
this project came from the local Habitat Restore for $15.
The blowers commonly come in 1/3rd, 1/2, and 3/4 hp models -- typical
airflows are:
1/3 hp -- 1700 cfm on high, 1000 cfm on low -- about 8.5
ACH in a 1500 sf home on high
1/2 hp -- 2500 cfm on high, 1400 cfm on low --- about
12.5 ACH in a 1500 sf home on high.
3/4 hp -- 2600+ cfm?
Just for reference, a commercial blower door is capable of about 5000 cfm
flow. So, there will be times when the furnace blower version will not be
able to reach the full 50 Pa depressurization where a commercial door would.
The model I have is a half hp that produces about 2500 cfm on top speed.
It will produce about 12 air changes per hour in a 1500 sf house, and if the
house is reasonably tight, it will pressurize it to 50 Pa (the standard for blower
door tests), or maybe even a bit more. If its unable to pressurize the
house to 50Pa, it will still produce plenty of flow to help in looking for
leaks, and after plugging enough leaks, the house will get tighter and
eventually get to the 50 Pa. A method is provided in the
Flow Rates section to estimate what
the flow would be at 50 Pa for homes where the blower can't get it up to 50 Pa.
Wiring for multiple speeds
Most of the blowers have three or four speeds, and its good to have access to
all of the speeds when testing.
The diagram below shows one simple way to wire the furnace blower motor so
that you have access to all 4 speeds by flipping switches.
The on-off switch (surprise) turns the power off and on.
The first three way switch selects fan speeds 1 and 2 in one position and
speeds 3 and 4 in the other position.
The upper right 3 way switch selects either speed 1 or speed 2 when the first
3 way switch is in the 1-2 position, and the lower right 3 way switch selects
speed 3 or speed 4 when the first 3 way switch is in the 3-4 position.
For example, if you want speed 2, you would put the first 3 way switch in the
1-2 position and the upper right 3 way switch in the "2" position.
Maybe there is a simpler or more elegant way to do this? But, this does
work OK and is easy to use.
You could just have 4 single pole switches with one switch for each speed, but
you would have to be VERY careful to make sure you turn one speed off before
turning the other one on. Or, a rotary 4 position switch would be good,
but I was unable to find one at a reasonable price.
The three way switches are just ordinary hardware store switches intended for
hooking up lights that can be switched on or off from two locations -- they are
single pole double throw switches, and I just use them to select one of two
hookups. I think that 20 amp switches are preferable since you switching
motor start currents.
The blower motor is the circle at the right.
.png)
For the blower I have, the motor wires are marked this way:
| Speed |
Wire Color |
| High (4) |
Black |
| Med-Hi (3) |
Brown |
| Med-Lo (2) |
Yellow |
| Low (1) |
Red |
| Common |
White |
The color coding of the blower wires does vary from blower to blower. For the ones I've seen, white
has been common and black has been high speed and red has been low speed, but
the colors for speeds 2 and 3 have varied. The motor label may tell you,
or you can hook them up and see what speed results.
You will need to wire a power cord to go from the switch box to an electrical
outlet so you can plug the blower in. Use a 3 prong plug and wires of
adequate size -- #14 wire is good. Tie the ground wire on the power
cord to the ground terminal on all the switches and also run a ground to the
blower housing and tie it the power cord ground. Sometimes its easier just
to buy a an extension cord and cut off the female end and use the rest for the
power cord.
The motor will also probably have two wires going to the run capacitor which
will probably be mounted on the blower housing. The capacitor must be
hooked up for the motor to run correctly.
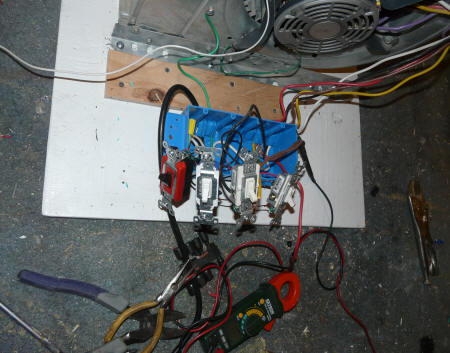
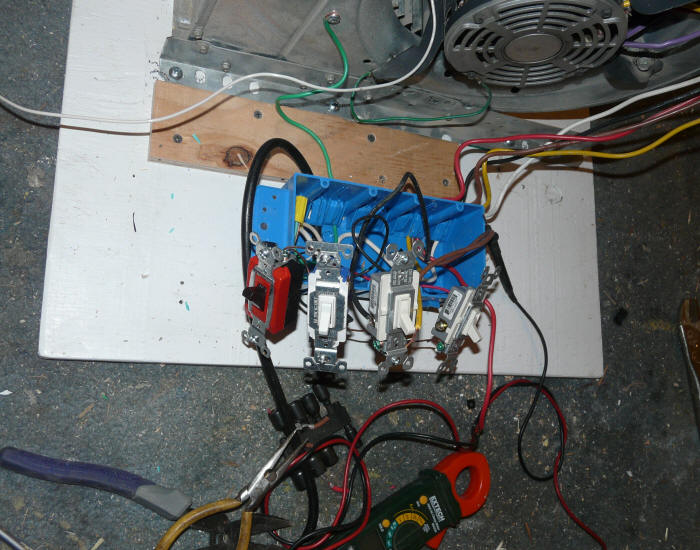
The 4 switches being wired
|
Switches in use (it ended up upside down of course) |
A note on furnace blower motors:
Furnace blowers are designed to work into back pressure from the house duct
system. With no load on them, they deliver a little more air, but they
also draw more power, and the motor current may be more than the rated
(nameplate) current. I think its a good idea to measure the amperage
that your blower draws, and if its substantially over the amperage draw listed
on the motor nameplate, it would be good to add some resistance. This
could be in the form of blocking a small part of the duct exit. In the
case of my blower, the current with no flow resistance is somewhat above the
nameplate current, and I'll probably add a little resistance.
Measuring Pressures
You can use the furnace blower door without having any way to measure the
pressure differential from the inside of the house to the outside, and it will
work fine for finding infiltration leaks. If you add the pressure
measurement capability, then the use of the blower door can be extended to check
how well your sealing is going, and to estimate your infiltration flow rate and
the heat loss due to this infiltration flow. The pressure being
measured is just the pressure difference between the inside of the house and the
outside -- for a given flow rate (blower speed), the lower this pressure is, the
leakier your house is. The pressure gage is basically measuring how hard
the fan had to work to pull air through the cracks and gaps in your house -- the
tighter and fewer the cracks the higher the pressure.
Commercial blower doors use very sophisticated manometers that provide very
good accuracy and many automated features, but they probably cost more than you
would want to pay for a blower door you will probably only use a few times.
Most of the time, I use a Dwyer Magnehelic meter that I picked up on ebay for
about $10 sometime back. A lot of them come up on ebay, or they are
available new from Dwyer for about $70. They are high quality and well made. The one I have is 0 to 0.2
inches of water (0 to 50Pa). This gives nice accurate readings up to 50 Pa
-- I can easily read it to less than 1 Pa.
I think that an ideal range would be 0 to 100 Pa, and Dwyer does sell such a
meter new for about $70.
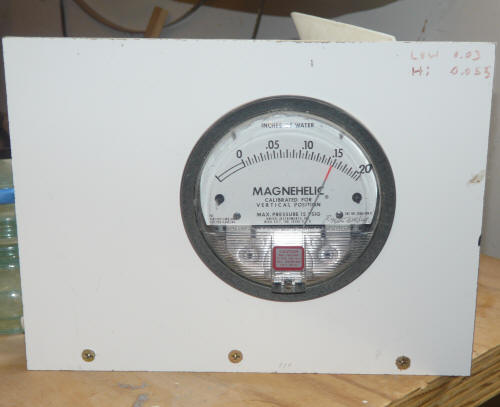
The ebay Magnehelic I use.
To measure the pressure difference between the house and outside, just place
the meter inside the house where you can read it easily. Then run a tube
from the meter to outside the house. I run this tube through a hole in the
blower mounting board. Be sure to have enough tube to get the outside end
away from the fan and to a sheltered area. When the blower is
setup to blow out (depressurize) of the house, hook the tube up to "high" port
on the meter, if the house is being pressurized, then hook the tube up to the
"low" port. Leave the other port open to the house air.
When the pressures are too high for the meter above, I use this lovely old
Dwyer oil manometer. I guess that being an old analog device myself, I
have a soft spot for other old analog devices.
Its quite accurate, nicely damped, hard to break, its obvious when its not
working right, never needs recalibration, and never needs software updates.
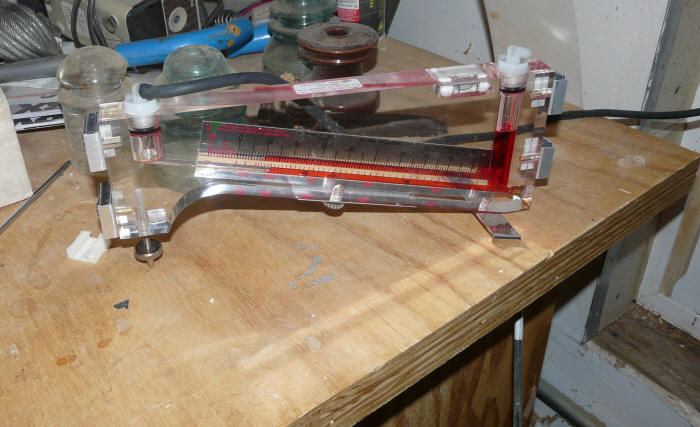
Another simple and cheap
manometer from Dwyer ...
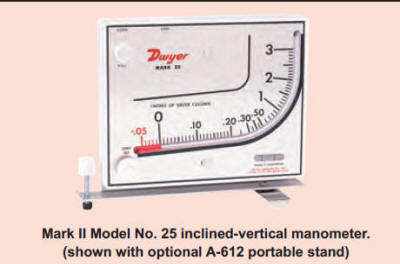
Each small division is 0.01 inches of water, so it can probably be read to about
0.005 inches of water or about 1 Pa. Cost from Dwyer is $34 new.
All of these meters allow you to hook up the tube to the outside and then,
with the fan not running, adjust the meter so that it reads exactly 0 Pa with
the fan not running. This basically zeros out the effect of any light
winds or stack effect.
I don't own any Dwyer stock -- I just happen to have accumulated some of
their stuff -- I'm sure other brands are fine also.
There are various digital manometers made by a variety of manufacturers --
these can be as low as $40. I don't have any experience with any of these,
but I suspect they would work fine. Just make sure that they will give
accurate readings at the relatively low pressures needed.
Measuring Airflow
On commercial blower doors another job of the manometer is to measure the
velocity pressure of the fan, and to convert that into a fan airflow rate so
that you know not only the pressure difference between the house and the outside
but also the airflow rate out the house that goes with it.
Furnace blowers have the nice property that over the range of pressure drops
of interest for blower door tests, the flow rate at fan each speed is
essentially constant. That is, regardless of the pressure difference
between the house and outside, the flow rate of the furnace blower on any given
speed will be nearly constant. So, if you can find the specifications for the
furnace blower and look up the flow rate for each speed at pressure drops in the
0 to 0.2 inches of water area, that will be the flow rate for your blower door.
Even if you can't find the flow rate specs, the flow rates for all of the half hp furnace blowers
I have looked at (all two of them) are quite similar. So, you might just assume your
blower is about the same.
Here are the flow rates for a Fasco half hp fan and the flow rates I measured
for my furnace blower:
| Speed |
Flow rate Fasco (cfm) |
Flow rate my blower (cfm) |
| 1 |
1220 |
1427 |
| 2 |
1450 |
1650 |
| 3 |
1800 |
1945 |
| 4 |
2400 |
2540 |
The specifications for the
Fasco blower listed above are listed on this Grainger catalog page...
Note that on high speed at 0 inches of water pressure drop, the flow is
2400 cfm, and when the pressure drop is 0.3 inches of water ( 75 Pa), the flow
has only dropped to 2380 cfm -- so, the furnace blower flow is very constant for the full range
of blower door pressures.
I measured the flow rate for my fan with a very tedious 75 point velocity
survey across a duct connected to the fan blower exit. This is a fair bit
of work and takes an instrument that can measure flow velocities accurately --
probably more than most people want to do. So, using the average of the
two values in he table above is probably fine.
Back to the main page on the DIY Blower
Door...
Gary February 22, 2013