Search
The Renewable Energy site for Do-It-Yourselfers
Building the Solar
Dino Swing and Neck
| This page shows how the solar dinosaur neck and swing are built and
assembled.
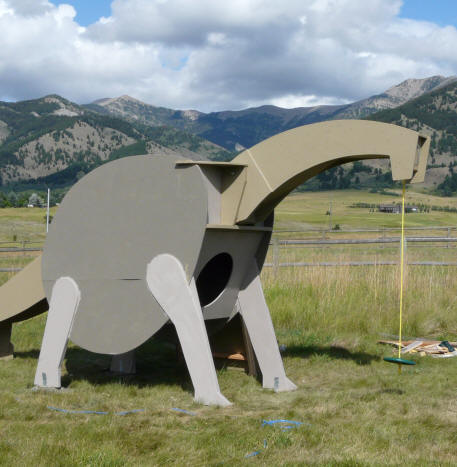
The dino has a neck that pivots where its attached to the body, and
bounces up and down on springs. this makes for a somewhat involved
pivot joint, as the neck applies a lot of force to the body as you
bounce up and down on it. |
|
The neck is a plywood box beam made
from 3/4 inch exterior plywood. The neck is put under quite a bit of
stress by the swing and pivot, and the box beam provides a very strong
structure. Since the neck is curved, the top and bottom of the box beam
has to be made in two sections, each covering about half the length of the beam.
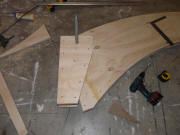
As for the other parts, the sketch on
the shop floor is transferred to the plywood and then cut out.
|

The dino neck side
pieces. |
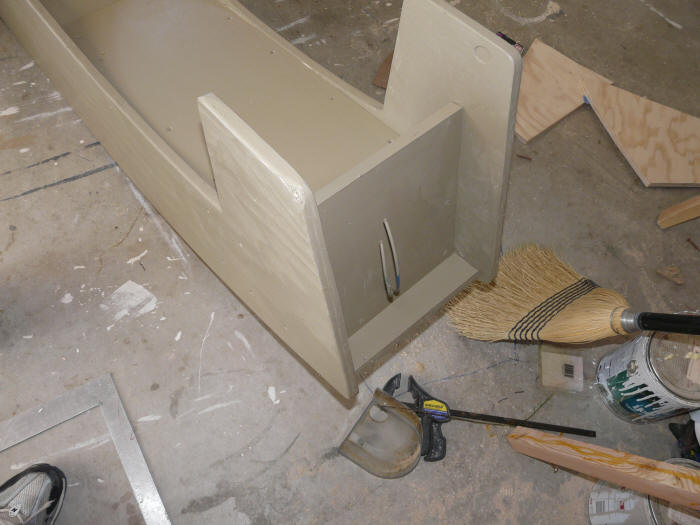
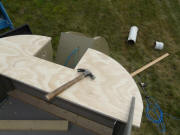
A trial assembly of the pivot
area. See note below. |

The neck box beam. |

The head end of the dino
neck. Note the wires
for the horn. |
The neck box beam is 12 inches wide,
and is assembled using the 2X2 cleats to reinforce the joints just like the rest
of the joints in the dino box. The side pieces of the neck are doubled
with a 2nd piece of 3/4 inch plywood near the pivot area for extra strength.
On the 2nd picture, note that I
miscalculated on the pivot location, and had to move and re-drill it
during assembly of the neck to the body.
The third picture shows the finished
box beam neck. The top and bottom of the box beam are made from 12 inch
wide, 3/4 inch plywood. The top of the neck beam is made from 2 pieces of
plywood because it curves too much to be made from one. Likewise the
bottom is also made from 2 pieces. The sides are attached to
the top and bottom via the same kind of 2X2 cleats as were used for the dino
body.
Once the box beam is finished and the
glue is set, you could hang an SUV off the end of it.
|

The neck joint starts
with a 2X6 horizontal piece
that the drill is sitting on.
Double plywood vertical
pieces are installed
so the neck just fits
between them. |

A horizontal 2X8 is added
across the top of the
drivers platform area. The
plywood piece in front
of the 2X8 will be installed
over the 2X8.
All of this is to get the pivot
load out to the side walls
of the dino. |

The neck in place with the
3/4 inch steel pipe that
serves as the pivot
installed.
The bounce spring balls
go just below the pivot.
|
This plywood piece and
the 2X8 just below it must
all be carefully glued and
screwed together and
to the sides. |
The neck to body joint is probably he
most complex element of the dino. If you bounce on the swing at the end of
the neck with a couple hundred pounds of force, it causes a forward acting force
on the pipe pivot joint about about 1300 lbs -- so pivot area needs to be strong
enough to handle this, and the large forward acting load also has to transferred
over to the sides of the dino.
Likewise, the bottom of the neck
applies a 1300 lb aft acting force to the dino body at the bottom of the neck.
This force is less of a problem, since it lines up pretty well with the drivers
platform floor, which is capable of taking a larger aft force.
On the 2nd picture, note that a
pocket is formed between the bottom of the neck and the front wall of the
drivers compartment. Rubber balls are placed in the pocket to act as
springs to give some bounce to the dino neck when you bounce up and down on the
swing.
The 2X8 and the plywood piece that
goes just above it are particularly important. Without these pieces, the
dino top of the dino neck would apply way to much force to the front wall of the
drivers compartment, and would break it. So, don't leave these out, and
install them carefully.
In the end, this whole neck joint
area turns out to be solid as a rock when built as shown.
One could attach the neck to the body
without the pivot joint, and this would make the joint simpler, but you still
need the same basic structure to transfer the neck load over to the dino sides.
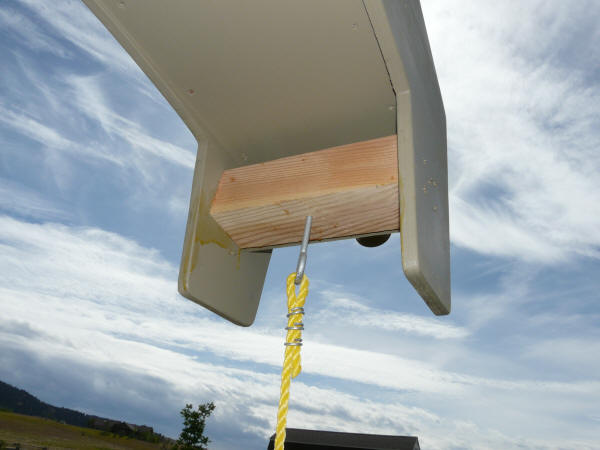
The swing was bought from the play
structure parts area and Home Depot. Its a simple platter that hangs from
an eye bolt. I installed a 4X4 across the width of the neck box beam to
hold the eyebolt. All of the other parts were included in the swing kit.
|

4X4 anchor for the
swing eyebolt. |
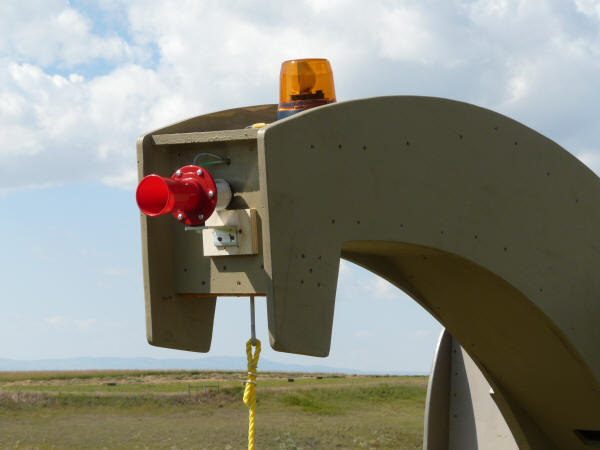
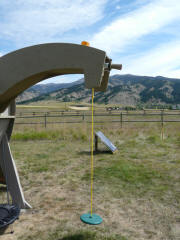
|

Swing attachment, horn,
and light |
The swing. |
Gary September 6, 2009