Search
The Renewable Energy site for Do-It-Yourselfers
DIY PV System --
Selecting the Right Components
|
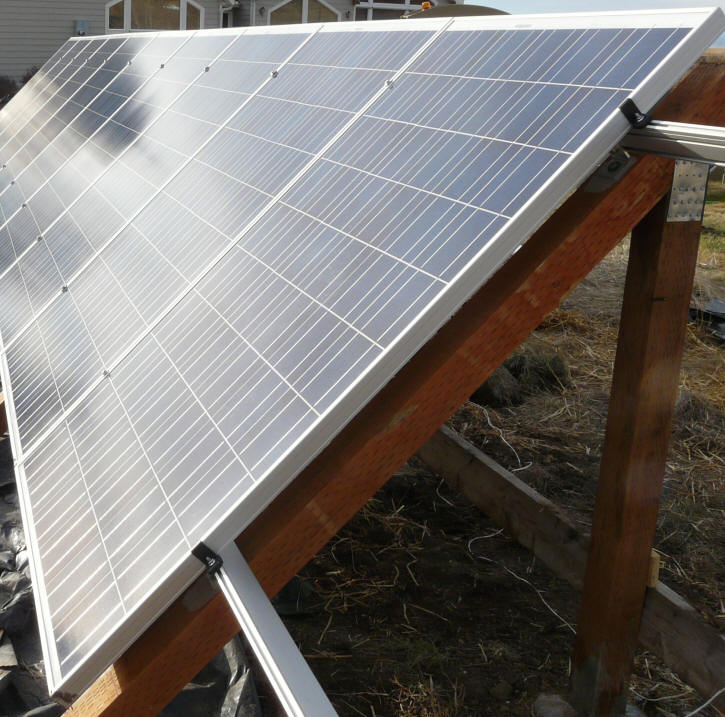
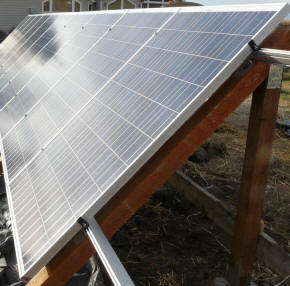
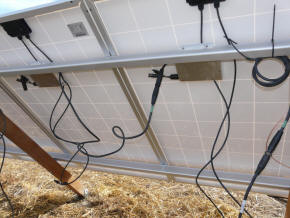
Panels with micro-inverters mounted |
|
Back to the PV
System page...
Having
decided on a grid-tie system, it was now necessary to decide on what
components (brands) of equipment to use to build the system. There are a
dazzling array of manufactures and products out there.
Inverter
There are now two fundamental types
of inverters to go with for grid-tied systems. The most common grid-tie
inverter configuration uses a single inverter for the whole system.
Several companies make these large inverters intended for grid-tie systems.
These inverters (sometimes called string inverters) are designed to take a
string of PV panels connected in series. The voltage from a string of PV
panels can be several hundred volts, and the string inverters for new grid-tie
systems are designed for these voltages. There are several good
manufactures of these inverters, including
Fronius,
SMA Sunny Boy,
Xantrex, ...
These inverters are highly developed
2nd generation products. The scheme they use, in which multiple PV panels
are connected together in a series string both simplifies the wiring and
increases the efficiency by keeping voltage drops down without the need for very
heavy wire gages.
The other fundamentally different
choice is to use an individual "micro-inverter" for each PV panel. In this
type of system, each PV panel gets its own grid-tie inverter to convert the DC
output of one PV panel into 240 volt AC, grid compatible power. As far as
I know the only company making such a system is
Enphase.
I think both of these approaches can
result in a good system, and we went back and forth for quite a while on which
way to go. In the end, we decided on the Enphase micro-inverter
system.
Some of the features of the
micro-inverter system:
- Each PV panel gets its own
inverter -- this means that each PV panel gets its own MPPT tracking, and
the PV panels do not have to be the same size or brand. Wholesale
Solar actually has a
demonstration system in which each PV panel in the system is a different
brand and power level.
- Expansion of the system is
easy, in that you can add additional PV panels and micro inverters -- the PV
panels do not have to be the same brand or size as the existing ones.
- If one inverter goes down, the
rest of the inverters continue to produce.
- Enphase has a unique system in
which each inverter reports how it is doing to an "EMU" unit which you buy
along with the system. The EMU unit in turn sends this information on
to the Enphase website. Each system gets a website set up by
Enphase which reports power production and any problems the system may be
having.
If you don't have a sufficiently good internet connection to support this,
you can connect a computer directly to the EMU and still get some simple
reports from it.
There is a $2 per year fee for
this online reporting per inverter per year.
Here are a couple examples:
Our
system...
Here is an example of the what it looks like on Guy's system...
- The inverters are designed to
live in a very wide range of environmental conditions.
- The system is probably a bit
more straight forward for a DIY home owner to install.
On the down side, multiple
micro-inverters means multiple potential failure points, and the even though the
company appears to be doing well, it is relatively new. When you look
strictly at the dollars per watt of inverter capacity, the Enphase system
appears to me to be more expensive, but it may earn that back with the way it
tracks and optimizes each panel separately -- that is, it may get more out of
the system.
In the end we decided on the micro
inverter approach by a small margin. Part of this decision had to do with
the ease of adding capacity to the the Enphase system. You don't have to
worry about having to replace your entire expensive single inverter, you just
buy as many more micro-inverters as you need, and if you can't get the same PV
panels you used on the initial system (a common problem), you can use different
PV panels. The other reason, which may be somewhat unique to our
situation, is that if we were to go with a single inverter, by far the best
place to install it would be on the outside wall next to my meter. But,
this is Montana, and while these inverters are designed for outdoor use, the low
end of the temperature range in the inverter specs does not go low enough for
our very low winter temperatures. This may be something that the inverter
can handle OK, as it would tend to warm up as it starts getting power from the
PV panels, but I got mixed opinions on whether it was a good idea or not.
If I were to mount the inverter inside (which some people recommended fairly
strongly), the whole job becomes significantly more complex. On the other
hand, the Enphase inverters are rated all the way down to -40F, and are designed
for long term outdoor exposure.
We found the Enphase customer support
people easy to get hold of, knowledgeable, and genuinely interested in resolving
the couple small questions and problems that came up. They also provide a
good library of
downloadable docs on the system that cover the installation well...
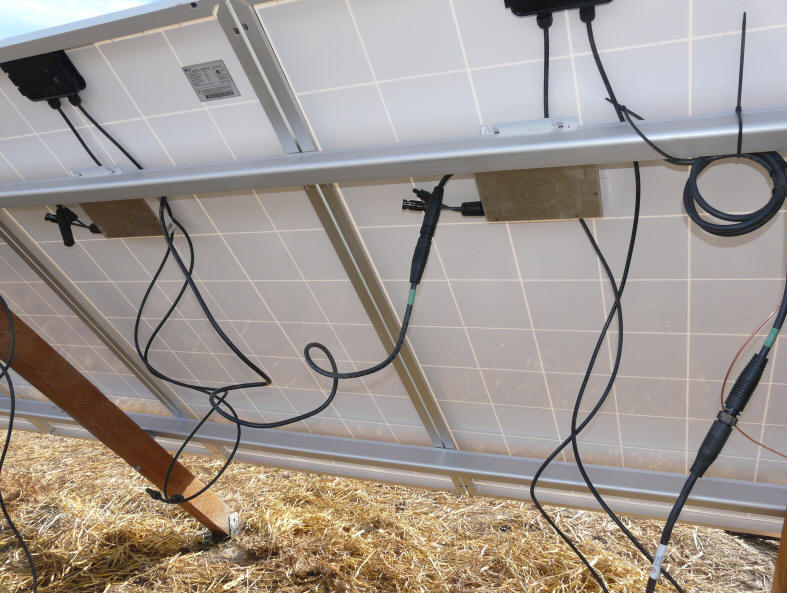
|
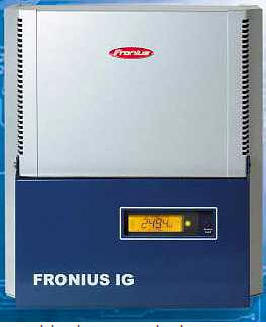
A 3000 watt Fronius grid-tie string inverter |
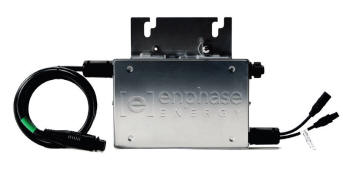
An Enphase 190 watt micro-inverter |
| |
Update January 7, 2010: One small concern I had
about the Enphase micro inverters is that they are recommended and often
packaged with PV panels that have a higher power output rating than the
inverter itself has. For instance my system uses the 190 watt
inverter with 215 watt PV panels. We have had a chance to
see how this works out -- details here... |
PV Panels
Having selected the Enphase
micro-inverter system, the only other significant choice on components was to
select the PV panels.
The most commonly used Enphase
inverter (right now) is the 190 watt model. This inverter handles a wide
range of PV panels up to 230 watts. Enphase publishes a
list of modules that are compatible with each of their inverters. You
need to make sure the PV panels you buy are on on this list. While there
are many brands and models on the list, some well known brands (e.g. Evergreen)
are not on the list because their panels are not electrically compatible with he
Enphase inverter.
I ended up selecting PV panels made
the REC
Group. To be honest I had never heard of these panels until I saw them
in the WholesaleSolar kit, but when I looked into them and the company, they
appear to be a high quality choice. They seem well made, and have worked
fine so far (all 3 days since I put them in :).
One good thing about the way the PV
industry has matured is that there are lots of good choices out there, so have a
look around, and see what seems to fit your situation.
|
 |
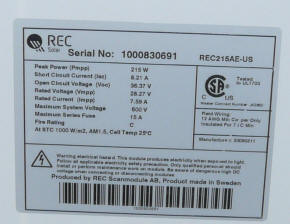
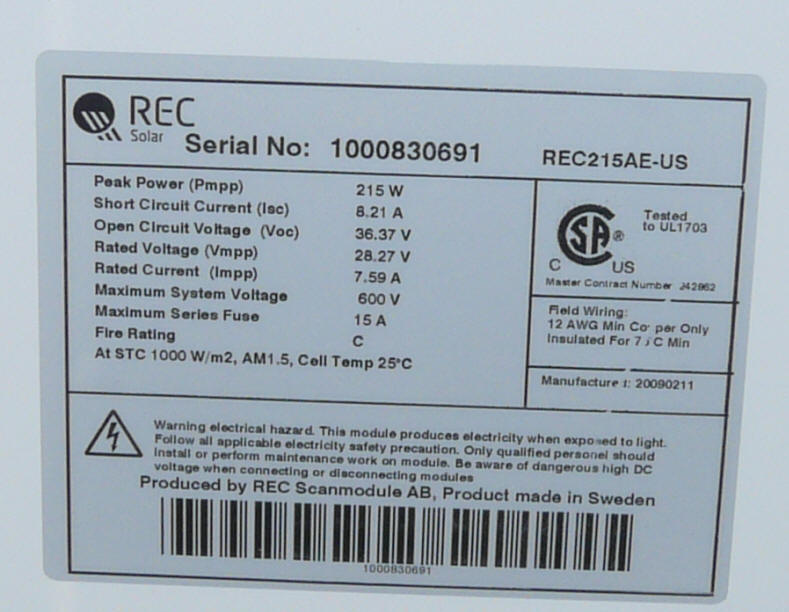
The PV panels must have the UL1703
label for grid tied systems. |
 |
Other Components
About the only remaining components
are:
- An AC disconnect switch near
the meter. This is a very standard, off the shelf item. I just
bought the one that the outfit I bought the system from used.
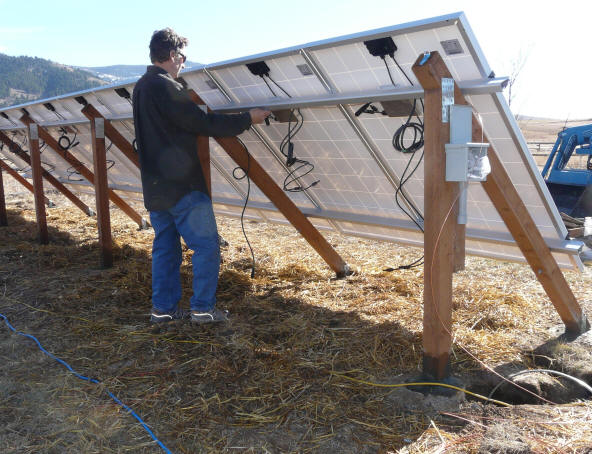
- A junction box at the array
where the connection from the string of Enphase inverters is made to the
underground wire that runs to the house and meter. I went with a large
metal box that our local hardware carried.
The Kit Approach
We ended up buying most of the
components for the system as a kit from
WholesaleSolar.com
--
this is the kit we got...
The kit approach (I think)
turned out to be a good way to go.
Wholesale Solar was good to deal
with. They always answered the phone and were willing to answer questions, the
kit was pretty complete and the components supplied in the kit were all high
quality. They also met all of their time and delivery commitments. To
the extent that I looked into it, their prices were competitive. I'm sure
there are lots of other good outfits out there, but there are also definitely
some marginal ones as well -- I would take the time to at least talk to your
prospective source over the phone -- ask them a few questions, and try to get a
feel for whether or not they will be there if you have a problem.
If when you read "kit" you are
expecting a Fisher-Price style insert slot A in tab B level of instructions, you
will be disappointed. The kit basically includes the parts you will need
and that's about it. It will be up to you to read the individual
installation manuals from the manufacturers and work it all out.
Also, be aware that kits are
offered by a lot of retailers, and content of these kits varies quite widely.
Some are way short of what will be needed to do a system -- for example, some
don't even include the PV panel mounting rails. Even the kits that
are fairly complete will almost always require adding some parts. You
really need to figure out what you will need right down to the last little
clamp, nut and washer and then compare this to what's in the kit to see how much
extra will be needed. As it turns out, the Wholesale Solar kit
assumed that the 10 PV panels would be installed in two rows of 5 (probably the
most common arrangement), but, since we were doing one row of 10, the kit came
short one set of mid row PV panel clamps, and with an extra set of end of row PV
panel clamps -- had I done a careful job of verifying what I wanted, I could
have saved an extra order and shipping time.
I think that we could have done
somewhat better on total cost by looking very hard for bargains, doing a roof
mount system, and (possibly) with a single inverter system. But, we are all
around pleased with the system and feel it was worthwhile to spend a few more
bucks in some areas.
Gary November 22, 2009