A Large Shop Thermosyphon Solar Air Heating Collector
This is Ivan's large shop heating thermosyphon solar air heating collector.
It is 6 ft high by 40 ft wide. This 240 sqft of collector will likely provide in excess of 40,000 BTU per hour on a sunny winter day.
These collectors are very effective heaters and since they rely on thermosyphoning to move air through the collector they do not need any fans, controls, or power. The only moving parts in the whole collector are the simple backdraft dampers that prevent reverse flow at night. At about $3 to $5 per sqft of collector, these are one of the fastest payback solar projects that it is possible to build.
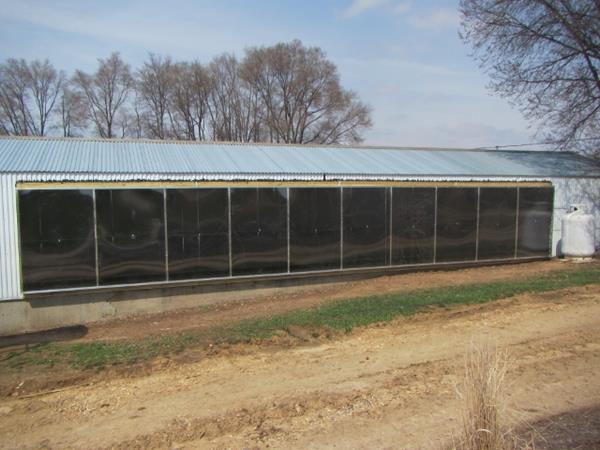
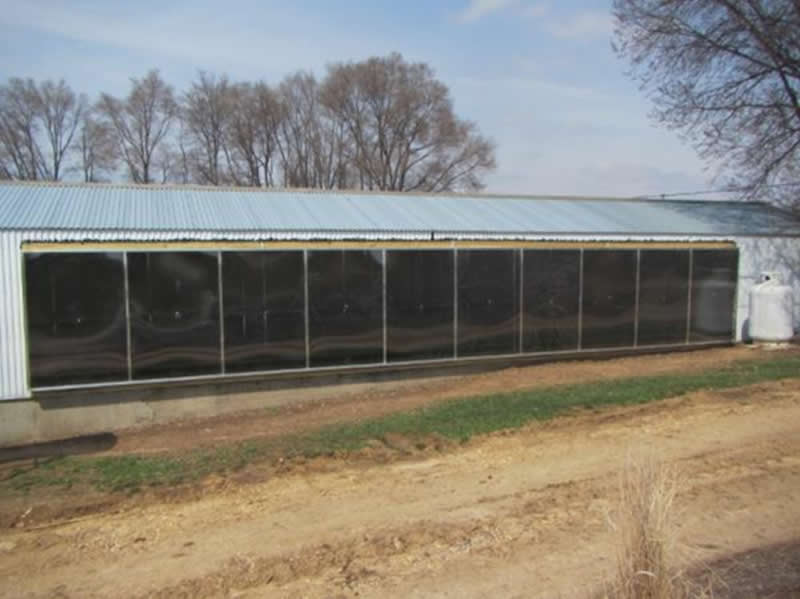
Ivan's completed 6 ft high by 40 ft wide thermosyphon solar air heating collector.
Thanks very much to Ivan for documenting this project!
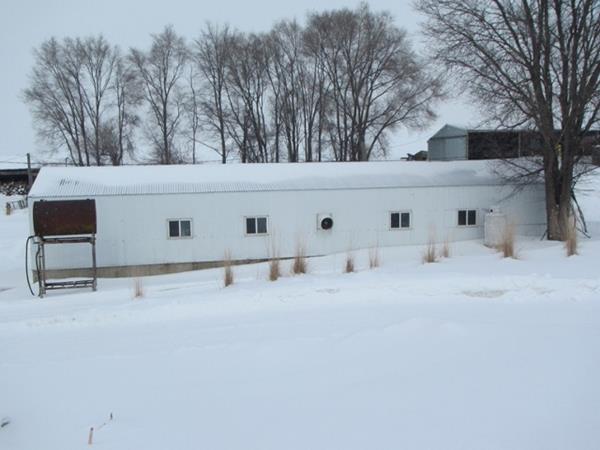
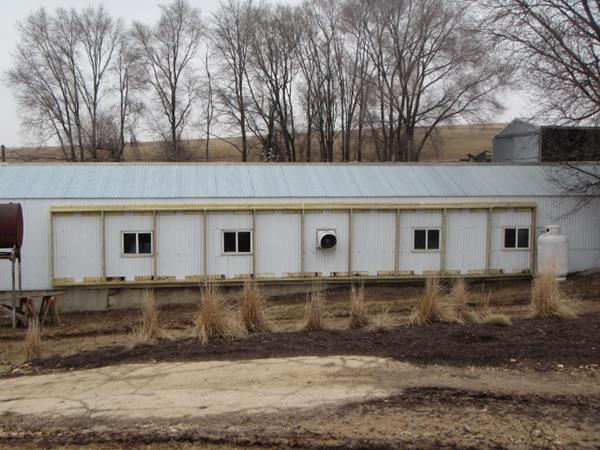
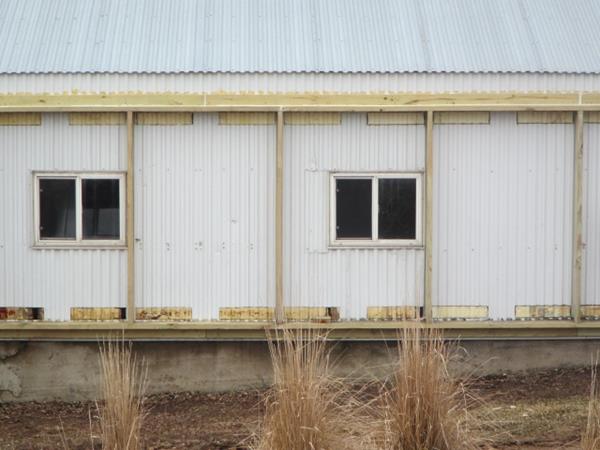
The left picture above is the before and the right picture shows the completed collector.
The collector is 6 ft high and 40 ft wide, and is glazed with 4 ft wide by 6 ft tall twinwall polycarbonate panels.
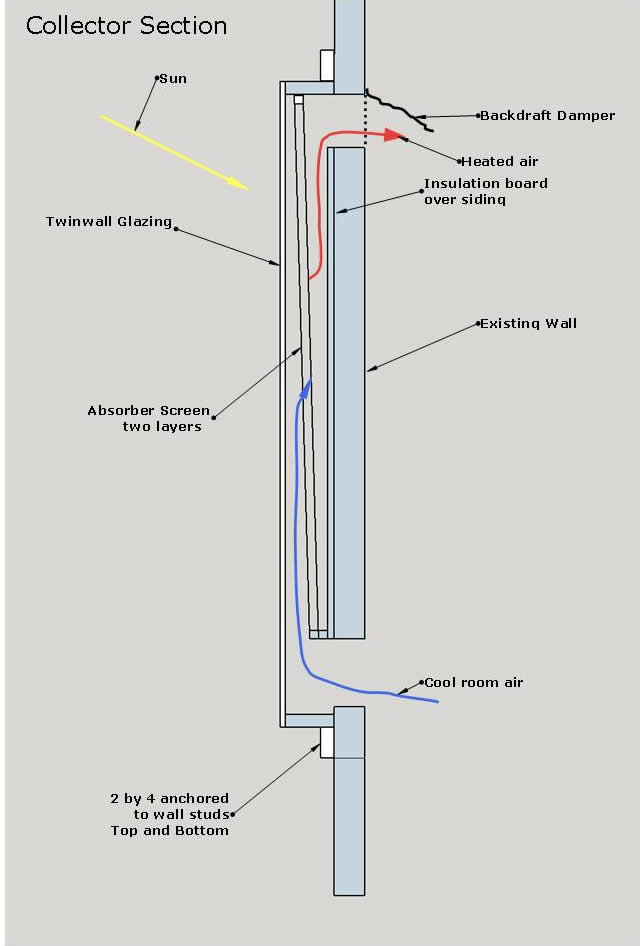
The sun shines through the collector glazing and heats the screen absorber. This heats the air around the absorber, which becomes more bouyant and rises out the top collector vent. This pulls new cool air into the lower collector vent. The backdraft damper prevents reverse airflow at night, which would cool the room.
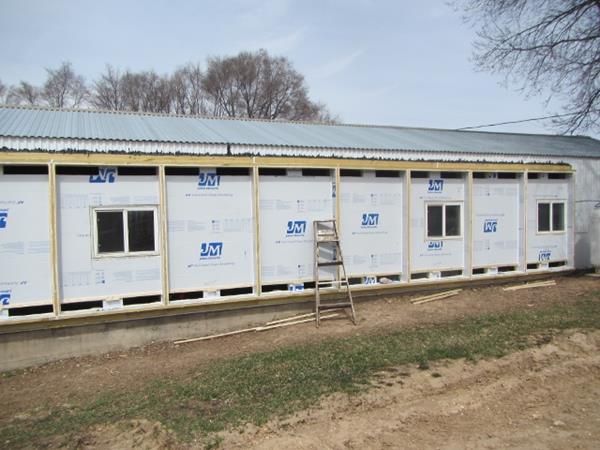
Building the Collector Framework
The frame work for the collector is built right on the south wall of the shop and starts with building the frame with 2 by 6's.
Frame up and starting to cut the openings for the inlet and exit vents.
Close up of the vent openings.
I put 2x4’s on first along the top and bottom for the full length of the collector with the 4 inch against the building and fastened them with long screws through the tin and into the studs wherever I could find one. I screwed the bottom 2x6 to the 2 inch part of the 2x4. The top 2x6 was screwed to the bottom of the 2x4 that runs along the top. I had to spray-foam behind all this to fill in the corrugations in the metal siding. I tarred the top of the 2x4 to keep out the moisture but will eventually put on a metal cap.
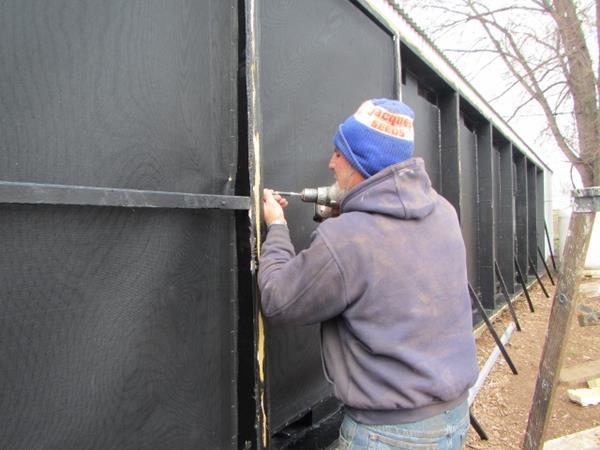
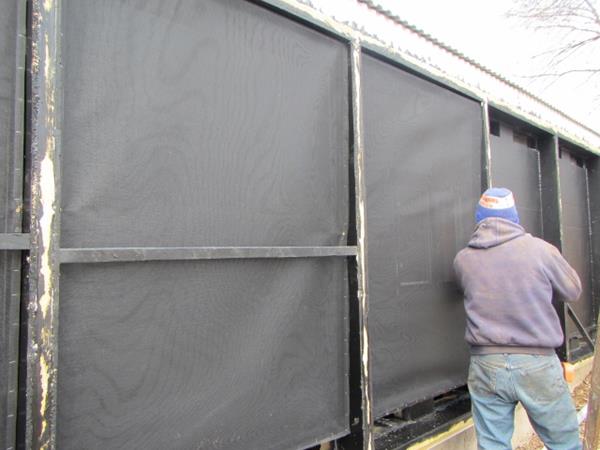
Silicone caulk was used to carefully seal the collector to prevent air leaks.
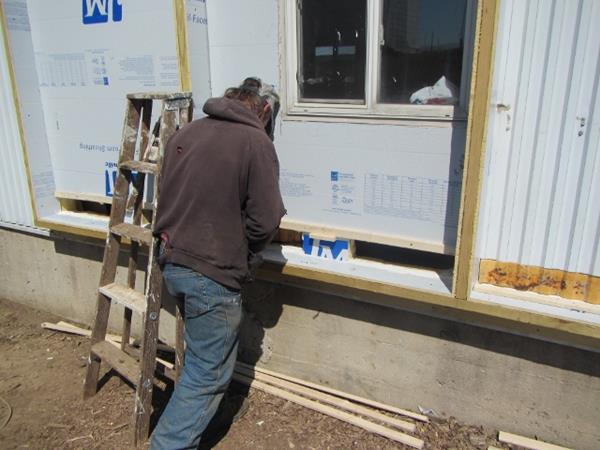
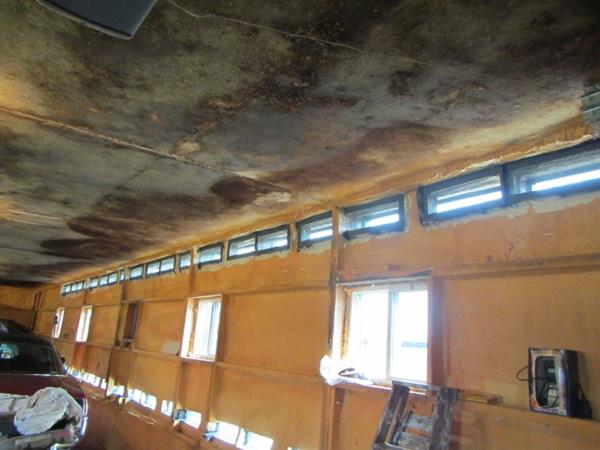
Building the collectors over the existing windows allows for an uninterrupted collector. The screen absorber in the collector will still let a lot of light through the windows.
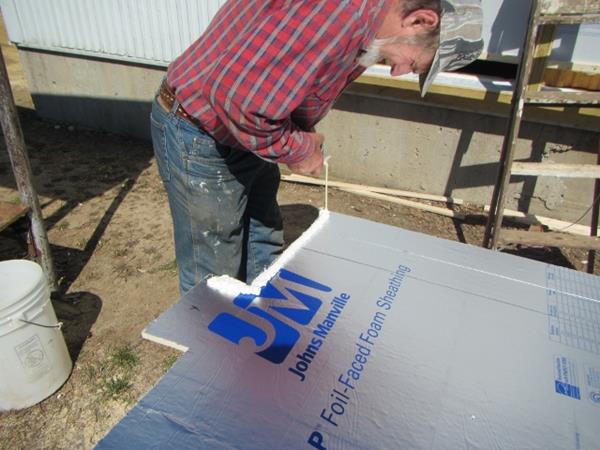
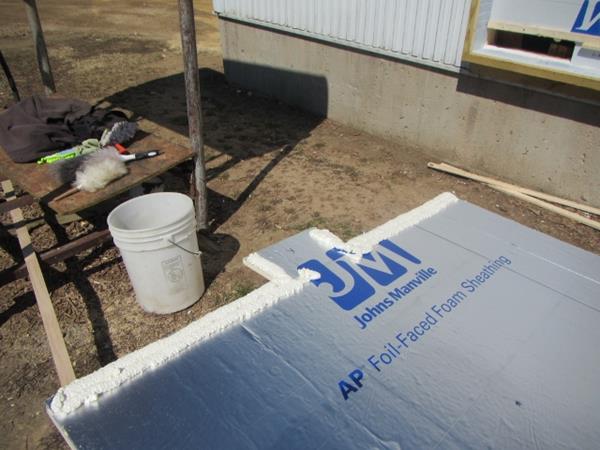
Insulating the Back of Collector
Bead of spray foam on the edges of the insulation panels before putting in place.
Another picture of the insulation board with spray foam.
The insulation that forms the back wall of the collector is cut to size. A bead of spray foams adheres the insulation board to the shop siding.
Screwing on the bottom support and spacer for the absorber screen.
All back insulation and supports are in -- ready to start installing absorbers.
Painting the insulation flat black.
Close up of painted insulation.
Painting the insulation panels flat black. The benefit of painting the back of the collector black is that light that gets through the absorber is absorbed by the back wall and air flowing past the back wall picks up this heat and delivers it out the exit vent to the room.
In right picture just above, the absorber sits on top of the narrow piece of wood at the top of and between the two lower vents. The spacer just above this prevents air from going behind the absorber -- all of the air entering the lower vents goes to the glazing side of the absorber, and then works its way through the absorber screens as it goes up toward the top vents.
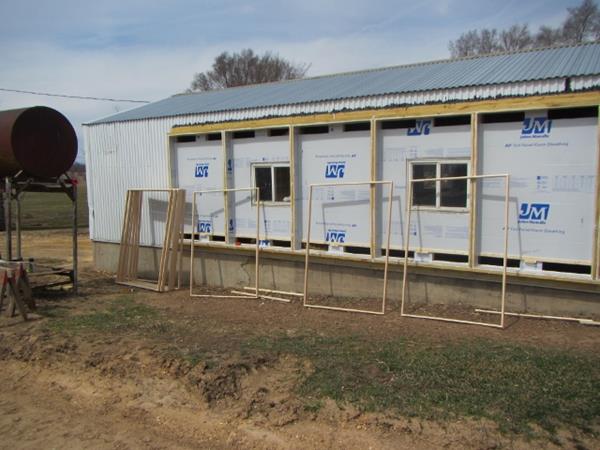
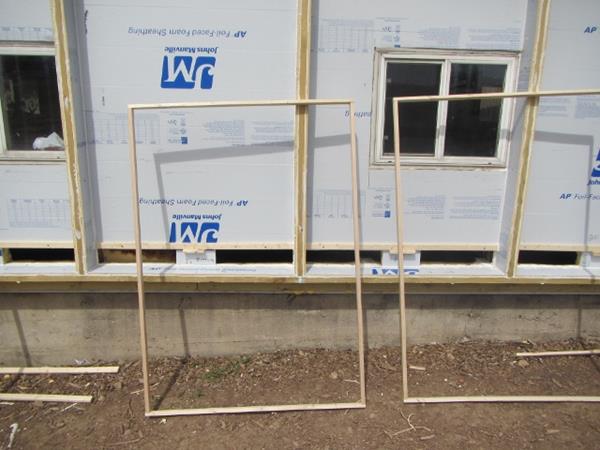
Building and Installing the Absorber
Making the absorber frames.
Close up of absorber frames.
The absorber is made from two layers of plastic mesh screeiing screening. One layer of screen is stapled to the front side of the absorber frame and the other layer to the back side of the frame. The sun is absorbed by the screen, and the air passing through he screen picks up the heat.
Screwing in the absorber screens and the middle support for the glazing.
The horizontal support half way up the collectors supports the twinwall glazing and keeps it from bowing as the collector heats.
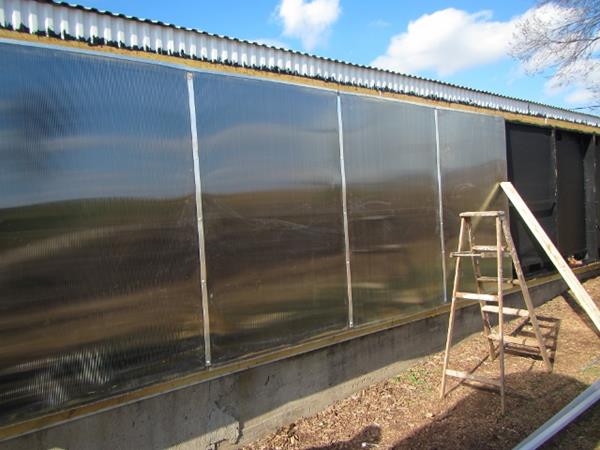
Installing the Collector Glazing
Installing the twinwall glazing using aluminum angles and flats.
The finished outside of collector.
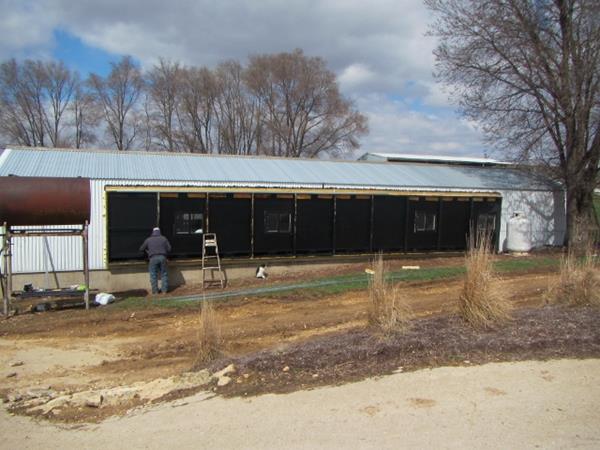
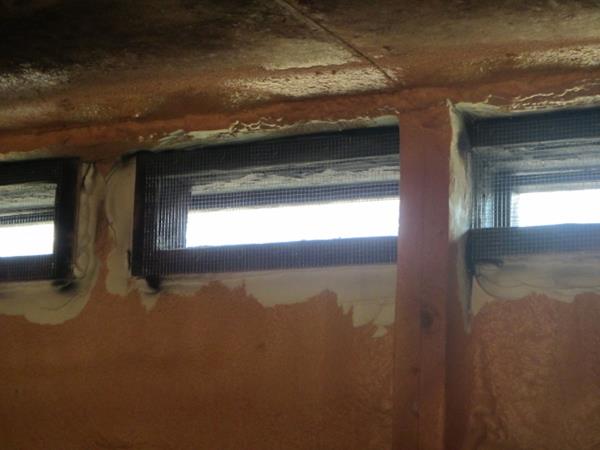
Building and Installing the Backdraft Dampers
Each of the top vents is surrounded by a frame that holds the back draft damper poly.
Wooden vent frames held in place with a bead of spray foam and screws
Close up of the back draft damper support frames.
The backdraft dampers act as one way valves that allow heated air to flow up out of the collector and into the room, but prevent the reverse flow of cold air out of the collector at night.
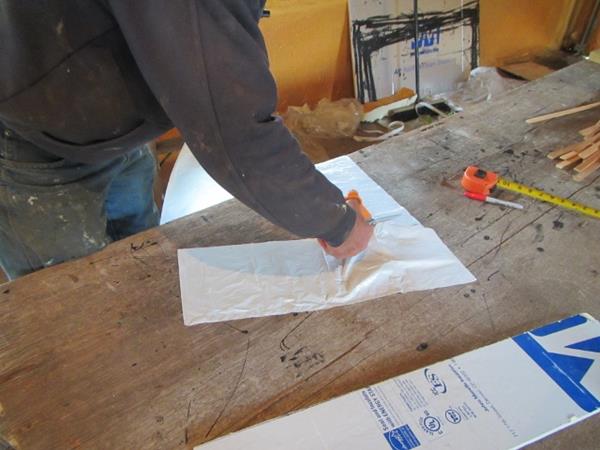
The backdraft dampers are made from polyethylene garbage bags -- they have to be light enough so that the heated collector air blows them open easily.
A layer of hardware cloth backs up each damper so that it does not get blown through the hole by the reverse flow at night.
Cutting the plastic trash bags to make the backdraft dampers.
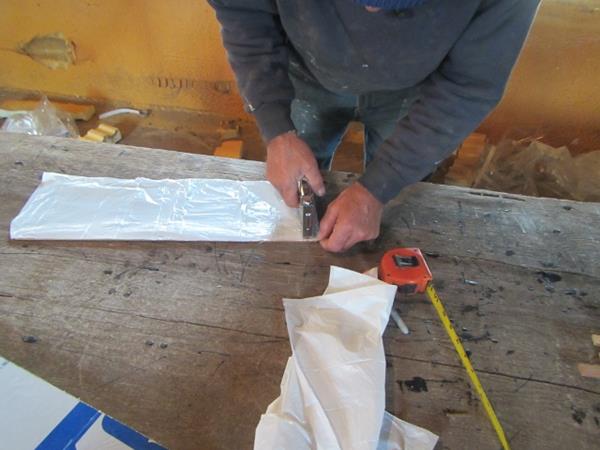
Stapling the backdraft damper film to the wooden strip at the top of the damper.
A wooden strip is attached to the top of each backdraft damper along its top to facilitate fastening it to the backdraft damper frame.
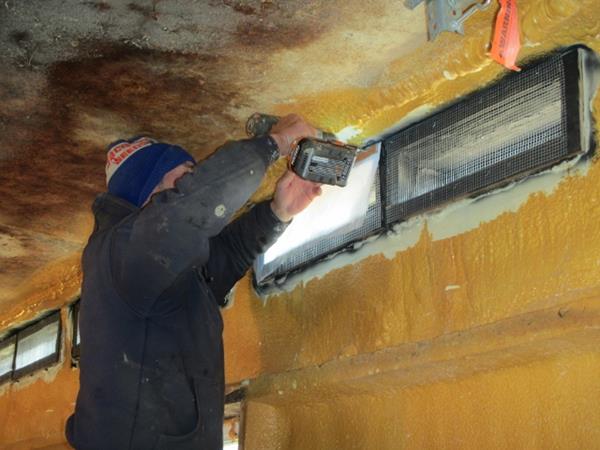
Attaching the backdraft damper to frame using the wooden strip on the damper film.
Warm air coming through right away.
All Done
Cost
The total cost was a bit over $1100 or about $4.60 per sqft -- with some useful scrap left over.
I used top quality materials including: treated lumber, twinwall polycarbonate glazing, and aluminum glazing cap strips.