Search
The Renewable Energy site for Do-It-Yourselfers
ProMaster Camper Van Conversion -- Installing the Floor
|
This page will cover the installation of the finished floor for the ProMaster camper van conversion.
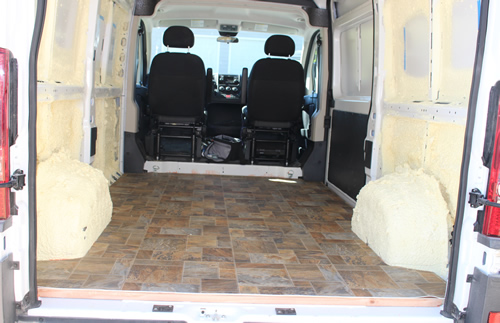
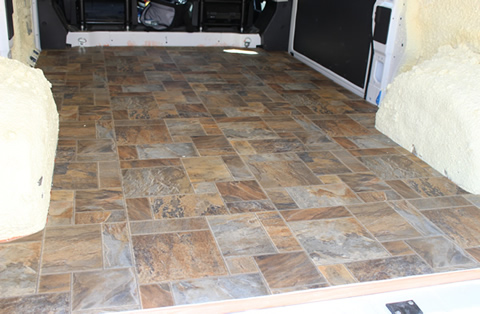
We decided to go with a Vinyl sheet floor. Thought about carpet, but decided it was too likely to get dirty and be hard to clean.
The Vinyl sits on top of thin plywood and an inch of insulation board.
Go back to the main camper van conversion page...
|
|
| |
Important Update
The material on these pages describing our camper van conversion has been moved to our new new site dedicated to efficient RVs and camper vans.
The new site covers all the material here and adds a lot of new material on other camper van conversions, camper van design and build, resources for people converting vans, other efficient camping vehicles, new ideas in efficient RVs and camper van travel hints.
The new site is here...
I'm leaving these pages here as you may have bookmarked them and the Comments section has some good suggestions, but I suggest that you go to the new site -- I won't be updating this material anymore.
Thanks to all the people who read these pages and especially to the people who left comments and suggestions! Feedback on the new site is very much appreciated.
Gary
|
|
Construction
From bottom to top, the floor constructing is:
- The truck floor, which is ribbed.
- Plywood slats to fill in the spaces between the ribs in traffic areas.
- An inch of rigid foam board insulation.
- A layer of quarter inch plywood
- The Vinyl sheet floor
The insulation is bonded to the truck floor with Great Stuff polyurethane foam, and the quarter inch plywood is in turn bonded to the top of the insulation board with Great Stuff.
The Vinyl sheet floor just floats on top of the plywood.
The quarter inch plywood might seem on the thin side, and it probably is, but we are trying to minimize weight, and using 3/4 inch plywood would have added about 70 lbs. The way everything is bonded together with the foam polyurethane, the steel floor, insulation, and thin plywood act as a single unit, and the finished product seems quite stiff and strong to walk on.
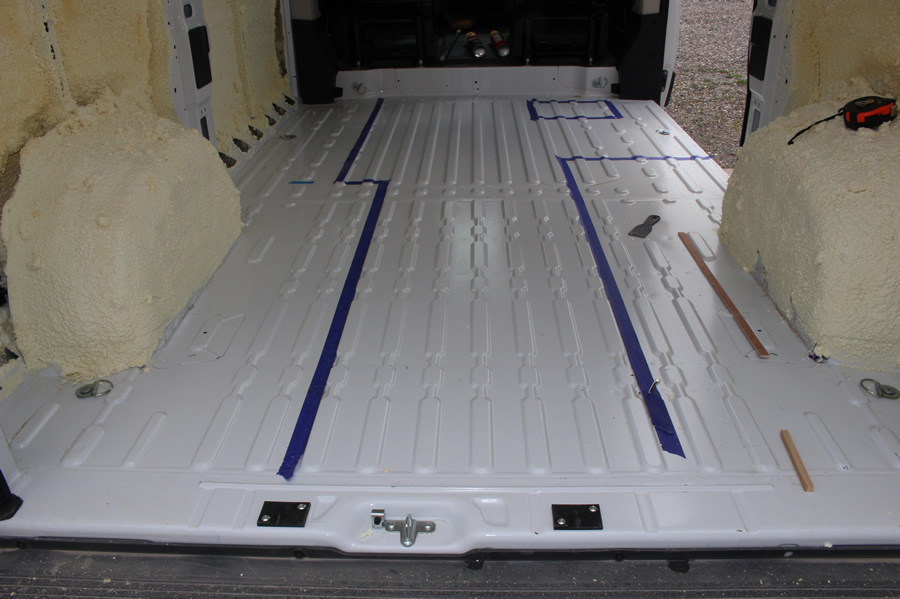
This is the ProMaster floor before starting. Note the low spaces between the floor ribs.
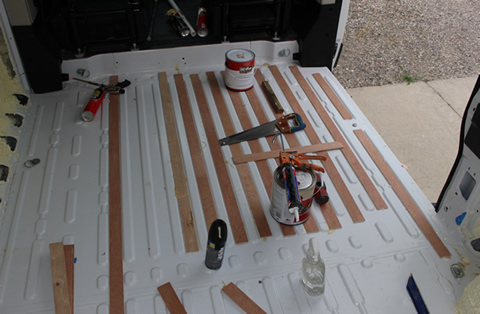
Filling the Space Between Ribs
I filled the spaces between the floor ribs with strips of 1/4 inch plywood glued to the metal floor in order to give the insulation a flat surface to rest on.
These pictures show the filler strips going down. I only used them in the areas subject to foot traffic, not under the beds or galley. The paint cans are weights while the glue dries.
I tried a couple of things to glue them down the -- I wanted something that would not require weighting.
The XXX worked pretty well for this.
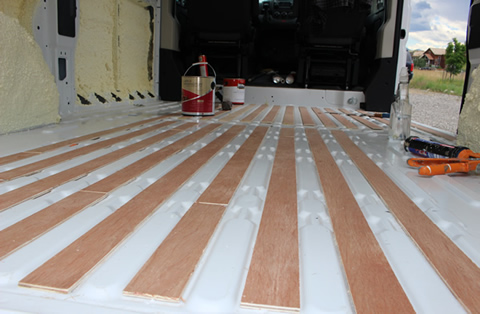
Insulation Board
The insulation board I used is 1 inch thick polyisocyanurate rigid foam board. The brand I used has thin face sheets that appear to be made of a fiber reinforced material. Atlas RBoard is one brand that has this kind of face sheet. I think that the more normal polyiso with the reflective alum foil face sheets would also work OK -- I used the ones already had on hand.
The left pictures shows cutting the foam board to fit the wheel wells and the front step up area.
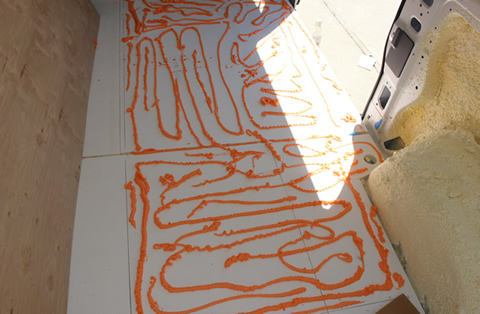
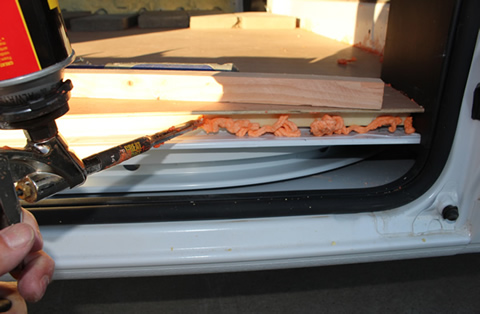
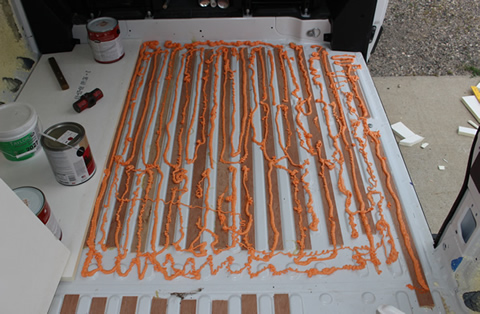
I used beads for Great Stuff polyurethane foam in a can to bond the insulation panels to the floor (its the orange stuff).
I used the Great Stuff Pro version, because I had it on hand, but the regular Great Stuff (I think) bonds even better.
Using Great Stuff for an adhesive might seems strange, but I've used it on a number of projects and it works well -- its a very tenacious adhesive, and it fills voids well.
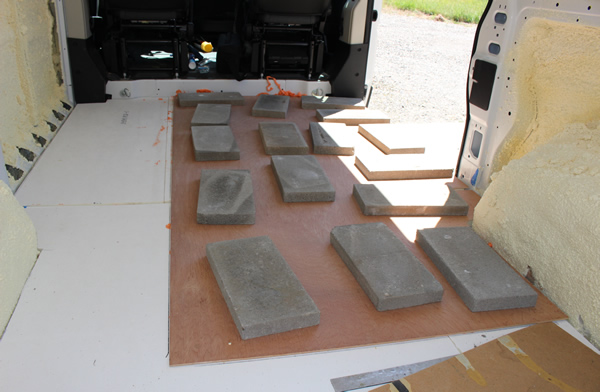
This shows the foam insulation board being weighed down with concrete pavers we had around. The weights keep the foam from expanding upward and pushing the foam board up.
I drilled out the the tiedown locations that would be located under furniture for any potential future use. This turned out to be all but two of the tiedown locations.
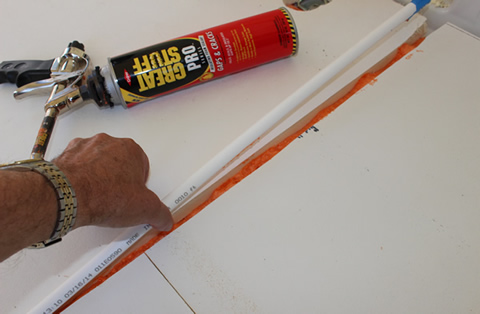
Water Pipe
We are going to have the fresh water tank on the passenger side just aft of the sliding door, and the galley sink is on the drivers side, so I needed to run a water supply pipe between the two. Running under the floor seemed like the most logical place for the pipe.
Its a little hard to see in the left picture, but there is a space between the forward and aft insulation panels just wide enough for a half inch PEX line. The PEX tubing is white and is already in the groove.
The right picture shows the groove partly filled with Great Stuff (for insulation under) with the PEX pipe being pushed into the groove.
I will probably have to use a SharkBite elbow fitting to connect to each end when doing the plumbing as its probably to tight to get the crimper in.
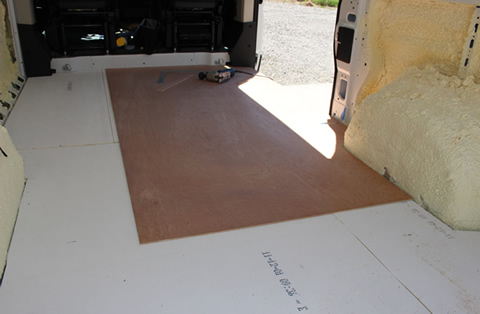
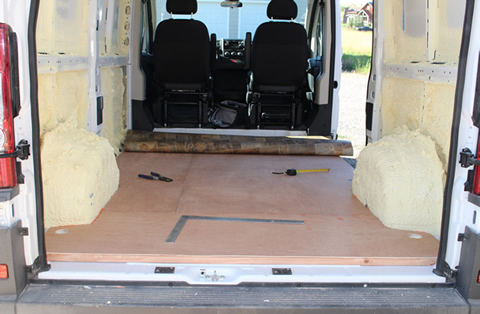
Plywood Floor
I used 1/4 inch laun plywood over the insulation board. This spreads out the load of walking on the floor to enough area that the underlying insulation board does not dent when you jump on it.
The left pictures shows the plywood sheet being trimmed to fit the wheel wells and the front step area. I positioned the plywood so that the seams did not coincide with the insulation board seams.
The right picture shows the Great stuff over the insulation board to bond the plywood and the insulation board together.
The pictures shows the plywood weighted down while the Great Stuff is curing.
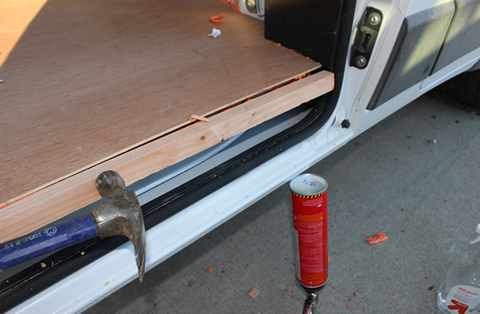
Edge Strips
I put in wood edge strips to support the edge of the plywood at the two doors, to keep the edge of the insulation from being compressed down.
The left picture shows how the plywood overhangs the insulation board by about an inch to allow room for the edge board that supports the edge of the plywood. The edge board is sitting on the plywood just above. I put a bit of Great Stuff in before installing the edge board just to bond things together.
The right picture shows the edge board being tapped into position.
There will eventually be a metal molding to protect the edge of the Vinyl.
Vinyl Floor
We decided on a Vinyl floor because it would be easy to clean.
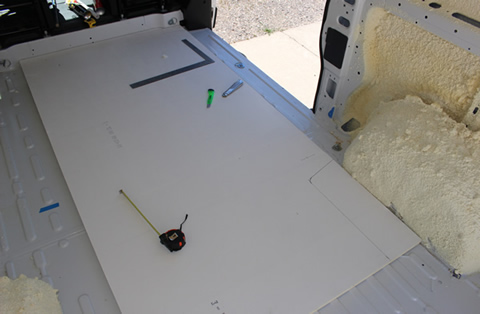
I cut the Vinyl to 72 inches wide and 122 inches long and then unrolled it in the van.
Trimmed the edges by just pushing it into the corners and edges and cutting with a utility knife -- leaving about 1/8 inch for expansion -- this goes surprisingly fast.
After reading the instructions on the adhesive can and talking to the floor store person, we decided not to glue the floor down, but just let if float. The adhesive says that repeated freeze thaw events and temperatures below 10F may damage it (not sure if the "it" is the adhesive or the floor), and the floor store people said that they have some difficulties with RVs that live outside and some types of Vinyl floor cracking with the heating and cooling cycles. According to the floor store, the floating installation is fine and they do it quite a bit.
Will probably do something later to finish the step up to the seats at the front (or not).
Cost, Weight and Time
The time to do the floor was about 2 1/4 days -- these are lazy old retired guy days, so you might do much better.
| Item |
Cost ($) |
Weight (lb) |
| 3 sheet luan plywood |
$36 |
37 |
| 2 sheets 1 inch polyiso insulation |
$38 |
16 |
| Vinyl Floor |
$110 |
26 |
| Great Stuff Foam (about 1.5 of the Pro size cans) |
$20 |
1? |
| |
|
|
| Total |
$204 |
96 lbs |
The weights are based on the actual square footage used, while the costs are based on the materials bought and include waste.
Go back to the main camper van conversion page...
Gary
July 21, 2014

.JPG)