Search
The Renewable Energy site for Do-It-Yourselfers
Portable Water Catchment for
Livestock
|
Ray describes the portable livestock
shelter and water catchment system he built. A nice simple,
efficient, and inexpensive design.
Thanks very much to Ray for providing
this!
|
|
Water catchment system with in line filter for watering livestock.
I built a moveable shed for the goats and the cow out of
livestock panels, 2x4’s and a tarp. I bought gutters and attached them to the
sides with baling wire. The roof is 8 x 14. A 1” rain will provide 70 gallons
of water. I decided 4 barrels would be enough for 3 goats, a cow and half a
dozen chickens. Four full barrels supplies them with water for 50 to 75 days
without rain. The design of the goat house is based on Joel Salatin's
designs.
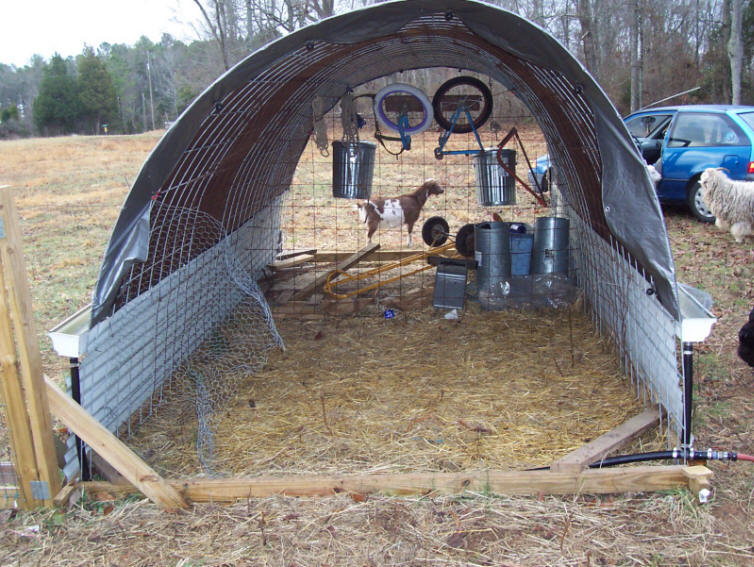
Portable livestock shelter that includes rainwater catchment, storage,
filtering, and water basin.
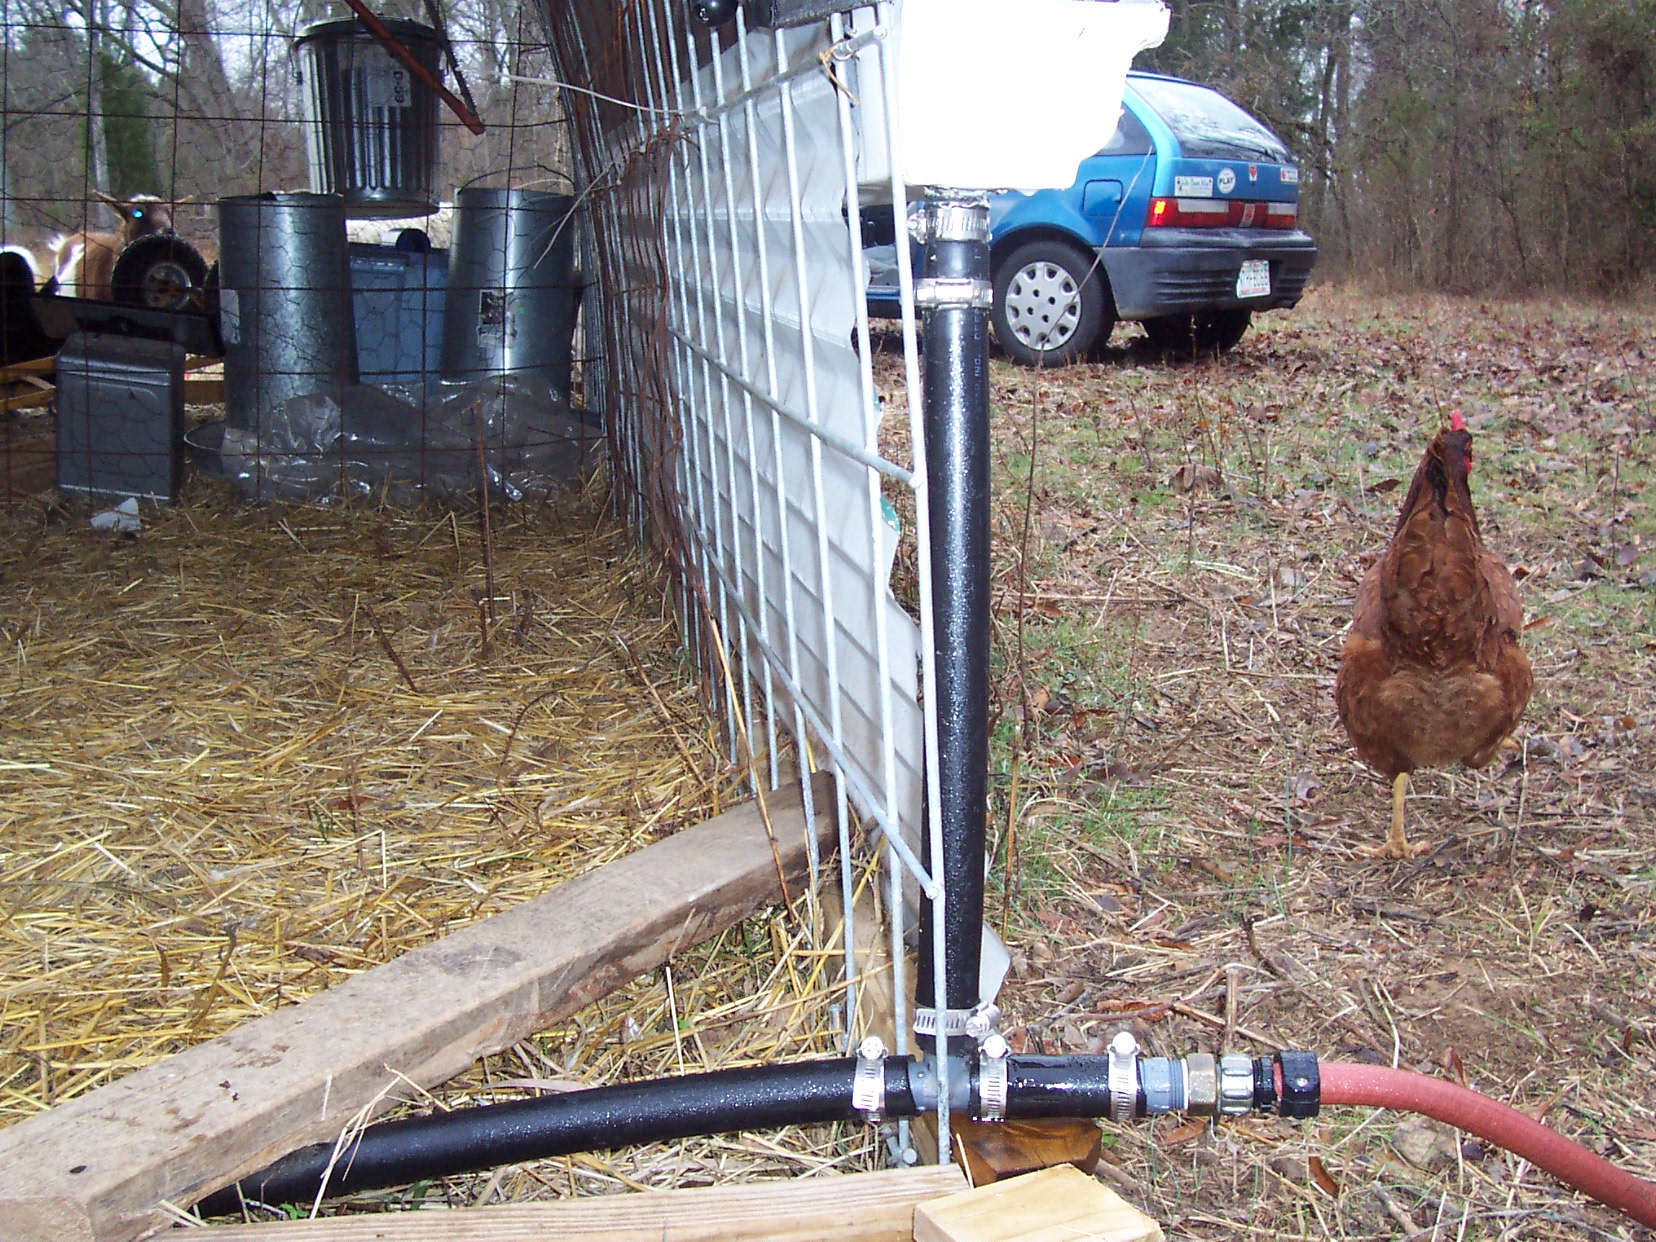
I drilled a hole in the gutters and attached a 1” plastic pipe fitting
through the hole. A cylinder of hardware cloth is inserted in the top to
prevent clogging with organic material. (Not shown, as I hadn’t installed them
when I took the pictures, but they’re on there now.) I plan to install gutter
guards but haven’t done it yet.
One inch black plastic pipe, elbows and tees connect the 2
gutters down by the ground. (Hint: To make watertight connections with black
plastic pipe, heat all ends before clamping them in place.) The end is fitted
with a garden hose fitting. A garden hose conducts the water to a whole house
filter. The filter can pass several gallons a minute with as little as one foot
of pressure head. The water passes through the filter and heads to the rain
barrels via a garden hose.
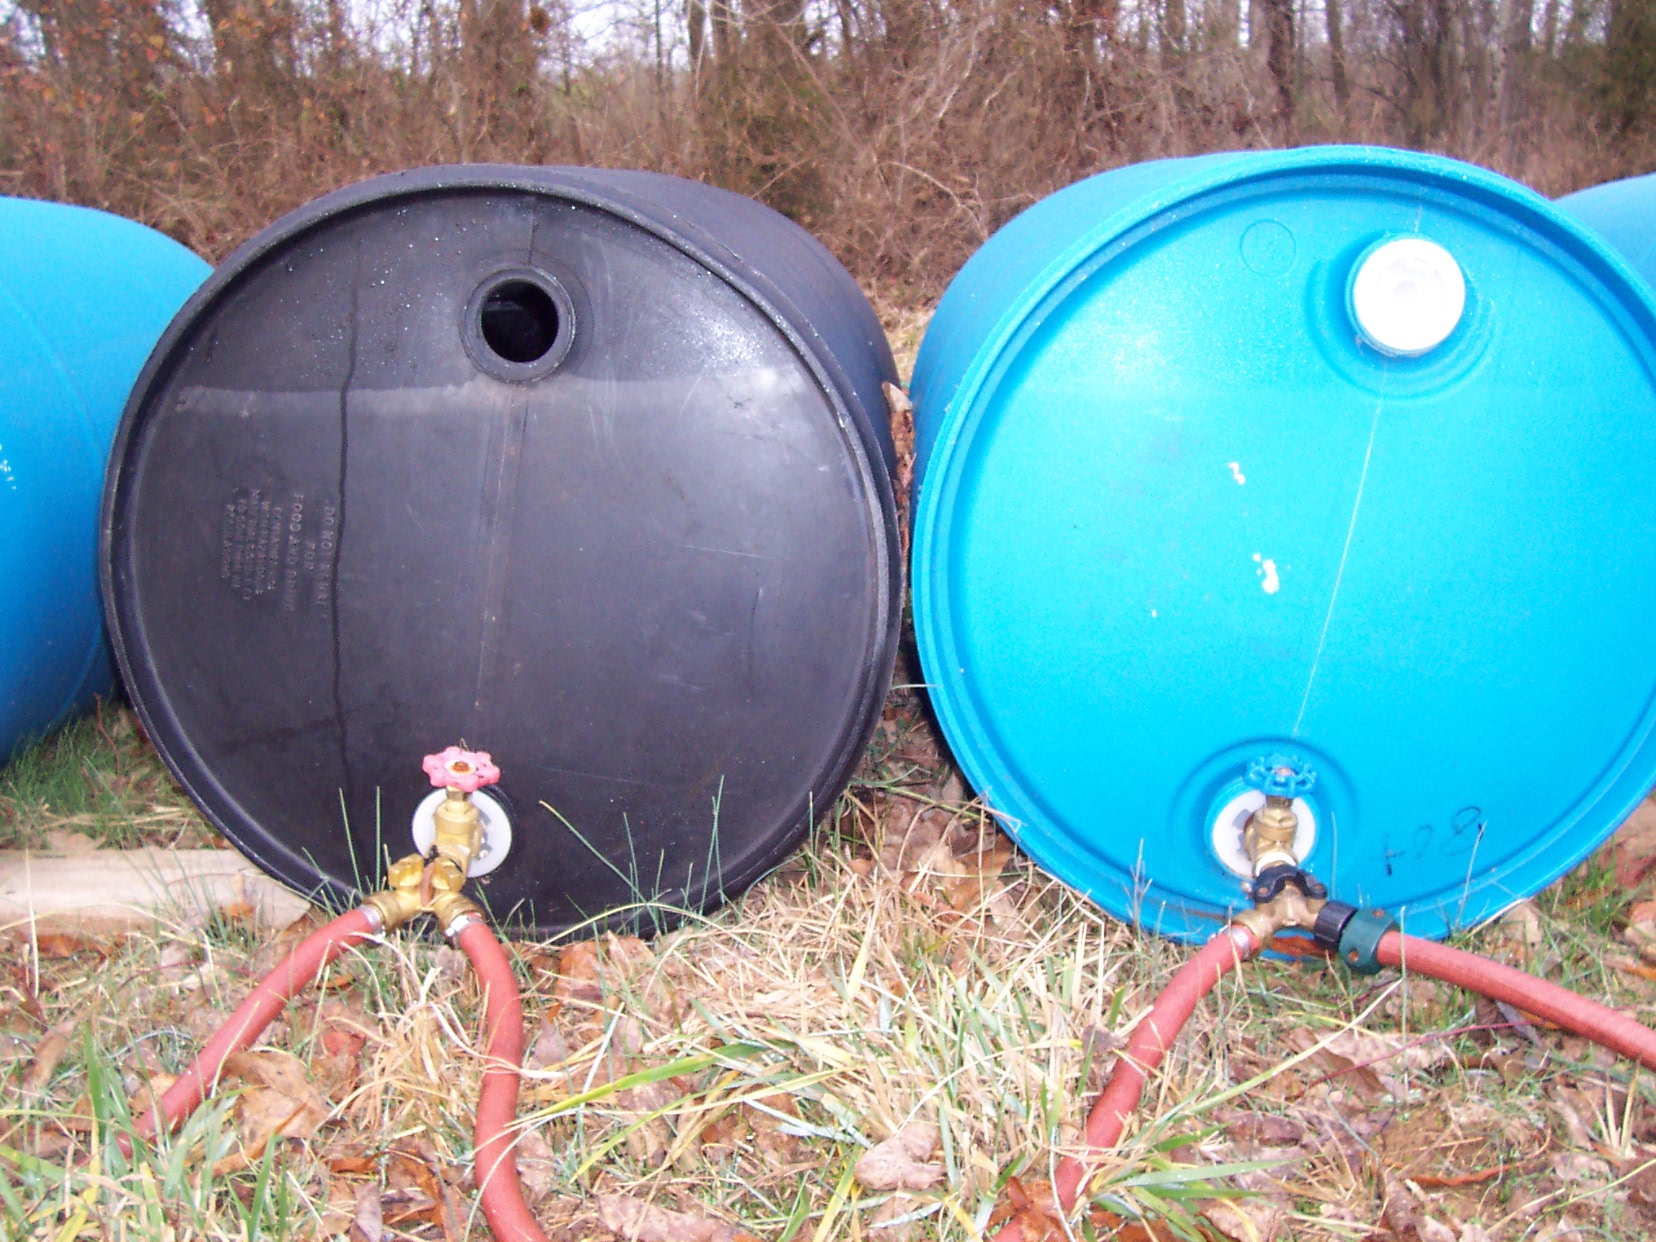
The barrels I bought have 2 caps on them. There is a
knockout on each cap that accepts ¾” standard threads, so I bought standard
spigots and some teflon tape and screwed one into each barrel. The barrels are
also opaque to prevent algal growth. The barrels lie down next to each other.
The bottom cap is fitted with the brass spigot as well as a 2 way splitter with
an on/off valve on each one. The top cap of the barrel is left in place, but
loose, so air move in and out. I attached four barrels, but can add more if I
want to store more water. Sections of garden hose with the female hose ends
attached to each end are used to connect the barrels. The last barrel leads to a
garden hose that ends at a float purchased at a hardware store that caters to
folks with livestock. I got a basin that fit inside an old tire to keep the
animals from turning it over. I bought a plastic float, but I hear that
aluminum ones and the ones with a plastic ball float are less susceptible to
breaking when they are frozen in place.

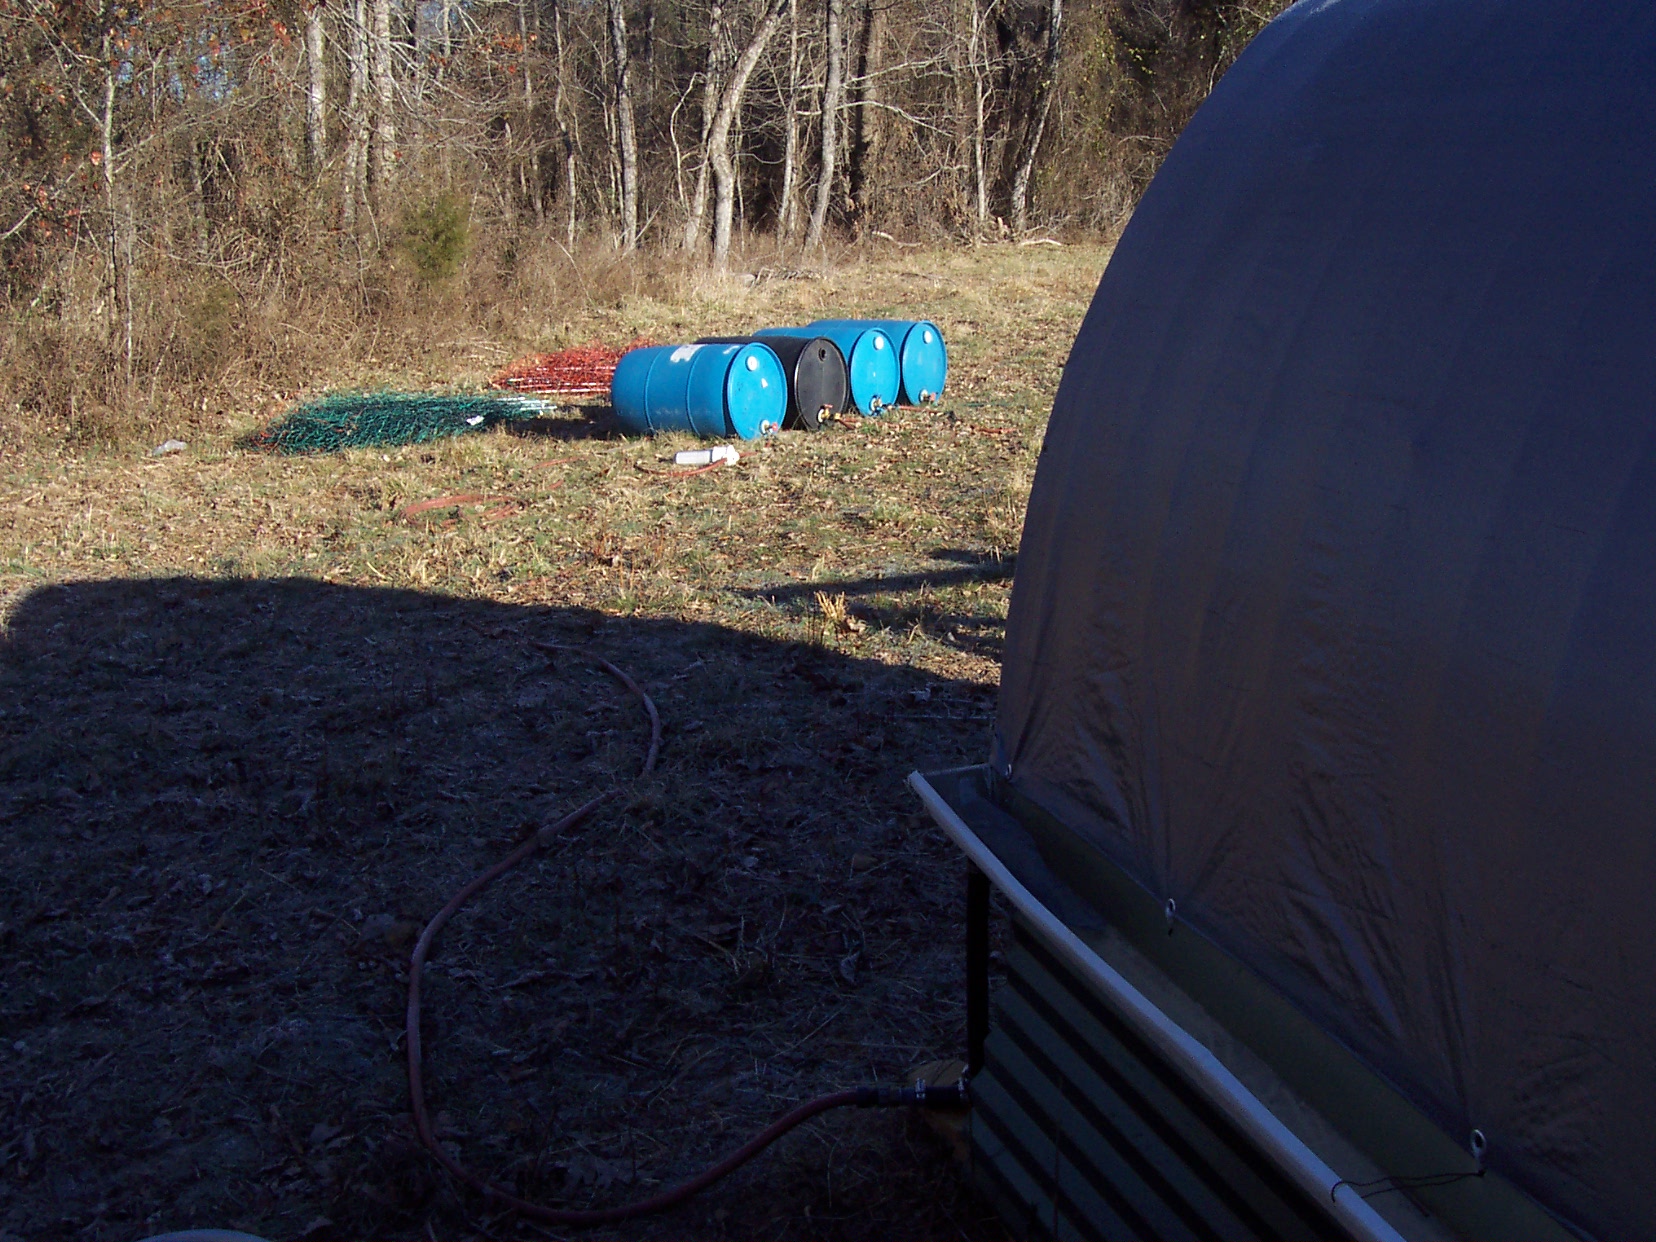
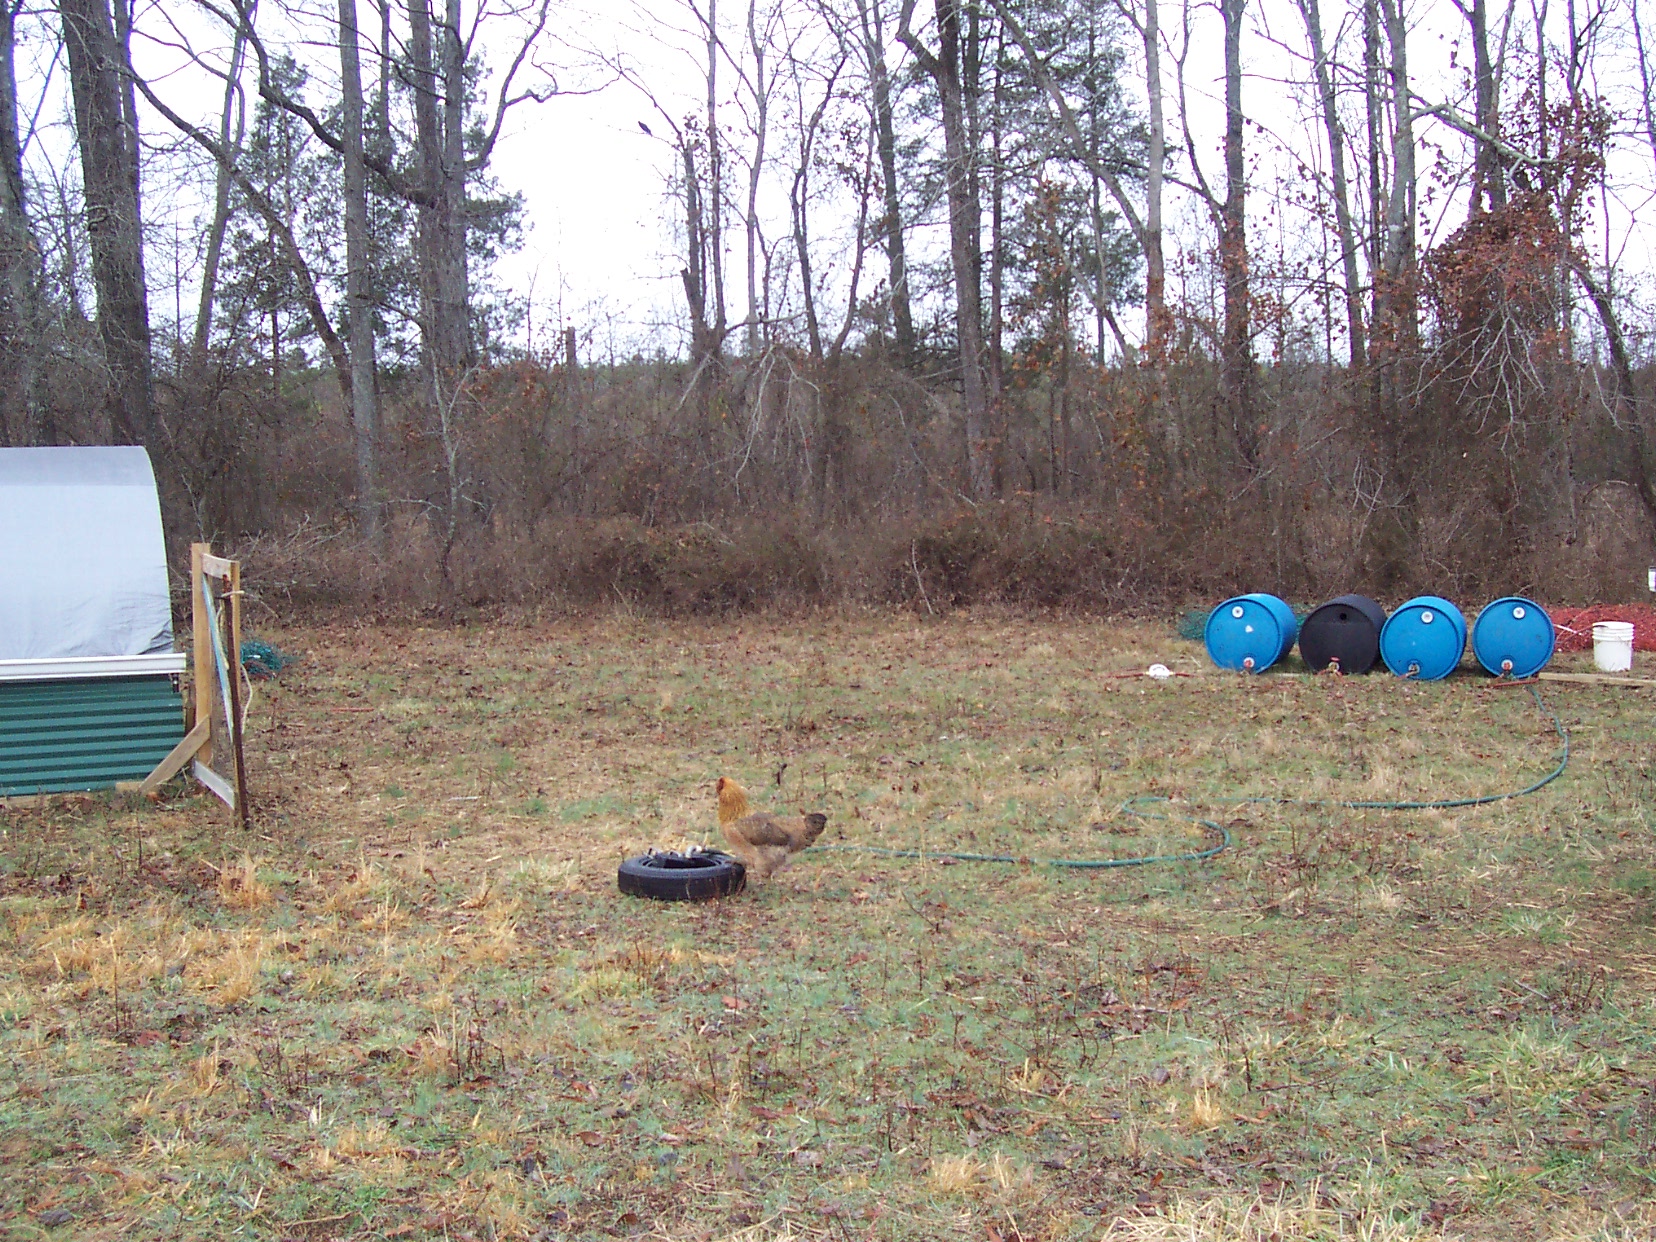
Relationship of collection barrels to shelter. |
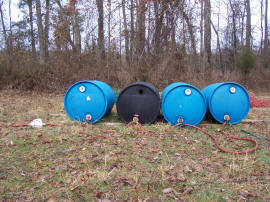
Collection barrels.
Click on pictures to enlarge |
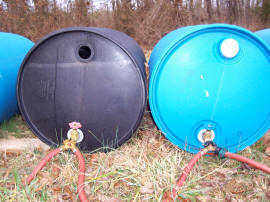
Collection barrel plumbing using standard garden hose components. |
I used all plastic, hose and brass to lessen the chances of
the thing breaking when it freezes. It has survived freezing solid on several
occasions this winter during 10 degree nights. I got spigots that go straight
out from the barrels, rather than turning down so they don’t turn down toward
the grass. I got splitters with on/off valves, to allow for more tinkering with
the barrels and the system. Anything that develops a leak can be shut off or
bypassed and the system will still work. I bought all good quality garden hose
and brass fittings. I also used exclusively fittings commonly available in any
hardware store. (A leak can drain hundreds of gallons of water in no time.)
The barrels can be moved individually with a hand truck, if necessary, but
they’re 450 lbs when full so be careful. Place the barrels such that their tops
are below the gutter bottoms so they can fill all the way. Think about placing
the barrels where the animals can’t step on the fittings, if you have animals
prone to do so. Be careful when building it to have things tucked in so the
animals can’t snag or step on any of the parts. Cows are heavy and aren’t too
picky about where they put their feet or what they bump into.

Shelter, barrels and drinking basin.Click
on pictures to enlarge |
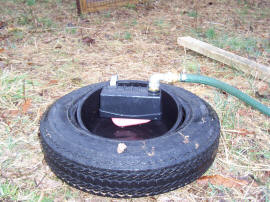
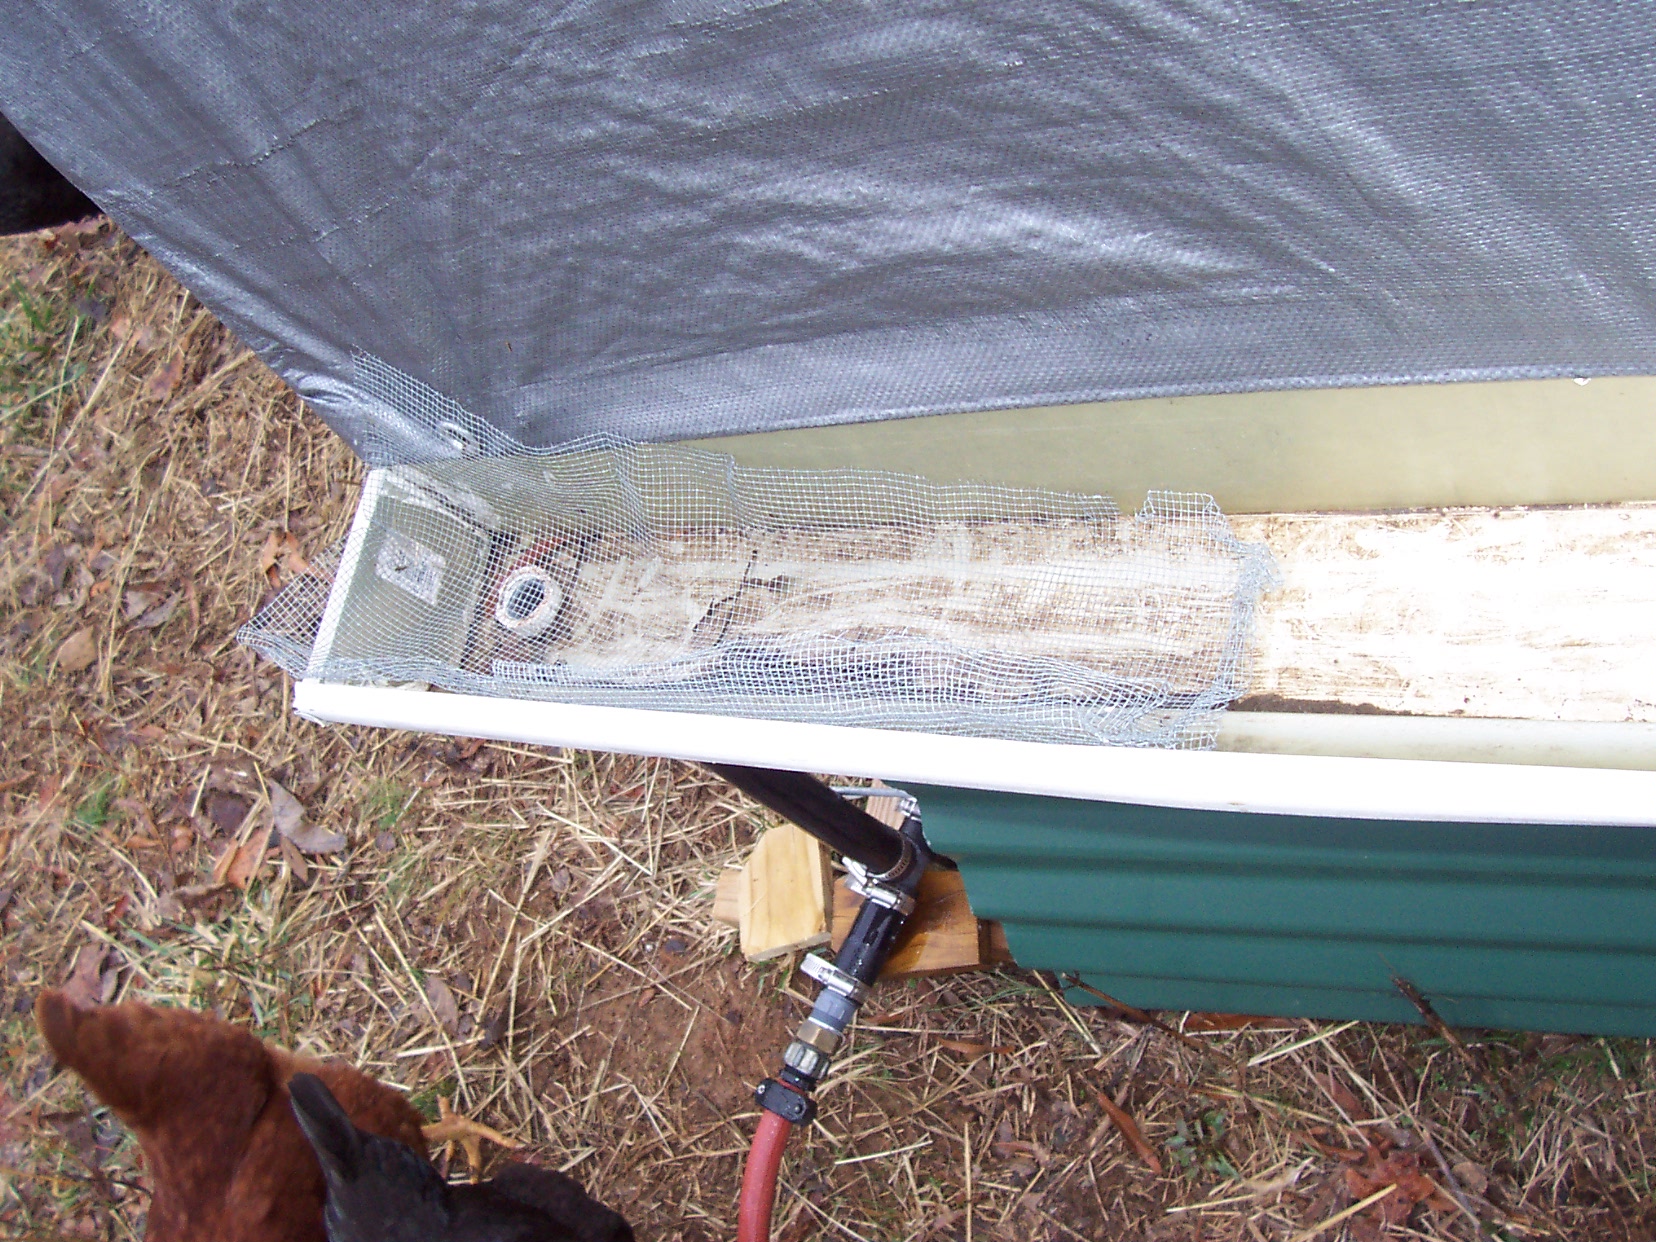
Drinking basin has float valve that keeps
it filled. Basin fits inside a tire to
protect it. |
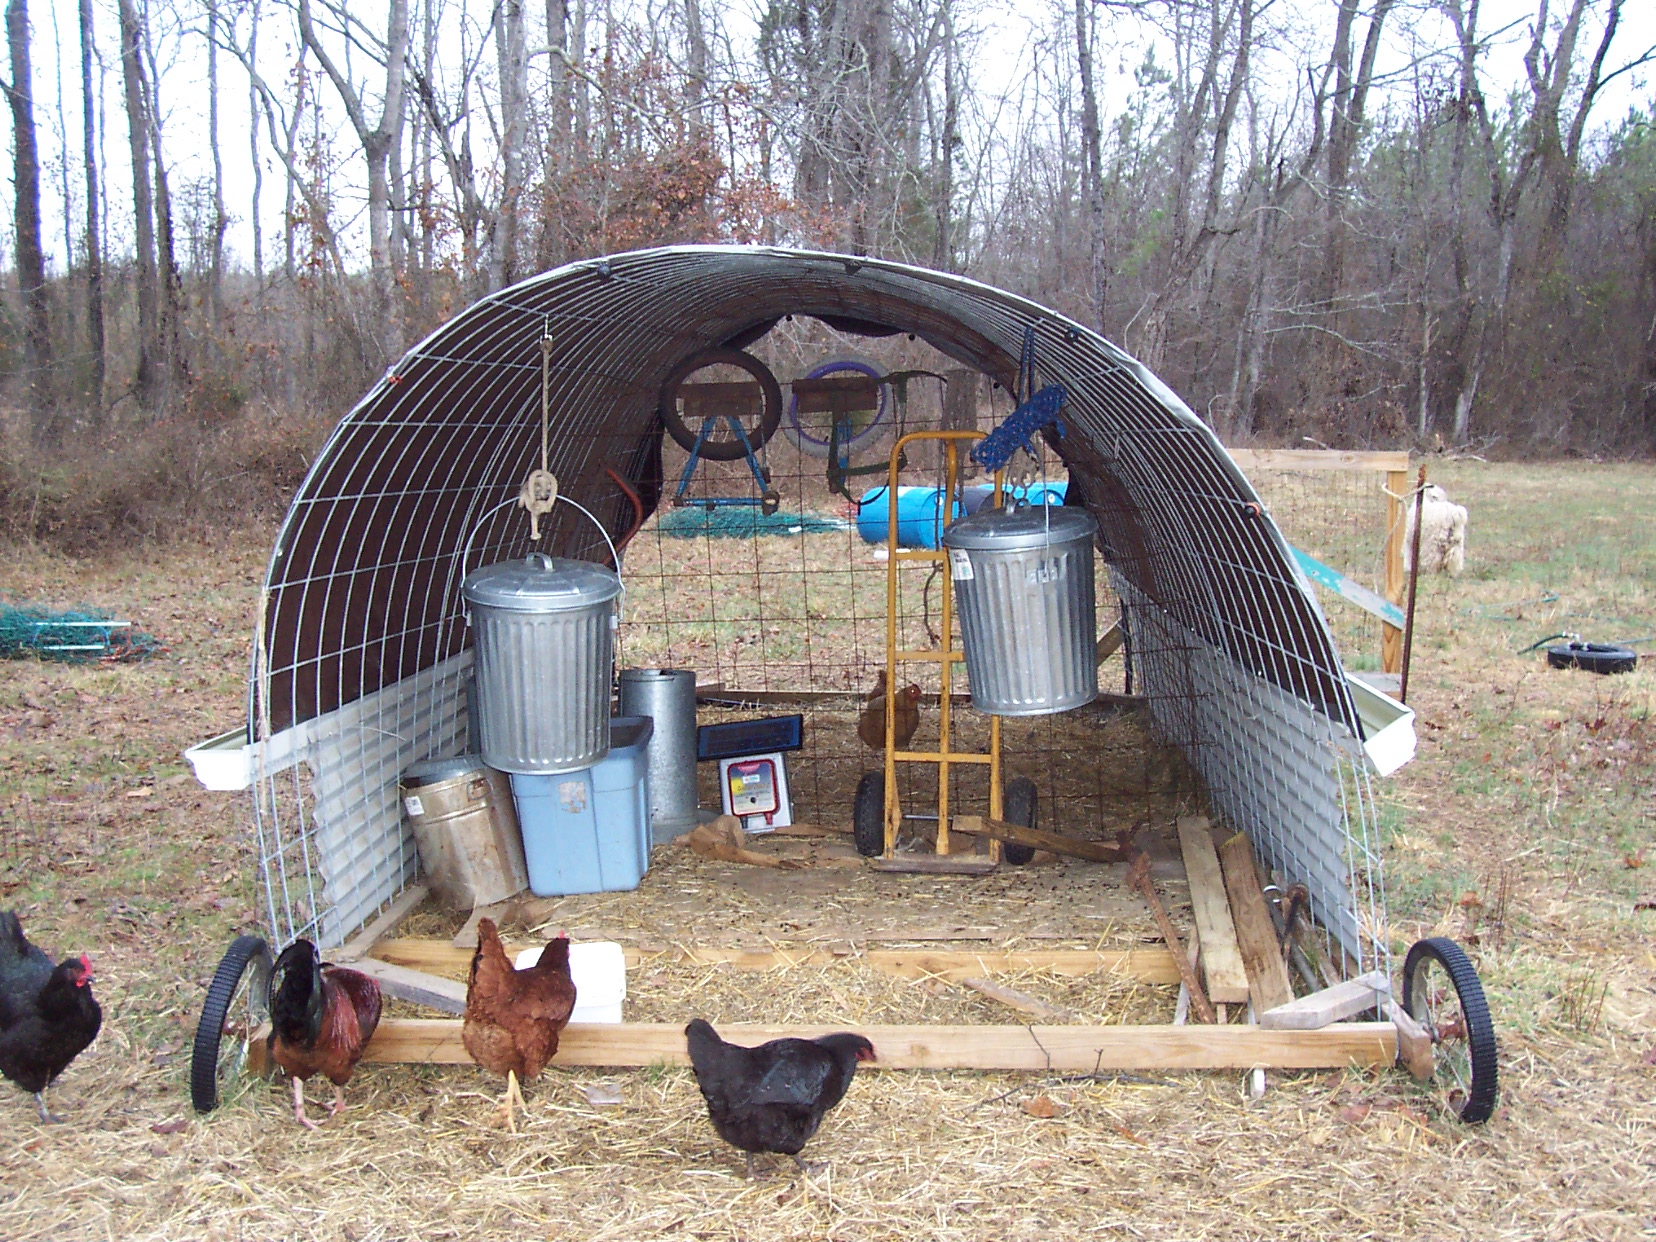
Finished -- note the wheels.
I didn’t keep track of the cost of it all, but it is
somewhere around $200 with the barrels costing $5 each and the gutters being
prolly about $20, but without the whole house filter (which costs about $30 to
$40 at any big box hardware store)
What it takes:
4 opaque 55 gal drums with 2 caps
2 gutters with end caps
Baling wire
2 @ 1” plastic thread x barb fittings
Teflon tape
2 @ 1” plastic thread nuts
2 little cylinders of ¼ inch hardware cloth
8 @ 1” hose clamps
1@ 1” plastic barbed elbow
1 @ 1” plastic barbed tee
1 @ 1” plastic barbed x internally threaded ¾” fitting
1 @ ¾ “ brass external thered x male garden hose fitting
14@ brass ¾” barb x female garden hose fittings
14 @ 3/4” hose clamps
1 @ whole house filter with male garden hose fittings on inlet and outlet
Spare filters (5 micron size)
4 @ brass spigots
4@ brass garden hose splitters with shutoff valves
1 @ stock tank float
A high quality ¾” garden hose to be cut up to lengths that work and fitted with
female ends.
The better part of a day. Actually building it goes pretty fast, but there will
likely be a fair amount of indecisive head scratching
A torch to heat the black plastic water pipe, a screwdriver and a knife to cut
the hoses.
Ray Milosh
You can email questions to: raymilosh AT hotmail DOT com (replace AT
with @ and DOT with a period)
Jan 18, 2008