Search
The Renewable Energy site for Do-It-Yourselfers
Paul's DIY Solar
Water Heating System
The Collector
Here are some pictures of my solar
DHW heater. My solar collector is based on Gary's $1K design with changes
described below.
Collector Box
I made some things a little
differently. I used 20G steel studs for the sides. I used .030 aluminum for the
absorber plate, and I installed the absorber plate with the copper tubing facing
out.
When buying the steel studs for the
sides and top, ask for 20 gage 3 5/8 inch metal "runner". The runner has
no pre-drilled holes, whereas the studs do have pre-drilled hoes which would
have to be plugged.
The corners have a tab about 1" long
bent at 90 degrees, then pop riveted, the runner is attached to the OSB with
some self drilling screws, then sealed with silicone.
The metal runner is painted with 2
coats of Rust-Oleum semi flat enamel.
The collector measures 45 3/4 by 96
inches.
Click on pictures for full size
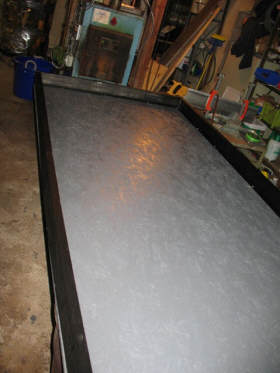
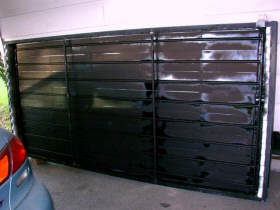
Metal side rails with painted OSB bottom |
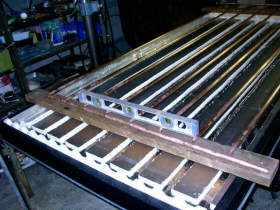 |
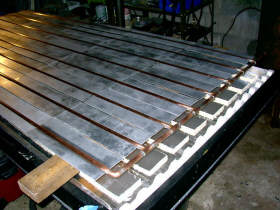
Absorber with fins and inslation. |
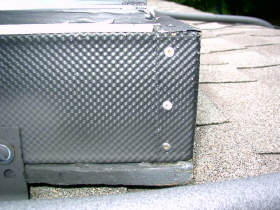
Collector box corner detail. |
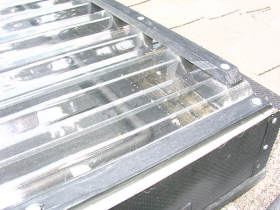
Glazing attachment detail. |
 |
The OSB back has one sheet of 1"
polyiso insulation glued to it, then there are strips of 1/2" polyiso cut 4" X
86" to space the copper pipe/collector plates.
The collector absorber has 8 lengths
of copper pipe, the plates on the left and right sides have one side shortened
by about 2" to make everything fit. The copper pipe is attached with U shaped
pipe hanger screwed through the foam to the OSB.
Mounting the Glazing:
On the top and bottom there are 2 strips of 1" polyiso to space up the foam
wiggle strips. On either side I used foam tape, it has one adhesive side (it is
made for mounting pickup truck caps). On the sides I used sheet metal screws
with rubber washers. On the top and bottom I used 6" long flat head screws, had
to order them from Mc Master Carr. I used wood strips on the top of the glazing
to apply even pressure to the glazing.
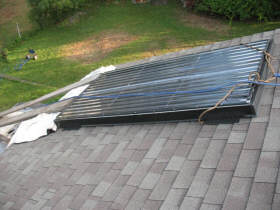
The collector is mounted to the roof
with angle brackets, there is a strip of rubber and silicone seal underneath.
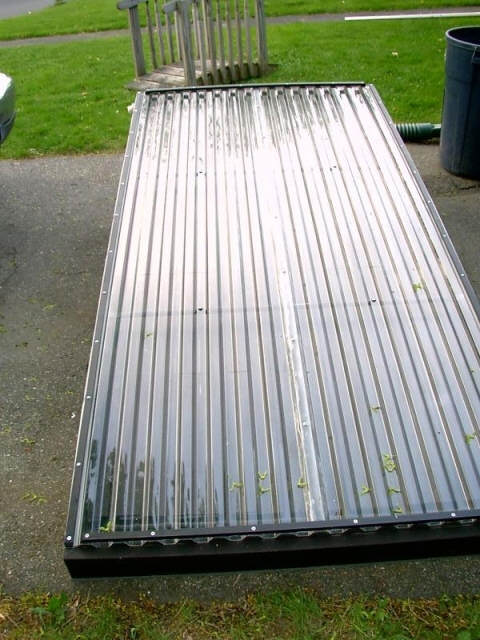
I used a sheet of 1” Polyisocyanurate insulation and strips of ½” Polyiso under
the absorber and tubing.
Absorber
The .030 aluminum was sheared to size
18" X 6", the (6" dim shrinks to 5 1/2" after bending). The aluminum was then
sanded on one side with a DA sander to roughen the surface, then cleaned with
solvent.
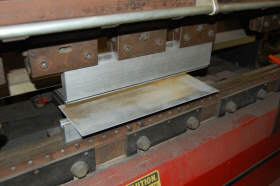
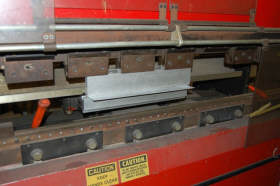
The absorber plates were formed on a bending break; I designed and built the
dies myself.
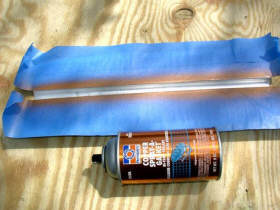
Masking tape was placed on either
side of the channel and then sprayed with Permatex copper gasket.
The Permatex was allowed to dry for a few minutes. The copper pipe was cleaned
with Scotchbrite and contact cleaner prior to installing the collector plates
(fins).
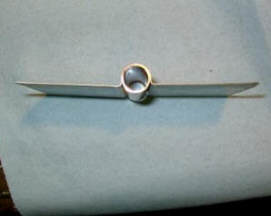
As you can see in the pictures the aluminum is a very good fit around the copper
pipe, the Permatex provides a thin conductive adhesive bond. As a test, I
made a small test piece -- a 4" long section of collector. On the test
piece, the copper pipe seems to be bonded well. I think I will leave it outside
for a while and see how it is affected by the outdoor environment..
I used special solar selective
coating collector paint form
Thermalox Paint from Dampny Co.
I am fortunate the Dampny Co is not
too far from where I live, I stopped by and picked up 2 spray cans of solar
selective paint.
According to the
spec sheet I figured I would need 2 cans per collector but one can had just
enough paint for the collector. The paint was easy to apply, a thin coating is
recommended. So, the coverage is about 30 sqft per spray can of Thermalox.
The special paint was not much more expensive (about $12/can) than regular high
temp paint so I figured with all the work I put into the collector the extra
cost was justified.
Instead of silicone for bonding the absorber to the copper tubing I used
Permatex Copper Spray-A-Gasket Hi-Temp Adhesive Sealant.
I chose the Permatex because my absorber plates fit the copper tubing very
tightly, I figured the copper sealer would give a bit better heat transfer; I
did not think I needed the gap filling ability of silicone.
Click on pictures for full size
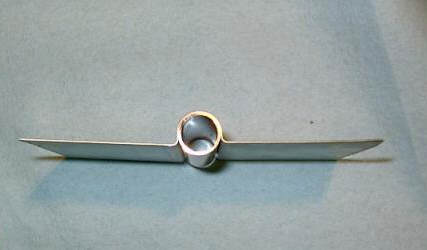
Near perfect fit of fin to tubes.
Up to the Roof
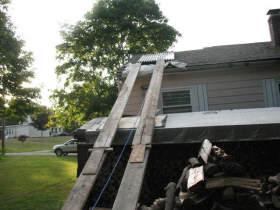
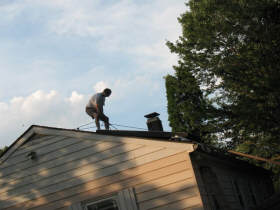
To get the collector up on the roof I tied a rope with a pulley on the end of it
to my truck bumper on the other side of the house. I tied a rope to the
collector, ran that up to the pulley and back down and wrapped a few turns
around a pipe driven into the ground. I pulled on the rope and pushed the
collector up the ramp while my daughter kept tension on the end of the rope.
Tank, Pump, and Heat Exchanger
The storage tank is made form 2 55 gal drums, it is a design similar to the one
on John Canivan's site,
http://www.jc-solarhomes.com
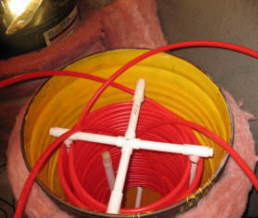
Each drum has two 100' coils of 1/2 PEX run in parallel.
The pump is a Taco 00R-IFC 3 speed
pump. The check valve was removed to allow drainback. I am running the
pump on medium speed as low would not overcome the head ( about 25').
The barrels are insulated with
foil/bubblewrap insulation glued on with great stuff foam, then wrapped with a
layer of R13 fiberglass insulation. I plan to improve the insulation, I am
thinking of enclosing the sides of the tank with polyiso foam board and filling
the voids with fiberglass and more fiberglass on top.
Each tank has a digital thermometer, I found them on Ebay for about $12 ea, only
downside is they read in Centigrade.
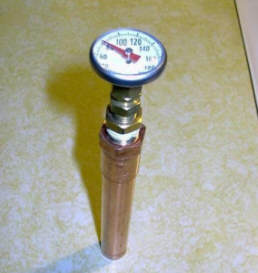
The PEX heat exchanger seems to work quite well, I have a thermometer in the
outlet of the heat exchanger, it is made form a kitchen meat thermometer
inserted into a copper fitting. The temp coming out of the heat exchanger is
about 5F cooler than the temp in the tank.
The controller is just a simple temp controller with a thermocouple attached to
the collector, it is set to turn the pump on at 120*F. I am in the process of
building a differential controller from some plans I have found on line.
While I don't have any data logging I have been recording tank temps, the
highest temp I have seen is 120F on a bright sunny day, the tank usually runs
around 95*F to 115*F depending on conditions.
<
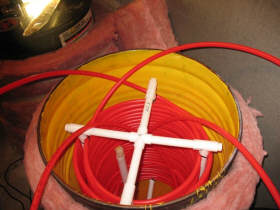
The heat exchanger uses two coils
of half inch PEX in parallel. |
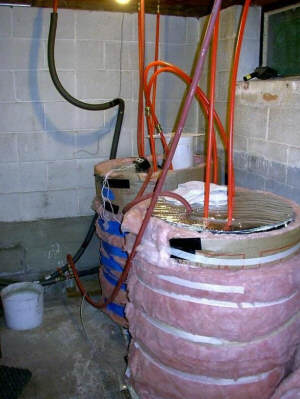
The two barrel storage system
with insulation. |
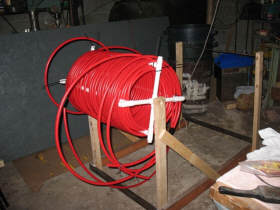
|
Preliminary Performance Test
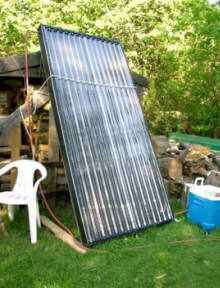
| A few weeks ago I did some testing of the panel, I used
an insulated cooler holding 12 gl, the pump is a computer cooling pump
running about 1.50gl/min. I started at 9:30AM with 60* water and by
3:30PM the water in the cooler was up to 165*, it was a sunny day with a
temps in the 70’s. I was quite happy with the initial results. Not bad
for a $200 collector. |
 |
There is still a lot
more work to be done, I plan to build another collector, get a differential
controller, mount the collectors on the roof and tie them into the heat
exchanger tank I am using for the wood stove water heater.
|
Here is picture of my meat thermometer temp gauge, that is installed in
the outlet of the PEX heat exchanger.
It is made from a 3/16 compression fitting with a piece of brass tubing
to adapt the thermometer diameter to the 3/16 fitting. I used some
Loctite retaining compound to make a good seal.
|
 |
Paul
Paul will answer
email questions at: nonsense91 AT comcast DOT net (replace AT
with @, and DOT with a period)
My two cents (possibly totally wrong
:) on some of the design changes that Paul made:
Metal Collector Case:
There is a lot of interest in metal collector cases, especially from people
in areas where wood may not have a good life. So, its good to have a
metal case design documented for those who want to go that way. If you
have done a metal case design, please send it in.
Selective Paint: It
seems likely that the selective paint will result in some performance
improvement. The tests on commercial collectors that use factory
applied selective finishes do show better performance in testing than black
painted absorbers.
The description of the
Dampny Selective finish says that is is partially selective -- they
claim that when properly applied, the Dampny paint has a 0.5 emissivity in
the long IR. This compares to regular black paint at 0.9+ IR
emissivity, and to commercially applied selective finishes with an
emissivity of about 0.05. So, if the Dampny claim is correct, it
is about half way between a good commercially applied selective finish and
plain black paint.
It also claims to be a good
and durable finish for high temperature applications.
So, it seems that its likely to
result in an improvement, and at the very worst should not be any worse than
regular black paint. About the only negatives I see are that it costs
more than BBQ paint, and you have to order it a wait for it.
I have a can of the Dampny paint
(Thermalox) paint in hand and plan to test it against plain black paint in a
new set of
small panel tests. -- my expectation is that it will do somewhat
better than plain black paint.
Copper Gasket Cement:
I have to say up front that I am a pretty strong believer in silicone to
bond the riser tubes to the aluminum fins for many reasons outlined
here. I particularly like that the silicone provides a strong,
pliable, very long lasting, and high adhesion and high temperature thermal
and mechanical bond between the fin and tube -- for parts that are going to
see years of serious thermal cycling and possibly condensation, this seems
like a good thing.
That said, the Copper Gasket
Cement may have some advantages and seems worth a try. I will try to
see I can do a small panel test with the Copper Gasket Cement as well.
Maybe Paul can be talked into an inspection after a year or so.
Fin Forming: Paul's
fins are works of art, and I am envious :) But, they do require
equipment not available to some of us. Fortunately there are a wealth
of good ways to
make or buy fins.... So, you don't have to save up your pennies to
buy a big press.
Gary July 28, 2010

