
Search
The Renewable Energy site for Do-It-Yourselfers
| |
1/2 -- Conservation Projects
|
|
|
These are the 16 energy conservation
projects we decided on. Energy conservation usually offers the most energy
saving per dollar spent.
The totals to date for Conservation
Projects are:
20,900 KWH/yr energy saving
9.1 tons/yr reduction in carbon
dioxide emissions
Total cost of projects $3,800
First year saving of projects
$1,800
First year return of 47%.
Again, your list of projects may be
much different -- see the Planning Section. for ideas
on making a good list. |
|
Conservation Projects
Electricity
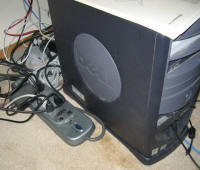
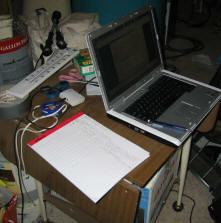
| Tame the PC's |
PC's and related
printers, wireless routers, ... use a lot of power.
Our two PC's and related equipment used 270 watts when on.
We put all the PC junk on power strips. At night we hibernate the
computers and then turn everything off with the power strip switch.During
the day we have the computers set to hibernate if they are inactive for 15
minutes.
This saves a total of 1780 KWH per year, 3560 lbs of green house gas, and
$178 per year!! This just knocked me out.
The computer uses zero power when hibernated. The computers come out
of hibernation in just a few seconds, and put you right back where you were
-- no pain at all.
Update:
this gadget will turn off all your peripherals when you turn your
computer off -- makes it a little easier to make sure all is off.
Suggestion: Email Michael Dell, and tell him you would like to see more
emphasis on energy saving in PC and related equipment --
michael_dell@dell.com
If you don't think this kind of saving is significant on a
global scale, take a look at this:
www.treehugger.com |
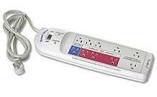 Use
this device to
automatically turn peripherals off when you turn your PC off. Use
this device to
automatically turn peripherals off when you turn your PC off.
|
| Energy Saving/yr |
1779 KWH |
Initial Cost |
$20 |
DIY Labor |
1 hrs |
| CO2 reduction |
3557 lb |
$'s Saved/year |
$178 |
DIY difficulty |
2 |
| Energy Source |
Electricity |
1st Year Return |
890% |
|
|
| |
|
10 yr saving (10% fuel inflation per year) |
$2834 |
|
|
Cost Estimate:
Cost was two power strips -- $20 -- they also provide some surge protection.Dollar Saving:
I measured the power levels with the Kill-A-Watt:
Everything turned on (2 PC's, printers, ...): 297 watts (174
downstairs PC + 123 upstairs PC) -- this is measured after everything
settles down. With PC's in hibernate, but other other peripherals on: 59 watts
(54 downstairs + 8 upstairs)
Saving is:
Power strips for night: (297 w)(10hr)(365 day/yr)(1/1000) = 1084
KWH! Hibernate after 15 min in daytime: (297w-59w)(8 hr)(365
day/yr)(1/1000) = 695 KWH!
Where 8 hours is the estimated time in hibernation during the day.
This adds up to 1779 KWH per year for a $178 saving at 10 cents a KWH.
Table of actual measured values...
Obviously, doing something like this is another no-brainer -- I feel like a
no-brainer for not seeing this sooner. |
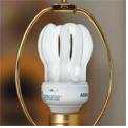
| Efficient Lighting -- Compact Fluorescents |
| Replace existing
incandescent lights with compact fluorescents. There is a much larger
variety of these out there now, so you can find them for most situations.
Check with your utility for a rebate program |
 |
| Energy Saving/yr |
1168 KWH |
Initial Cost |
$50 |
DIY Labor |
2 hrs |
| CO2 reduction |
2336 lb |
$'s Saved/year |
$117 |
DIY difficulty |
1 |
| Energy Source |
Electricity |
1st Year Return |
234% |
|
|
| |
|
10 yr saving (10% fuel inflation per year) |
$1861 |
|
|
Cost Estimate:
We spent about $50, including some rebates from the utility.Dollar
Saving:
Savings table:
| Quantity |
Place |
watts |
hrs/day |
KWH saving/yr |
| 6 |
Kitchen Overhead |
6(65-15)=300 |
4 |
438 |
| 4 |
Upstairs Office |
4(65-15)=200 |
2 |
146 |
| 2 |
Downstairs Office |
2(65-15)=100 |
3 |
110 |
| 3 |
Living Room |
3(100-23)=231 |
3 |
253 |
| 2 |
Master Bedroom |
2(100-23)=154 |
1 |
56 |
| 6 |
Master Bath |
6(40-7)=198 |
1 |
72 |
| 4 |
Half Bath |
4(40-7)=132 |
0.5 |
24 |
| 2 |
Dining Room |
2(60-13)=94 |
2 |
69 |
| 29 |
|
1409 watts |
|
1168 KWH/yr |
The numbers in the watts column a (qty of lamps) (old bulb watts - CF
lamp watts), and the KWH saving is:
(qty of lamps) (old bulb watts - CF lamp watts) (hours on per day) (365
days/yr)(1/1000) =
Again, this is pretty much in the no-brainer category. Some more
information on CFs and Mercury:
http://www.builditsolar.com/Projects/Conservation/conservation.htm#Lighting |
| Eliminate Phantom Electrical Loads |
I used a Kill-A-Watt
meter to measure the power consumption of all the plug in electrical devices
in the house to see how much power they used when switched "off".
I found a total of about 80 watts of power being used by devices that were
"off". This may not sound like a huge amount, but 80 watts is 700 KWH
per year!
I was able to either unplug or use power strips (that can be turned off)
to eliminate 20 watts of the 80, and that is what I show below.The
remaining 60 watts is my fancy Dish HDTV receiver that always uses 60 watts.
Turning it off has no effect on its power consumption whatever! -- nice job
Dish designers. I have not decided what to do about this, but its over
500 KWH and 1000 lbs of green house gas, so I will figure out something --
any ideas?
Update: 5/10/07 -- old sat receiver failed and was replaced with a new
receiver with 15 watt power use when "off" -- still not great but much
better. The numbers below have been changed to reflect this.
Upgrade cost was about $50.
Lobby your congress person to have all electrical devices labeled with
the amount of power they use when "off". |
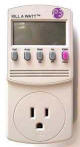 The Kill-A-Watt The Kill-A-Watt
Plug the Kill-A-Watt into the wall, and plug the
device into the Kill-A-Watt socket. It measures power use in watts,
voltage, amperage, power line frequency. It keeps totals for
kilowatt-hours and hours since it was plugged in. About $35.
Other brands work similarly -- Watts-Up is another. |
| Energy Saving/yr |
569 KWH |
Initial Cost |
$70 |
DIY Labor |
4 hrs |
| CO2 reduction |
1137 lb |
$'s Saved/year |
$57 |
DIY difficulty |
2 |
| Energy Source |
Electricity |
1st Year Return |
81% |
|
|
| |
|
10 yr saving (10% fuel inflation per year) |
$907 |
|
|
Cost Estimate:
The cost was a couple of power strips -- about $20, and the satellite
receiver upgrade was about $50.
Dollar Saving:
I measured the phantom power consumption with the Kill-A-Watt.
Yearly saving = (power use)(24 hrs/day)(365 days/yr)(1 KWH/1000
watt-hr) ($'s per KWH) = Saving $'s/yr
For my case: (20 + 45 watts)(24 hrs/day)(365
days/yr)(1/1000)($0.1/KWH) = $57 per year
(where the 45 watts is the old satellite receiver phantom load (60 w) minus
the new receiver phantom load (15w)Or, roughly: (phantom load in
watts)( 0.876) = $'s saved per year
Also a no-brainer -- just do it. |
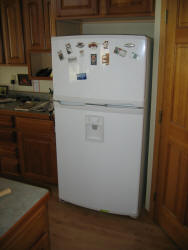
| Efficient Refridgeerator |
We replaced our old
fridge with a new Energy Star fridge.
After much searching and debate we settled on a conventional, top freezer
model at 21 ft^3 that has an Energy Star rating of 448KWH per year.
The top freezer style models offer the best space use (per Consumer
Research), and the best energy ratings.
This fridge uses only about a third as much power as our old one, so its a
very worthwhile change. If you want something that is spectacularly
better, see the converted chest freezers at the More Information below.
One aspect of this I found disappointing is that when I contacted Energy
Star to see if we should wait for new improvements that are just around the
bend, the response was that they have no plans to require more energy
efficient fridges for at least two years, and even then the change will be
small. This is progress?
More information |
 |
| Energy Saving/yr |
720 KWH |
Initial Cost |
$800 |
DIY Labor |
1 hrs |
| CO2 reduction |
1441 lb |
$'s Saved/year |
$72 |
DIY difficulty (hooking up water line) |
2 |
| Energy Source |
Electricity |
1st Year Return |
9% |
|
|
| |
|
10 yr saving (10% fuel inflation per year) |
$1147 |
|
|
Cost Estimate:
Cost was $800.Dollar Saving:
I measured the old fridges power consumption over several weeks as 3.2 KWH per
day, or 1168 KWH/yr. I used the Energy Star rating of 448 KWH/yr for
the new fridge.
Saving = 1168 KWH - 448KWH = 720 KWH
I do plan to monitor the new fridge with the Kill-A-Watt for a while to see
how it compares to the Energy Star rating. |
| Leave Less Stuff On |
| This is just getting
into the habit of turning stuff off. I have only included the
equivalent of 100 watts for 12 hours a day -- I suspect it can be much more
than this. But, this still adds up to 438 KWH/year, and almost
900 lbs of green house gas. The off-grid crowd will attest to how much
developing these habits can save. |

(a picture of no stuff left on) |
| Energy Saving/yr |
438 KWH |
Initial Cost |
$0 |
DIY Labor |
0 hrs |
| CO2 reduction |
876 lb |
$'s Saved/year |
$44 |
DIY difficulty |
0 |
| Energy Source |
Propane |
1st Year Return |
infinity |
|
|
| |
|
10 yr saving (10% fuel inflation per year) |
$698 |
|
|
Cost Estimate:
Nothing!
Dollar Saving:
I said that we would turn off the equivalent of 100 watts for
12 hours a day.
(100watts)(12 hr/day)(365 day/yr) = 438 KWH/yr
My guess is that we can do better than that. |
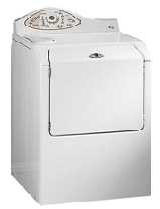
| Efficient Washer |
| We did purchase an
efficient, Energy Star washer a couple years ago -- a Maytag Neptune front
loader. I've decided not to take any credit for this until I can figure
out where all the laundry energy (washing and drying) goes, and how much we
are really saving.
Some of the saving is in water heating, some in better extraction of water
during spin to reduce drying energy -- not sure how this all goes together.
If you don't wash in hot water, I'm not sure you get all the advertised saving?
Update: 5/11/07
More information |
 |
| Energy Saving/yr |
350 KWH * |
Initial Cost |
$400 |
DIY Labor |
0 hrs |
| CO2 reduction |
700 lb * |
$'s Saved/year |
$35 * |
DIY difficulty |
|
| Energy Source |
Pro/Elec? |
1st Year Return |
9% |
|
|
| |
|
10 yr saving (10% fuel inflation per year) |
$558 |
|
|
| * The saving would be much greater if you use hot or warm
water washes or rinses. Most of the saving for the new efficient
washers as estimated by Energy Star is based on the fact that they use less
water, and that means less water to be heated. Heating the water is
80+% of the energy used in cloths washing. Since we have used cold
wash and rinse for years, this is not a saving to us. I estimated the
350 KWH based on better water extraction due to the high speed spin cycle on
these washers. Better extraction saves drying energy. If you use hot
water for wash and rinse, the savings for these washers can be much greater.
Just switching to cold water wash and rinse on a conventional (high water
use) washer can save as much as 7 or 8 KWH per load!
This is one of those cases where if we had done our homework better we
might have opted to use the new washer money for other energy saving
projects that would have been more cost effective. But, the new washer
is very nice, does a good job, saves some energy with better water
extraction, and saves about 7000 gallons a year in water. |
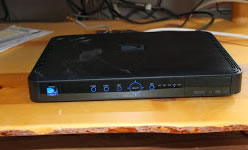
| Replace DVR |
|
Our old DISH DVR used 53 watts all day every day for 464 KWH a year. The new Direct TV DVR uses only 18 watts.
|
 |
| Energy Saving/yr |
310 KWH |
Initial Cost |
$0 |
DIY Labor |
0 hrs |
| CO2 reduction |
500 lb |
$'s Saved/year |
$31 |
DIY difficulty |
0 |
| Energy Source |
Electricity |
1st Year Return |
infinity |
|
|
| |
|
10 yr saving (10% fuel inflation per year) |
$492 |
|
|
|
Cost Estimate:
Nothing! New DVR supplied by Direct TV.
Dollar Saving:
Dollar saving is just using 310 KWH less per year at 10 cents per KWH.
|
Insulation
| More Attic Insulation |
| We added blown in
cellulose over the existing fiberglass loose fill insulation in our attic. I can only do this for
about half the house -- the rest is cathedral ceiling.
Having cellulose over the FG insulation adds more R value, and also
should eliminate some of the problems with FG insulation (e.g. air
circulation).
Be sure to do the attic infiltration sealing of plumbing, electrical and
other penetrations, and the heat duct sealing BEFORE putting more insulation
in.
It takes 2 people to do this -- one at the blower, and the other
at the business end of the hose. Be careful about blocking venting and
can style light fixtures -- see the More Information link below.
More information |
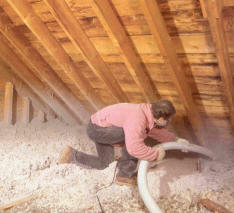
(photo from Harley book) |
| Energy Saving/yr |
1593 KWH |
Initial Cost |
$256 |
DIY Labor |
6 hrs |
| CO2 reduction |
812 lb |
$'s Saved/year |
$126 |
DIY difficulty |
3 |
| Energy Source |
Propane |
1st Year Return |
49% |
|
|
| |
|
10 yr saving (10% fuel inflation per year) |
$2007 |
|
|
Cost Estimate:
Cost of the cellulose for my attic was $256 (about 25 cents per sqft for 6
inches deep).
Most places will loan you the blower if you buy the insulation from them.
Rebates may be available.
In general, we had about 10 inches of loose fill fiberglass, which only
provides about R2.2 per inch, or R22 total. In addition, loose fill
fiberglass can loose as much as half its R value due to convection currents
within the
insulation. We added 7 inches of loose fill cellulose over the
existing 10 inches of FG. This brings our total R value up to about
47, and should reduce the convection currents problem with the FG.
Dollar Saving:
I used the
Insulation Upgrade Calculator to estimate the saving. Don't
be casual about the current R value -- measure the existing depth and put
the right number in -- it makes a big difference. If you have no
insulation, then read the note how to estimate your current R value.
Unless you already have tons of attic insulation already, this is another
no-brainer -- just put it on the "must do" list -- it will pay well.
5/11/07: Updated to reflect adding some more insulation to a part of the
attic we did not think we could get to earlier. |
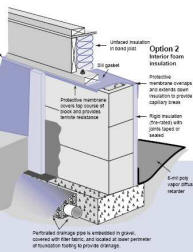
| Crawl Space Insulation |
| Our crawl space was
originally vented to the outside, and the floor above the crawl space was
not insulated. We converted to the crawl space to a conditioned space
by sealing the vents, adding a sealed poly moisture barrier over the dirt
floor, adding rigid foam insulation to the inside of the concrete walls, and
insulating the rim joists with rigid foam and fiberglass. This (it seems
to me) works better than insulating the floor above the crawl space, in that
1) its less work, 2) it lessens the possibility of moisture problems, 3)
eliminates any pipe freezing issues, and 4) lets the furnace and ducts live in a
conditioned space.
This would make much more difference if the crawl space extended under
all of the house, but its only under about 25% of the house.
More information
(search for "crawl") |
 |
| Energy Saving/yr |
1094 KWH |
Initial Cost |
$210 |
DIY Labor |
8 hrs |
| CO2 reduction |
558 lb |
$'s Saved/year |
$86 |
DIY difficulty |
4 |
| Energy Source |
Propane |
1st Year Return |
41% |
|
|
| |
|
10 yr saving (10% fuel inflation per year) |
$1370 |
|
|
Cost Estimate:
Cost of the poly and insulation was about $210Dollar Saving:
I used the Insulation
Upgrade Calculator to calculate the reduced heat loss.
Inputs to the calculator for my case are: 8000 deg-days.
Rold = (R2 + R1) + (R2 + R1) = R6 where the first paren is the
concrete wall and air film and 2nd is the floor
Rnew = R6 + R10 = R16 where R6 is the Rold, and R10 is the new
insulation
Area to 3 ft deep is 3(28 + 14 + 14) = 168 sqft |
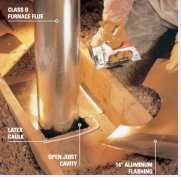
Duct Sealing
| Sealing and Insulating Heating Ducts |
| Sealed the exposed
heating duct joints with duct mastic. Insulated all the ducts that were not
already insulated and that were in the attic and the crawl space. Not
many in my case.
More information |
 |
| Energy Saving/yr |
940 KWH |
Initial Cost |
$20 |
DIY Labor |
4 hrs |
| CO2 reduction |
479 lb |
$'s Saved/year |
$75 |
DIY difficulty |
3 |
| Energy Source |
Propane |
1st Year Return |
375% |
|
|
| |
|
10 yr saving (10% fuel inflation per year) |
$1195 |
|
|
Cost Estimate:
The cost for sealing ducts is minimal -- a can of duct mastic for about $5.
The cost for insulating ducts is also low -- perhaps 25 cents a lineal
foot of typical ducting. I figured about $20 for both,
since most of my ducts were already insulated.
Dollar Saving:
Estimating the saving is very difficult, and is a guess at best. Good
sources say that duct loses are typically high -- perhaps
15% to 30% on average of
your heated air from the furnace is lost out cracks and openings at the
duct joints. In general, on an existing house you can't get at a lot
of the ducting that runs through walls. I did the ones I could get at
in the attic, crawl space, and basement. I insulated a few segments of
ducts that were not already insulated.
I estimated the fuel saving at 3% of the propane used for heating.
It may in fact be a good deal more than that, but I felt comfortable with
3%. I took no credit for the ducting I insulated, since it was just a
few feet that was not already insulated.
This is Pretty much a no-brainer -- just put on the list of "must do"
things. It may get you a huge saving, or it may not. But, its
easy and cheap to do.
Update: A person who has sealed many duct systems,
and then measured for leakage says that by:
- Sealing the exposed ducts at the furnace and in the attic and/or
crawl space
- Sealing everything that can be reached from each outlet duct
outlet (i.e. pull out grating and reach in with sealer)
He can get measured leakages down to 5% (the standard for new homes in
some states). So, this may be a very, very worthwhile project to do.
|
Infiltration
| Infiltration Sealing |
Caulk around windows
etc.
Seal wiring and plumbing penetrations from living space to attic.Most
infiltration is probably not where you think it is -- read the guides at the
More Information link, and find out where the cold air is really coming
from.
If your utility offers a blower door test, you should definitely take
them up on it. Take every opportunity during the test to identify
infiltration locations, so you can fix them later.
More information |
 |
| Energy Saving/yr |
1980 KWH |
Initial Cost |
$50 |
DIY Labor |
8 hrs |
| CO2 reduction |
1009 lb |
$'s Saved/year |
$156 |
DIY difficulty |
3 |
| Energy Source |
Propane |
1st Year Return |
312% |
|
|
| |
|
10 yr saving (10% fuel inflation per year) |
$2485 |
|
|
Cost Estimate:
A few tubes of caulking and some polyurethane foam in cans (e.g. Great
Stuff) -- maybe $50.
Dollar Saving:
Very hard to estimate -- best you can do without before and after blower
door tests is a guess.
I guessed that infiltration was cut down by 0.1 ACH (Air Change per Hour).
This would amount to an about 10% reduction on a typical house having a 1.0
ACH, or 20% on a well built and tight new house.
I used this method to
estimate 6,100,000 BTU/year, which is equivalent to 73 gallons of propane
burned in a 90% efficient furnace, or 1980 KWH (the calculations are
detailed at the link).Again, this is a no-brainer -- its very hard to
estimate exactly how much you will save, but the cost is so low and the
potential saving are so high, that its a must-do. |
Insulating Window Treatments
| Multi Wall Polycarbonate Storm Windows |
We have some high
windows with odd shapes that are hard to insulate with any kind of
conventional thermal shade or shutter. These were a large heat loss.
I ended up making inside storm windows from triple wall polycarbonate
glazing. This insulates well, works for any shape of window, still
allows daylight in and some view out (although distorted a bit).The More
Information link has complete construction details.
More information |
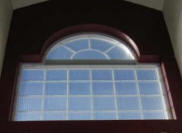
Polycarb storm window in place
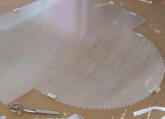 cutting
out the polycarb storm windows cutting
out the polycarb storm windows |
| Energy Saving/yr |
2700 KWH |
Initial Cost |
$450 |
DIY Labor |
8 hrs |
| CO2 reduction |
1100 lb |
$'s Saved/year |
$220 |
DIY difficulty |
4 |
| Energy Source |
Propane |
1st Year Return |
49% |
|
|
| |
|
10 yr saving (10% fuel inflation per year) |
$3500 |
|
|
Cost Estimate:
The cost was $450 for 134 sqft of window. The dual wall is probably a
better all around deal -- the R value is good, and price is much lower.Dollar Saving:
The saving is $220 per year.
I used the Insulation
Upgrade Calculator to do the estimate.
Inputs to the calculator are: 8000 Degree-Days, 134 sqft, Rold = 1.8, Rnew =
1.8+2.5 = 4.3.
This gives an energy use before storm windows of 14.3 MBTU (million BTU), vs
6 MBTU after storm windows.
Gallons of Propane saved = 100.2 gallons with a 90% efficient furnace.
At $2.20 per gallon, this is $220 saving per year.
Note the high (49%) return even on this fairly expensive material. |
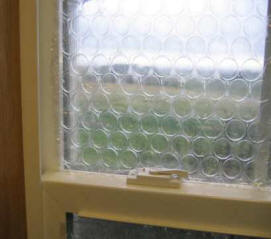
| Bubble Wrap Window Insulation |
This is kind of a neat
idea that comes from the greenhouse crowd.
You can insulate windows using bubble wrap packing material by spraying a
water mist on the window, and then applying bubble wrap. The bubble
wrap will usually stay in place for the full season with one spray.
The bubble wrap distorts the view, but does allow good daylight to still
come through -- good for windows you don't need a view out of.
This is very cost effective -- payback is usually less than one heating
season. At the end of winter, you can just pull the bubble wrap off,
roll it up, and save it for next year. If you are going to use
much of the bubble wrap, its worth finding a dealer in packing materials to
buy it from (or a greenhouse supply place). The places like UPS get
prices that are way to high.
See the More Information link for a complete how-to.
More information |
 |
| Energy Saving/yr |
955 KWH |
Initial Cost |
$38 |
DIY Labor |
1 hour |
| CO2 reduction |
487 lb |
$'s Saved/year |
$75 |
DIY difficulty |
2 |
| Energy Source |
Propane |
1st Year Return |
197% |
|
|
| |
|
10 yr saving (10% fuel inflation per year) |
$1195 |
|
|
Cost Estimate:
Cost was 141 sqft at 27 cents/sqft = $38.Dollar Saving:
I used the
Insulation Upgrade Calculator to estimate the saving.
Inputs to the calculator are: 8000 Degree-Days, 141 sqft, Rold = 2, Rnew = 3
This gives a saving of $85 for 100 sqft of downstairs windows, and $35 for
41 sqft of upstairs windows. I only counted half the downstairs
windows saving, since we allow the temperature to be lower downstairs.
This gives a saving of $35 + $85/2 = $78 per year -- pretty good for a $38
investment!
This is with propane at $2.20 a gallon and a 90% efficient furnace.
This is something you can do in a couple hours, and use until you decide on
a longer term solution (if ever). |
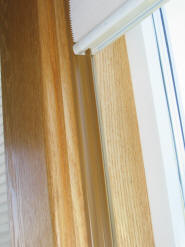
| Thermal Shades |
We have added thermal
shades to a total of 140 sqft of window. The cost for these shades
should probably be partly charged to aesthetics, since we would have some
form of shades anyway, but I have put the full cost of the shades against
the insulation function.
We have two types of shades. They are both the accordion pleated
style, but some have an "Energy Track" on the side (see picture) that
prevents air from flowing around the edges of the shade. While I have
no way to test it, it appears that it would be effective.
The claimed R values are R2.8 without the track and R4.3 with the track --
these do not include the existing window R value.
The supplier we used for shades (one of many)
Good book covering dozens of types of insulating window shades and shutters |
 |
| Energy Saving/yr |
3159 KWH |
Initial Cost |
$1086 |
DIY Labor |
3 hrs |
| CO2 reduction |
1525 lb |
$'s Saved/year |
$258 |
DIY difficulty |
3 |
| Energy Source |
Propane |
1st Year Return |
23.8% |
|
|
| |
|
10 yr saving (10% fuel inflation per year) |
$4109 |
|
|
Cost Estimate:
Cost for all the shades was $1086.Dollar Saving:
I used the Insulation
Upgrade Calculator to calculate the reduced heat loss.
Inputs to the calculator are: 8000 deg-days, 140 sqft of shade, Rold = 2,
Rnew = 6.3 or 4.8 depending on energy tracks or not.
The saving comes out to $166 for the Energy Track windows + $92 for the
non-Energy Track windows.
The first year return comes out a very respectable 24%, even though the full
cost of the shades was charged to the insulation function. |
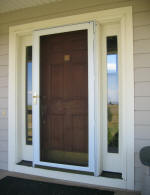
| Add Strom Door To Front Entry |
We added a storm door
to the front door. This was for a number of things, including better
summer ventilation, and a better view of sunsets, but it also reduced the
thermal losses out the front door for both conduction and infiltration.
Update: we have also found that this makes a pretty
good direct gain solar window on sunny afternoons in the spring and fall
-- just open the entry door, and leave the glass storm door closed for
some free heat!
|
 |
| Energy Saving/yr |
216 KWH |
Initial Cost |
$200 |
DIY Labor |
3 hrs |
| CO2 reduction |
100 lb |
$'s Saved/year |
$17 |
DIY difficulty |
4 |
| Energy Source |
Propane |
1st Year Return |
8.5% |
|
|
| |
|
10 yr saving (10% fuel inflation per year) |
$270 |
|
|
Cost Estimate:
The door cost $200.Dollar Saving:
I used the Insulation
Upgrade Calculator calculator to estimate the benefit of the added R
value.
Inputs were: 8000 degree-days, Rold = 4, and Rnew = 6.
This gives a saving or $8.5 per year. I doubled this to account for
the infiltration improvement, which is bad on this door. I need an
infiltration method that uses an estimate of crack length/width. |
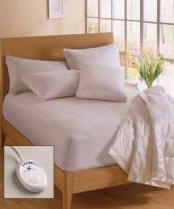
Electric Mattress Pads
| Electric Mattress Pads |
We use electric
mattress pads that fit under the mattress pad, and heat the bed.
Unlike electric blankets, the power consumption for mattress pad heaters is
very low (about 0.15 KWH per night). The energy saving comes from
being able to run the bedrooms much colder while still being
very comfortable. We have 2 furnaces in the house. But, since having electric mattress pad heaters, we
have pretty much turned off the furnace that heats the bedrooms.
The saving in propane is considerable, and the comfort is outstanding.
Others have reported being able to do the same thing with good down
comforters and the like, but we have tried that, and for us (actually me) it
does not work.Updated to correct a math mistake Nov
13, 2007
More information |
 |
| Energy Saving/yr |
2320 KWH |
Initial Cost |
$125 |
DIY Labor |
0 hrs |
| CO2 reduction |
1150 lb |
$'s Saved/year |
$186 |
DIY difficulty |
0 |
| Energy Source |
Propane |
1st Year Return |
148% |
|
|
| |
|
10 yr saving (10% fuel inflation per year) |
$2963 |
|
|
Cost Estimate:
The mattress pad heaters vary in price, but ours was $125.Dollar Saving:
$186 per year --
Details here.
(updated Nov 13, 2007) |
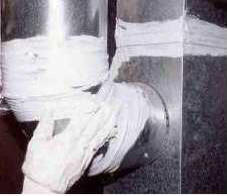
Vent Dryer Inside
| Venting Dryer Inside |
We have started to
vent the dryer to the inside of the house in the winter.
We live in a very dry climate, so the added moisture is a benefit, not a
problem.
The advantage of venting inside is twofold: 1) you recover the heat that was
added to dry the cloths (about 2.2 KWH per load), and 2) you avoid bringing
in cold outside air to make up for the air that the dryer is pushing
outside.
To vent to the inside, you need 1) a dry climate, 2) an electric (not gas)
dryer, and 3) a way to catch the lint in the dryer exit stream.
Caution: Gas dryers should never be vented inside, since the
combustion products are in the vented air. Electric dryers should only
be vented inside if your climate is dry --
be very alert for moisture
problems.
|
Logging humidity in room that dryer was vented to. |
| Energy Saving/yr |
630 KWH |
Initial Cost |
$5 to $20 |
DIY Labor |
2 hrs |
| CO2 reduction |
286 lb |
$'s Saved/year |
$63 |
DIY difficulty |
3 |
| Energy Source |
Propane |
1st Year Return |
314% |
|
|
| |
|
10 yr saving (10% fuel inflation per year) |
$1002 |
|
|
Cost Estimate:
$20 for some tubing and a lint filter.
Dollar Saving:
Part 1: Recover heat from dryer exit air:
From the Canada energy site, dryers use about 930 KWH a year to do 416 loads,
or 2.23 KWH per load.
I assumed we would vent inside for about 150 days and do one load a day, so
the heat energy recovery is:(150 loads) (2.2 KWH/load) = 330 KWH/yr
Part 2: Avoiding infiltration of dryer makeup air:
Dryers vent from 160cfm to 180cfm while running. This exiting air
requires that the same amount of air be brought into the house (else it
would collapse :).
The saving for not bringing this cold air in is:
(170 ft^3/min)(68 min/load)(70F-30F)(0.07 lb/ft^3)(0.24 BTU/lb-F) = 6800
BTU/load, or 2 KWH per load.
Saving for year is (150 winter loads)(2 KWH/load) = 300 KWH/year
The total saving then is 330 KWH/yr + 300 KWH/yr = 630 KWH/year
This is 13.6 gallons of propane burned in a 90% efficient furnace. |
Green House Gas Emissions:
Green House Gas gas reductions were
estimated like this.
DIY Difficulty:
In the project descriptions, "DIY difficulty"
is a 1 to 10 rating of how hard the project is to do yourself: 1 being
very easy, and 10 being "No chance I'm ever doing that again".
Economics:
There are a lot of ways to do a good
job of calculating economic return -- Internal Rate of Return (IRR), Life Cycle
Costs, ... I think most of these just go right over peoples heads, so I
decided on three less accurate, but very simple indicators: 1) dollars saved in
fuel in the first year, 2) first year rate of return, which is just (first
year $ saving/cost of project), and 3) 10 year fuel saving with 10% rise in fuel
prices each year. I think these give a pretty good feel for how good the
project is economically without requiring an econ degree to understand? If
you have a suggestion for a better way, I'd like to hear it.
Note that my heating fuel is propane,
which is a relatively expensive fuel. If you use natural gas, your savings
will likely be somewhat less for the same energy saving.
10 Year Cost Saving:
The "10 year saving" uses a fuel
inflation factor of 10% per year. This may be higher that what we will
actually experience, but I used it as a measure of what would happen if fuel
prices continue to go up at a high rate. If you would like to use another
factor, here are some others:
For 15% per year increase, multiply
the first year saving by 20.30
For 10% per year increase, multiply
the first year saving by 15.93
For 8% per year increase,
multiply the first year saving by 14.49
For 5% per year increase,
multiply the first year saving by 12.58
For 3% per year increase,
multiply the first year saving by 11.46
For 0% per year increase,
multiply the first year saving by 10.00
Gary 08/02/06, updated Nov 13, 2007, Updated 11/4/13 -- Added new DVR