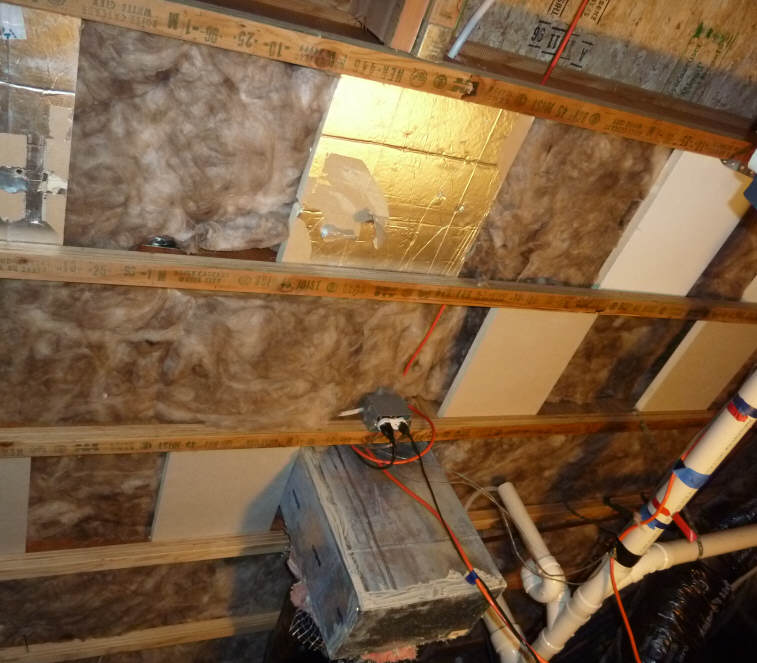
$2K Solar Space + Water: Staple Up Radiant Floor Heat


This page covers the installation of the staple up radiant floor heating loop.

It also covers insulating the radiant floor.

The system described on this page is about as simple as it gets -- one PEX floor heating loop, and a pump to circulate water directly from the solar storage tank through the loop.

For more options on heat simple heat distribution systems and for sizing information, see the Radiant Floor Design page...


Back to Table of Contents...

On this page:

Installing the Staple Up Floor Loop...

Insulating the Floor Loop...


Installing Staple Up Floor Loops

The first step is to snake the PEX tubing through the floor joist bays.  Holes are drilled through the joist webs to at the end of the bays to bring the PEX back in the next bay. 

I used half inch PEX for the loops through the joist bays.  I ran 3/4 inch PEX supply and return headers along one edge of the space, and connected the half inch PEX to the headers.  This method I used to distribute the heated water to the floor is shown on page 27 of this Radiant Floor Company document...

There is quite a bit of useful information in the above manual.


I used PEX 3/4 PEX for the headers, and half inch PEX for the floor loops. I think that this scheme of using the headers to distribute water to short floor loops saved a lot of installation time.  It would have been a real pain trying to snake a 200 ft long loop of half inch PEX through many floor bays.


 The plumbing connections go together very quickly and easily with the crimp tool you can borrow, rent, or buy.


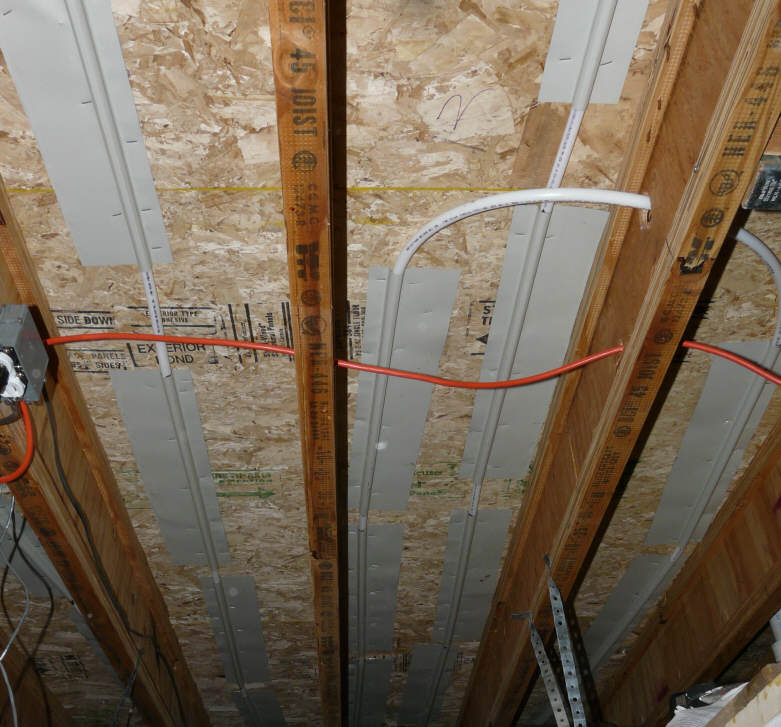
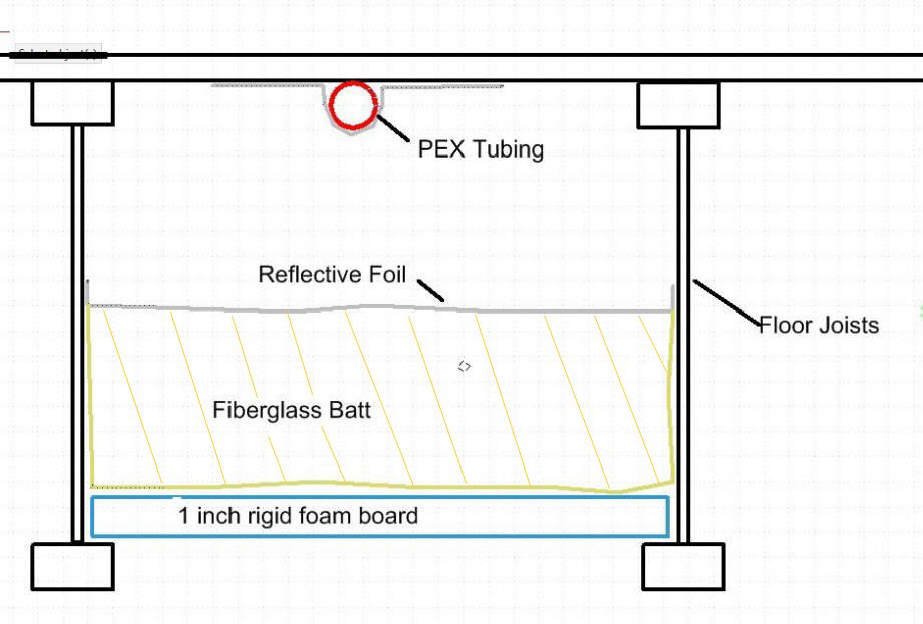
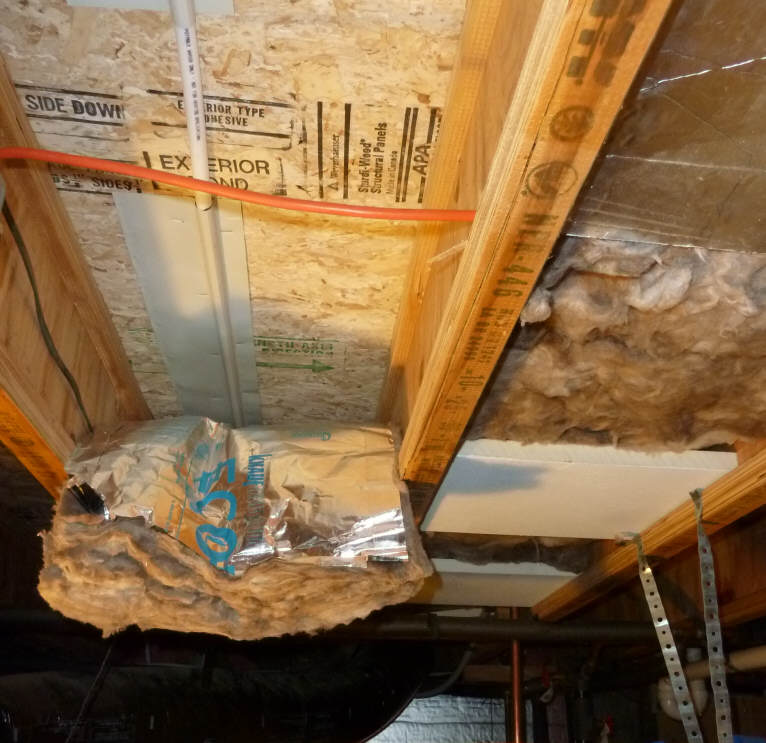
The PEX tubes efficiency of the heat transfer from the PEX to the floor is greatly improved by using these heat spreader plates.  This means that lower temperature water can be used to transfer the same amount of heat to the floor, and this will make the whole solar system 
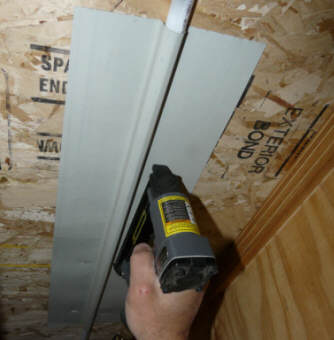
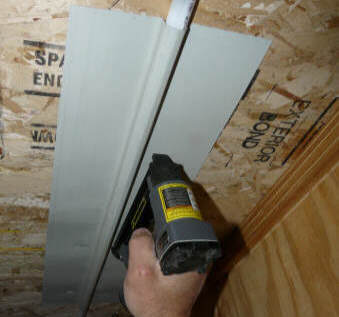
more efficient.

I used an inexpensive Harbor Freight air stapler to secure the heat spreader plates in place.  The air stapler is a big help given the low head room, working overhead, and lots of stuff in the way.

The heat spreader plates are homemade and are exactly the same ones I have used in some of my solar collectors...


In areas where we wanted more heat (eg bathroom floor), two  PEX runs were made in each floor joist bay.

The lopsided spreader plates are just because it was aluminum I had left over from another project -- its better to have an equal amount of fin on each side of the pipe.


The header arrangement from the Radiant Floor
manual .

Crimping the 1/2 inch PEX floor loop to 3/4 inch
PEX header.

Stapling the aluminum heat spreader fins to the
subfloor with the PEX tube in the fin groove.


Insulating the Floor

Our crawl space initially had no insulation.  Some time back, I converted it to a conditioned crawl space by adding insulation on the crawl space concrete walls.  But, we felt that with the radiant floor heating, too much of the heat would be going into the crawl space.  So, we added fiberglass batt insulation at the floor level under the PEX.  

We used the R11 batt insulation that has a reflective facing sheet.  In downward heat transfer, the reflective layers is quite effective.  In order to be effective, the reflective layer needs to be installed facing upward, and there has to be an air gap between the reflective layer and the surface it is facing.  The reflective layer also needs to be toward the heated side as it is the vapor barrier.  With downward heat heat transfer, the reflective layer adds about R3.5, so its worthwhile taking a little extra trouble to get that.


This arrangement with the faced side facing upward makes it somewhat awkward to support the batts, as the paper flanges that would normally be stapled to the wood frame are not accessible.

We had some one inch thick rigid foam board insulation left over from another projects, so we decided to use it to support the fiberglass batts in place from the bottom.   The foam board pieces are cut to just fit inside the flanges on the manufactured floor joints.    See the diagram to the right.


Reflective side up with airspace.

Left over rigid foam board squares hold batts in place.


Gary February 20, 2011